21 Dollar Tree Halloween DIY Ideas for a Spooky Home
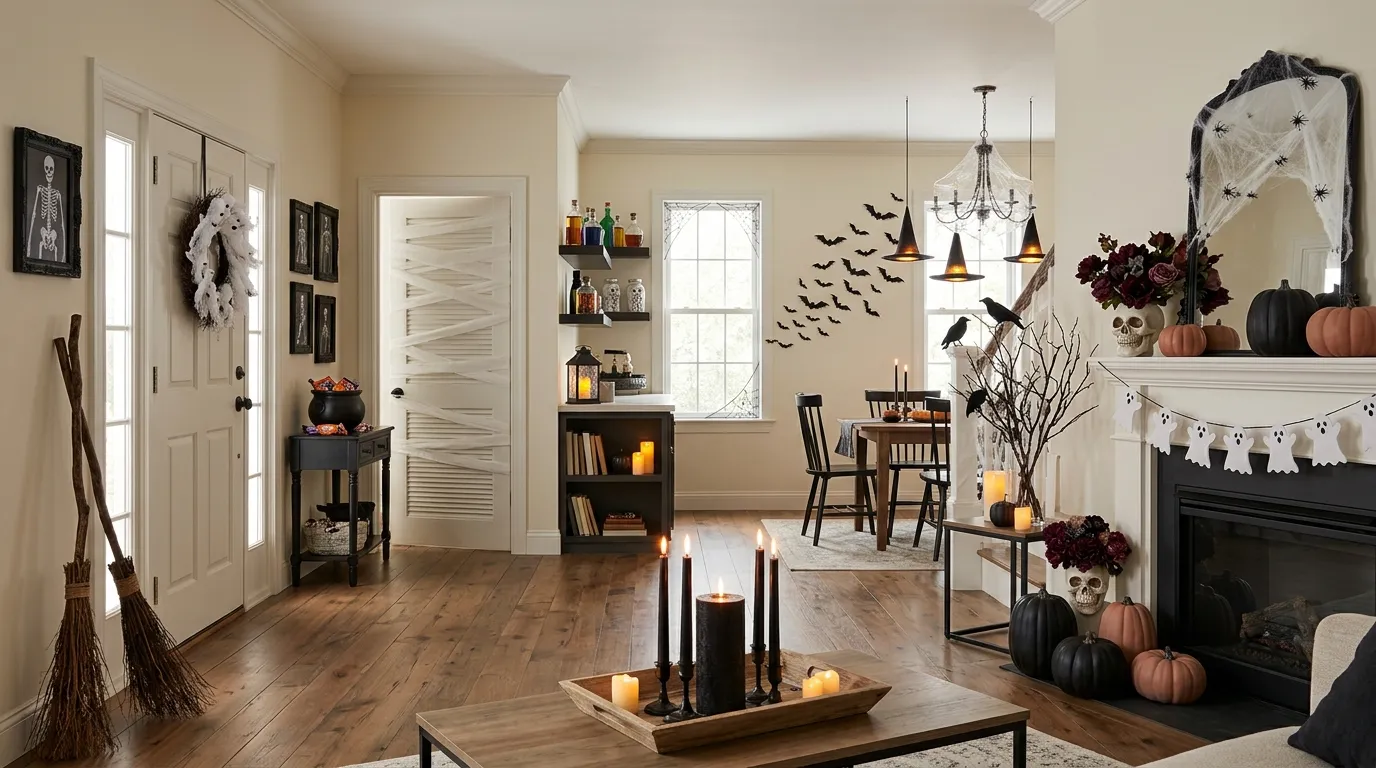
Your home can feel spooky, stylish, and festive without spending a fortune. These dollar tree halloween diy ideas make it easy to create eye-catching Halloween decor on a small budget.
From glowing lanterns and hanging ghosts to creepy picture frames and pumpkin displays, this collection is packed with simple projects that can transform everyday spaces. Whether you are decorating a small apartment, refreshing your entryway, or preparing your home for Halloween guests, you’ll find plenty of inspiration to try. In my experience, the biggest decorating impact often comes from small details placed thoughtfully. A few black accents, warm lights, faux cobwebs, or handmade pieces can completely change the mood of a room. Explore these ideas, choose your favorites, and create a spooky home that feels uniquely yours.
Black Candle Centerpiece
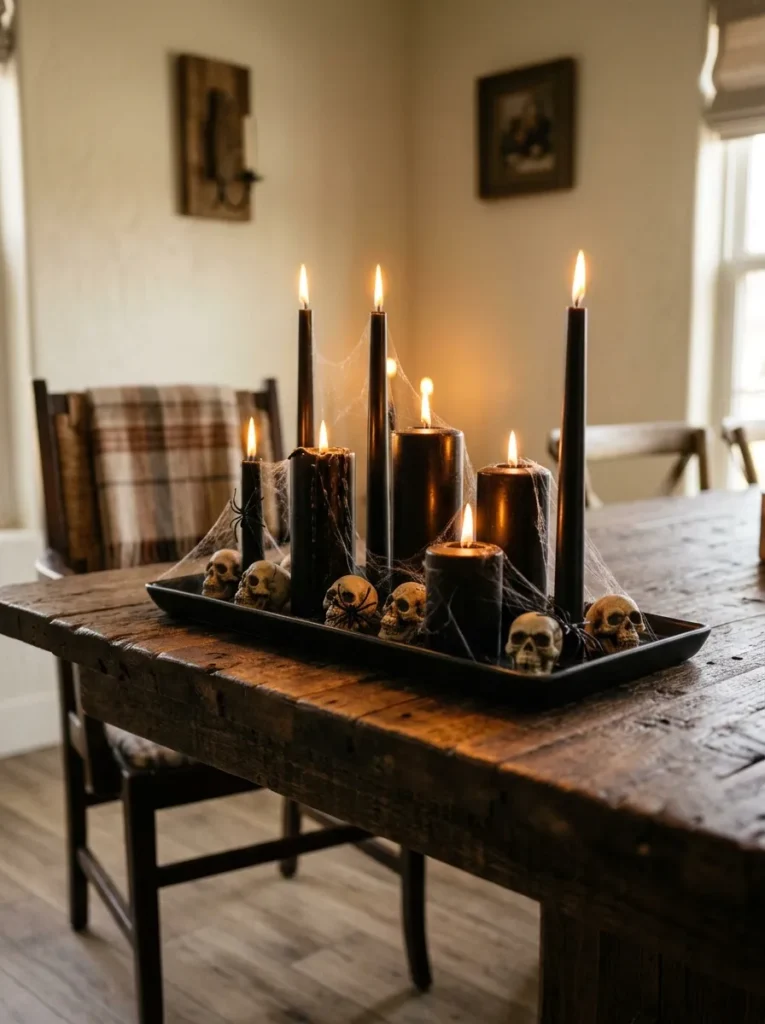
- Groups inexpensive black candles create an instant Halloween focal point without making the room feel crowded.
- A shallow tray keeps the display contained and makes decorating or moving it easier.
- Add faux cobwebs sparingly for texture while keeping the centerpiece neat and polished.
- Place it on a dining table, entry console, or coffee table for a flexible seasonal accent.
Nothing changes a plain tabletop faster than a dramatic candle display. For this dollar tree halloween diy, gather black candles, a small tray, and a few inexpensive Halloween accents to create a moody centerpiece. Arrange candles at different heights so the display feels layered rather than flat. A matte black tray works especially well against lighter wood or neutral surfaces. Add a thin layer of faux cobwebs around the base, but leave some tray visible. The contrast creates definition and keeps the arrangement looking intentional. Battery-operated candles are also a practical choice for homes with children or pets.
A simple candle grouping can make an everyday room feel decorated without requiring a major seasonal makeover. Place the tallest candle toward the back and shorter pieces toward the front, creating a balanced view from across the room. I’ve noticed that repeating one dark color is often enough to make inexpensive decorations look more coordinated. For extra interest, tuck in a small plastic spider, black rose, or miniature skull between the candles. Keep the surrounding area mostly clear so the centerpiece remains the visual focus. This setup works beautifully for Halloween dinners, entryways, and cozy evening gatherings at home.
Hanging Ghost Garland
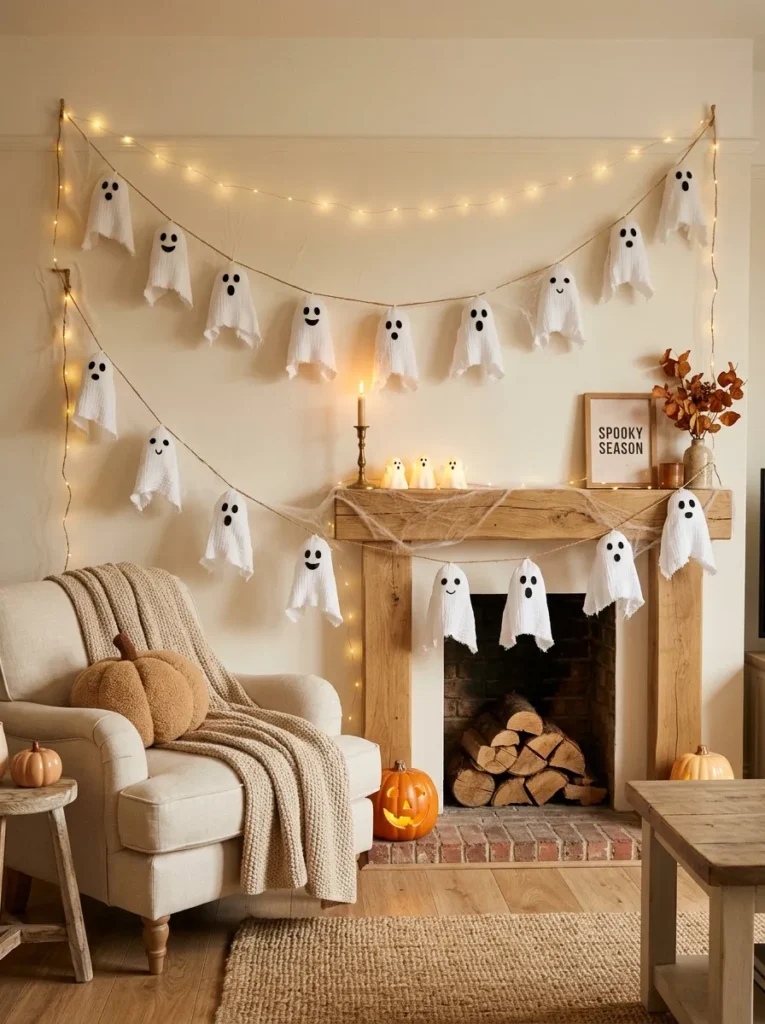
- Lightweight white ghosts add movement and personality to blank walls, windows, or stair railings.
- White fabric or tissue creates a soft contrast against darker Halloween decorations.
- Varying ghost sizes makes the garland look handmade instead of overly uniform.
- Use removable hooks when decorating rental spaces or painted walls.
A row of floating ghosts can turn an empty wall into a playful Halloween display in minutes. Use inexpensive white fabric, tissue, or lightweight material to form small ghost shapes, then add simple black facial details. Hang them at slightly different heights across a mantel, window, doorway, or staircase. The pale figures stand out beautifully against dark walls, wood finishes, or colorful artwork. This approach keeps your dollar-store decorating budget low while creating a large visual effect. In my experience, spacing matters more than perfection; uneven placement gives handmade decorations a charming, relaxed look that feels right for the season.
The best part of a ghost garland is its flexibility around the house. Drape the finished pieces across a fireplace mantel for a traditional seasonal accent, or suspend them in front of a window where daylight makes the white shapes especially noticeable. For evening decorating, add warm string lights behind or around the display to create gentle shadows. Keep the faces simple because small details can become difficult to see from a distance. If your room already has several decorations, choose plain white ghosts to provide visual breathing space. They add Halloween character without overwhelming furniture, walls, or other carefully chosen accents.
Spooky Mirror Frame
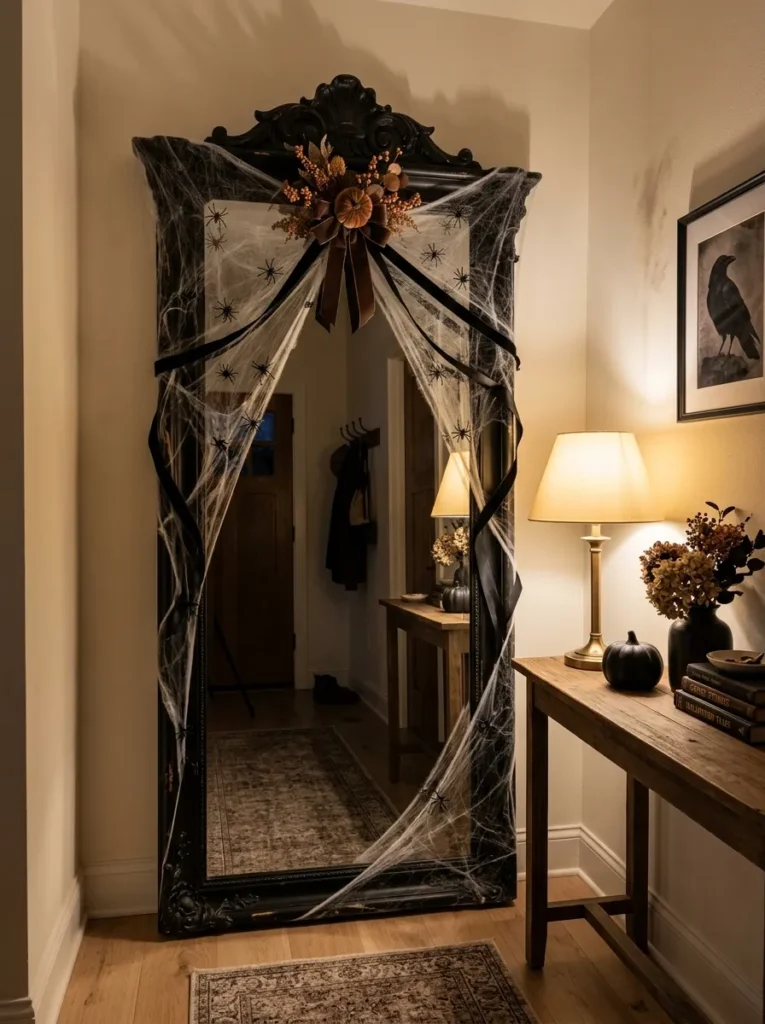
- A plain mirror becomes a dramatic seasonal feature with removable black accents around its edges.
- Faux spiderwebs soften the frame while adding texture and depth.
- Small plastic spiders create focal points without covering the reflective surface.
- Keep the center clear so the mirror remains useful for everyday decorating and quick outfit checks.
Turn an ordinary mirror into a Halloween focal point with a few inexpensive details around the frame. Start with a simple mirror and add black ribbon, faux cobwebs, plastic spiders, or removable decorative trim along selected edges. Keeping the reflective center mostly open prevents the arrangement from becoming messy. This dollar tree halloween diy works especially well in entryways, bathrooms, bedrooms, and living rooms because mirrors already attract attention. Choose a black-and-white palette for a cleaner appearance, or introduce muted orange through a small ribbon or nearby accessory. The result feels spooky, stylish, and surprisingly easy to recreate.
A decorated mirror can also make a small room feel more visually layered without taking up floor space. Concentrate the heavier decorations near two corners or along the top edge, then let a few cobweb strands extend naturally toward the sides. I’ve seen this work well when the surrounding furniture stays simple, because the mirror becomes the main seasonal statement. Avoid permanent adhesives on delicate frames, especially painted or antique surfaces. Removable hooks, ribbon ties, and carefully placed webbing offer safer alternatives. Add a small black vase or orange pumpkin nearby to connect the mirror with the rest of the room.
Skull Flower Vase
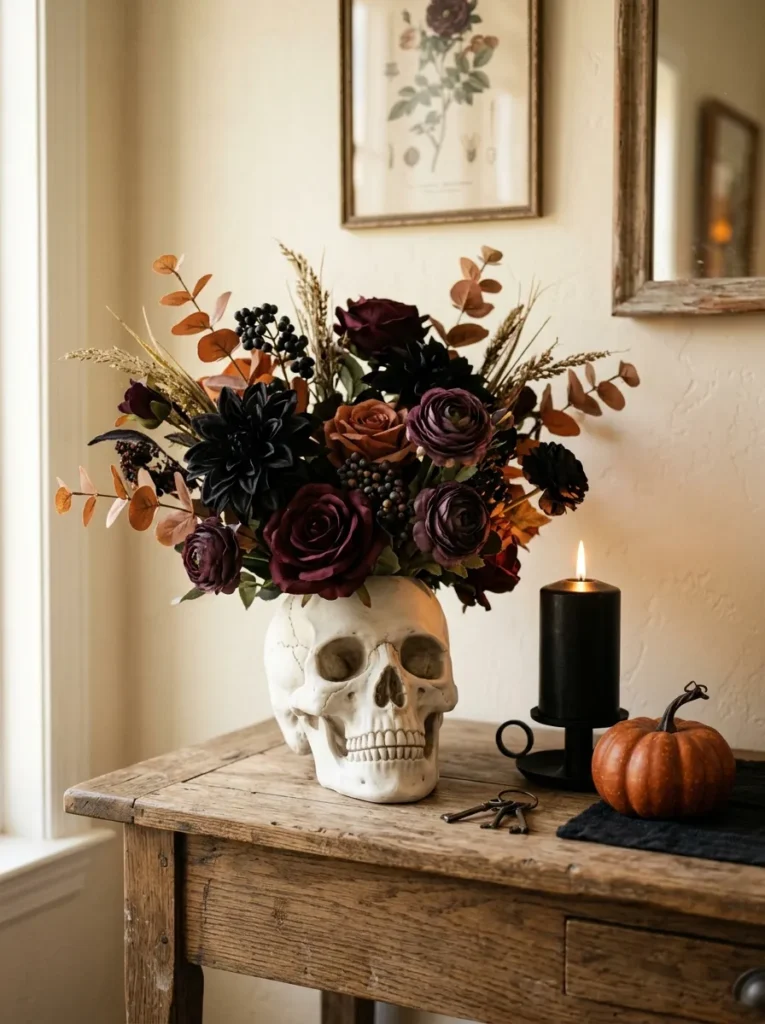
- A plastic skull becomes an unexpected vase for creating a spooky floral focal point.
- Black, burgundy, and deep purple flowers give the arrangement a richer seasonal appearance.
- Faux flowers eliminate watering and keep the display looking fresh throughout October.
- Place it on a console, bookshelf, or dining table where the unusual shape gets noticed.
A skull filled with dramatic flowers instantly gives an ordinary surface a Halloween makeover. Choose a lightweight plastic skull and carefully arrange faux flowers through the opening at the top. Dark burgundy, black, purple, and muted orange blooms create a sophisticated palette that feels more decorative than frightening. For this dollar tree halloween diy, mix flowers with a few dark leaves or wispy branches to add height and texture. Place the arrangement inside a shallow tray if the skull feels unstable. The finished piece works particularly well on entry consoles, dining tables, shelves, or fireplace mantels where it can become an instant focal point.
The secret to making this arrangement look polished is giving the flowers different heights and directions. Let a few stems rise above the skull while others curve slightly outward around its face. I’ve noticed that using mostly dark flowers with one subtle orange accent creates a more sophisticated Halloween look than combining too many bright colors. If the skull has a glossy finish, surround it with matte textures such as burlap, wood, or dried-looking foliage. This contrast adds depth and keeps the display from appearing overly plastic. A small black candle or pumpkin beside the vase can complete the arrangement without overcrowding it.
Raven Branch Display
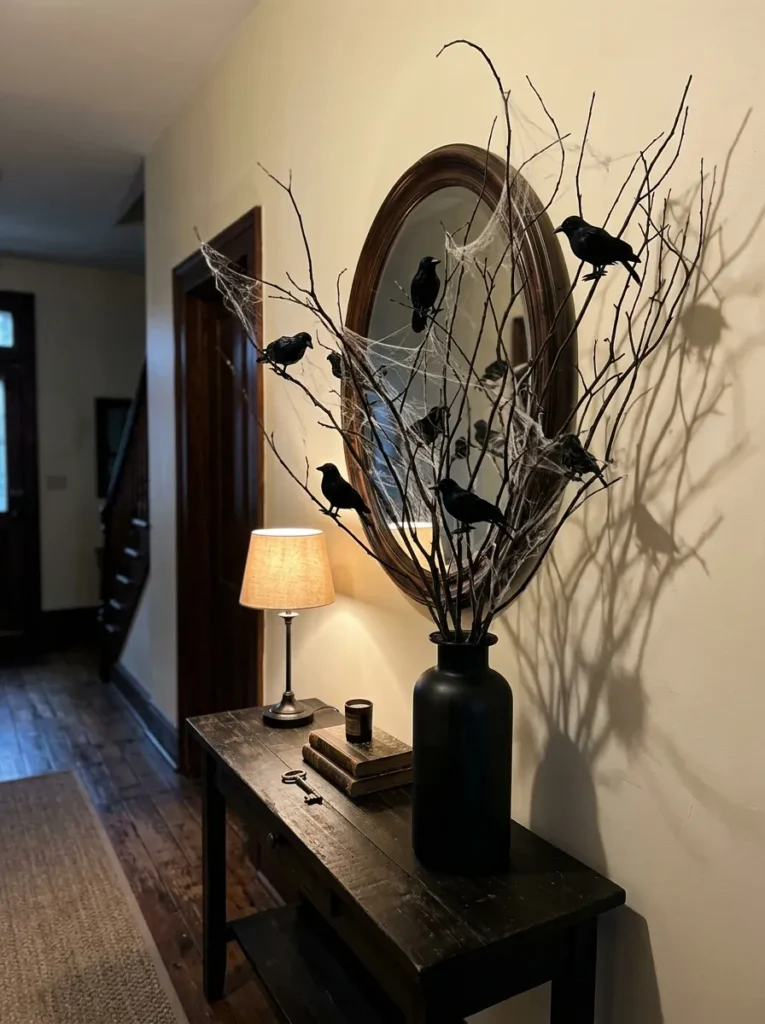
- Bare branches create height and a slightly eerie silhouette without taking much space.
- Small black birds add a strong Halloween detail while keeping the arrangement visually simple.
- A clear or dark glass vase gives the display a more finished appearance.
- Position branches near a wall or mirror so their shadows become part of the decoration.
Bare branches and black birds create an eerie silhouette that feels striking without filling an entire room with decorations. Collect clean, dry branches or use inexpensive faux branches, then arrange them vertically inside a sturdy vase. Attach small black bird figures to several branches, keeping their positions uneven for a natural appearance. This setup is especially effective against pale walls because the dark shapes become instantly visible. Add a few tiny cobweb strands for texture, but avoid covering every branch. The restrained color palette makes this display easy to coordinate with existing furniture, whether your home has rustic wood, modern black accents, or neutral decor.
Height is what makes this arrangement particularly useful for decorating a small space. A tall branch display draws the eye upward while using very little table or floor area. Place it beside an entry mirror, fireplace, or console where the silhouette can remain unobstructed. In my experience, a narrow vase works best when the branches are naturally spreading near the top, because the contrast creates a balanced shape. Add one or two miniature pumpkins around the base if you want a warmer seasonal touch. Keep the surrounding surface uncluttered so the branches remain the dominant visual feature from across the room.
Black Pumpkin Cluster
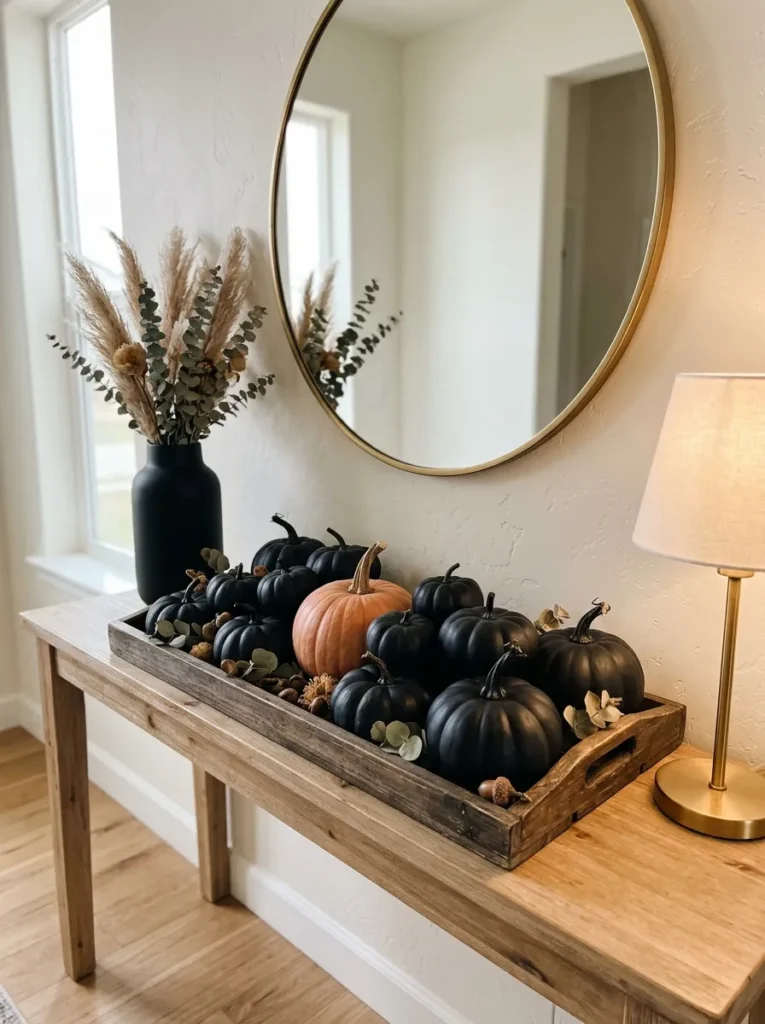
- Black pumpkins create a cohesive Halloween display with very little visual clutter.
- Mixing small and medium sizes adds dimension and makes the arrangement feel collected.
- Place pumpkins on a tray, tiered stand, or directly across a console for flexibility.
- Add one metallic or orange accent to prevent an all-black display from looking flat.
A cluster of black pumpkins can make a plain shelf or tabletop look intentionally decorated with almost no effort. Choose pumpkins in several sizes and arrange the largest piece slightly behind the smaller ones. Matte black finishes create a sophisticated base, while a single metallic gold, silver, or muted orange pumpkin can introduce contrast. This simple dollar-store Halloween arrangement works beautifully in entryways, living rooms, dining areas, and bedrooms. Use a wooden tray underneath the group if you want a defined display zone. The layered heights help inexpensive pieces look more substantial while keeping the overall composition neat and Pinterest-friendly.
For a more finished arrangement, combine different textures instead of adding lots of extra decorations. Pair smooth plastic pumpkins with a ribbed pumpkin, rough burlap ribbon, or a small wooden sign. I’ve noticed that repeating black across nearby accessories helps separate inexpensive seasonal pieces from the everyday decor, making the entire display feel more cohesive. Leave some empty space around the cluster so each pumpkin remains easy to see. You can also place the arrangement beneath a mirror or artwork to create a stronger visual anchor. When Halloween ends, the same grouping can be quickly packed away without changing your room layout.
Witch Hat Pendant
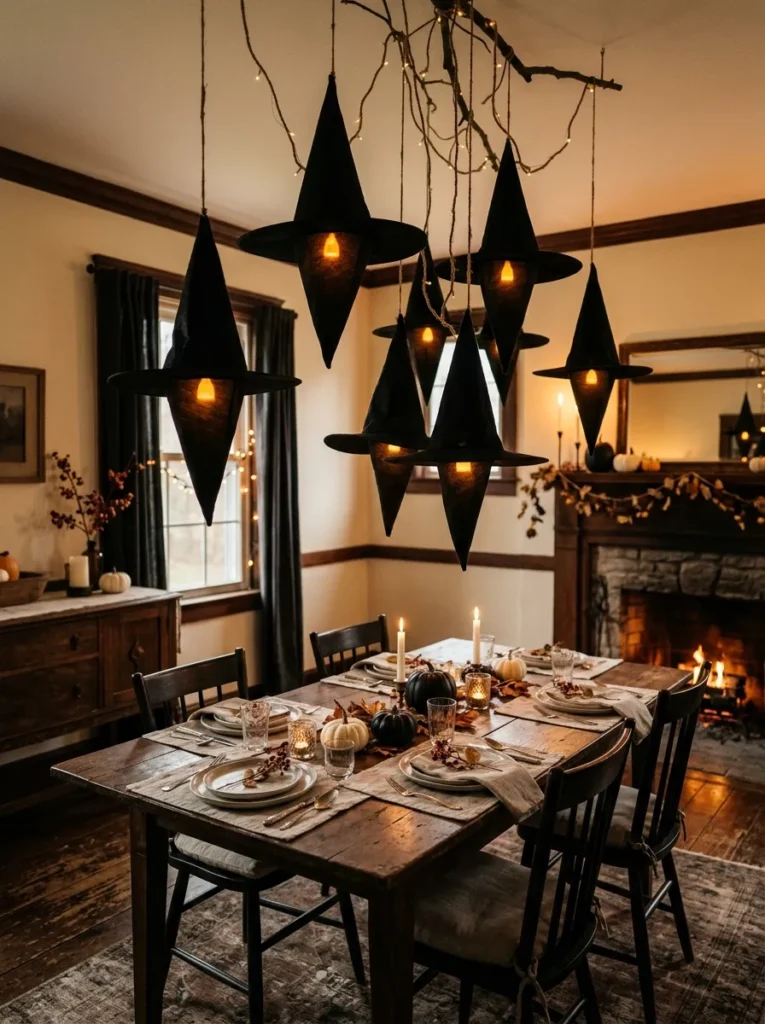
- Upside-down witch hats can become inexpensive hanging shades with an instantly recognizable Halloween shape.
- Black hats create strong contrast against light ceilings, walls, and neutral furniture.
- Battery-powered lights provide a soft glow without requiring complicated electrical work.
- Hang several at different heights above a dining table, entryway, or party station.
A few hanging witch hats can completely change the look of a room from above. Turn inexpensive black witch hats upside down and place small battery-powered lights inside each one for a simple glowing display. Suspend them at slightly different heights above a dining table, kitchen island, entry console, or party area. The pointed silhouettes create an unmistakable Halloween accent while using very little surface space. This approach is especially useful when your tabletops are already full. Keep the hats evenly spaced for a cleaner arrangement, and choose warm-white lights to create a soft glow that feels inviting rather than harsh.
The hanging arrangement works because it adds decoration to an area that often gets overlooked: the ceiling. Use clear thread, removable hooks, or another suitable lightweight hanging method to keep the setup visually clean. I’ve noticed that three hats usually create enough repetition to feel intentional without making a room look crowded. Let the lowest hat hang slightly closer to eye level while keeping the others higher for depth. If your room has dark furniture, place the hats against a lighter ceiling so their outlines remain visible. Finish the surrounding area with small pumpkins or black accents that repeat the same color palette.
Potion Bottle Shelf

- Recycled jars become charming faux potion bottles with simple labels and dark-colored fillers.
- Grouping bottles at different heights creates depth on narrow shelves and countertops.
- Black, amber, purple, and green tones give the arrangement an authentic Halloween palette.
- Add corks, twine, or aged-looking paper for inexpensive texture and character.
A collection of mysterious little bottles can turn an ordinary shelf into a miniature Halloween display. Reuse small jars or inexpensive containers and fill them with colored water, beads, dried herbs, or other safe decorative materials. Add simple labels such as “Moon Dust,” “Spider Venom,” or “Witch’s Brew” to create the potion effect. This dollar tree halloween diy is easy to customize around your existing decor because the bottles can be arranged in almost any space. Mix amber, green, purple, and clear containers for variety. Place taller bottles behind shorter ones so every piece remains visible and the display feels layered.
Small details make these decorative bottles look far more interesting than a random collection of jars. Wrap twine around a few necks, add cork-style tops, or attach tiny paper tags for extra texture. Avoid using anything unsafe or storing actual household chemicals in containers that resemble decorative potions. Instead, use clearly decorative materials that are not intended for consumption. In my experience, placing the collection on a dark tray helps separate it from everyday shelf items and makes the colors stand out. Add one small skull, faux spider, or black candle nearby, but leave enough empty space for the bottles to remain the main attraction.
Webbed Window Corners
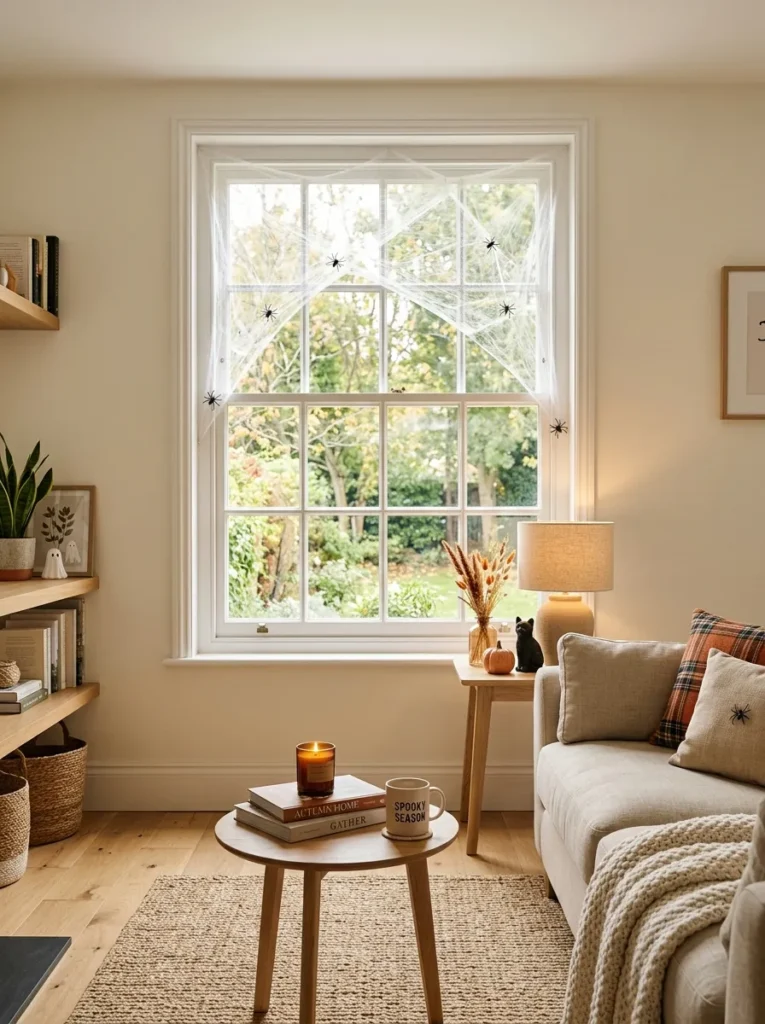
- Light faux cobwebs create an eerie window treatment without blocking natural light.
- Concentrating the webbing in corners keeps the display tidy and visually balanced.
- Small spiders add recognizable Halloween details without overwhelming the glass.
- This technique works well in living rooms, entryways, bedrooms, and covered porches.
Bare windows can become surprisingly effective Halloween decorations when delicate cobwebs are concentrated around their corners. Stretch lightweight faux webbing loosely across the upper corners and add a few small plastic spiders for definition. Avoid covering the entire window because too much material can look messy and reduce the clean appearance of the glass. The dark spider details become especially noticeable against daylight, making this a simple way to add seasonal character without purchasing large decorations. For an evening display, warm indoor lighting behind the window creates a gentle glow that highlights the web texture while keeping the room comfortable and inviting.
This decorating technique is also useful when you want Halloween style without changing your furniture or wall arrangement. Keep the center of the window mostly open so sunlight can still enter naturally and the room does not feel visually closed off. Use small amounts of webbing and pull the fibers apart carefully to create a thin, realistic texture. I’ve noticed that one or two spiders positioned near the densest areas provide enough contrast to make the web visible from across the room. Repeat the same treatment on a second nearby window if desired, keeping the placement similar for a coordinated look.
Skeleton Photo Wall
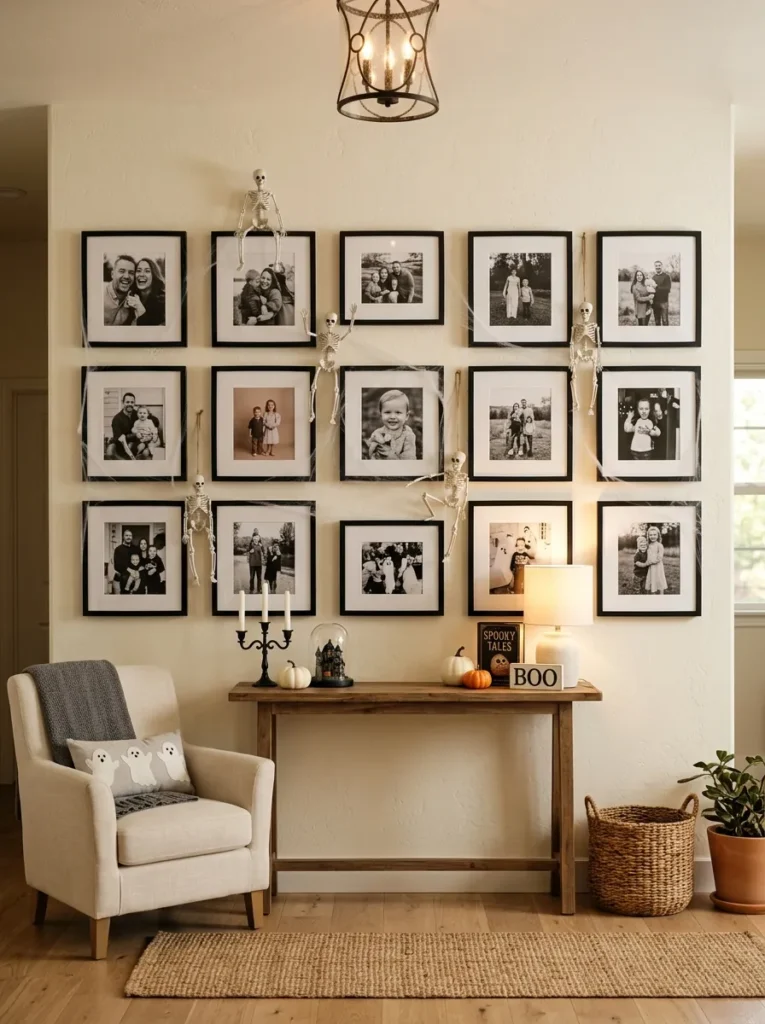
- Small skeleton figures create a playful gallery effect when arranged around framed photos.
- Black frames help connect the Halloween display with existing wall decor.
- Keep the arrangement symmetrical for a cleaner look in living rooms or hallways.
- Removable hanging strips make it easier to decorate without leaving permanent marks.
Turn an ordinary photo wall into a playful Halloween gallery by adding small skeleton figures between your favorite framed pictures. Choose several lightweight skeletons and position them as if they are part of the gallery arrangement, rather than placing them randomly around the room. Black frames, white mats, and simple family photographs provide a strong foundation for the display. This approach adds seasonal personality while keeping your existing wall decor useful. Arrange the frames first, then place the skeletons in the remaining spaces. The result feels collected and intentional, especially when the surrounding furniture and accessories stay relatively simple.
A skeleton gallery works particularly well in hallways, stair landings, and family rooms because these areas naturally invite people to stop and look. Keep the skeletons at different angles or heights to create movement without making the wall chaotic. I’ve noticed that repeating black frames or another common element helps connect playful Halloween pieces with everyday artwork. If you are decorating a rental, use removable hanging strips and lightweight decorations wherever appropriate. Add a few small paper bats around the outer edges if the wall needs more coverage. Avoid filling every empty space; breathing room helps each photo and skeleton remain clearly visible.
Ghostly Door Wreath
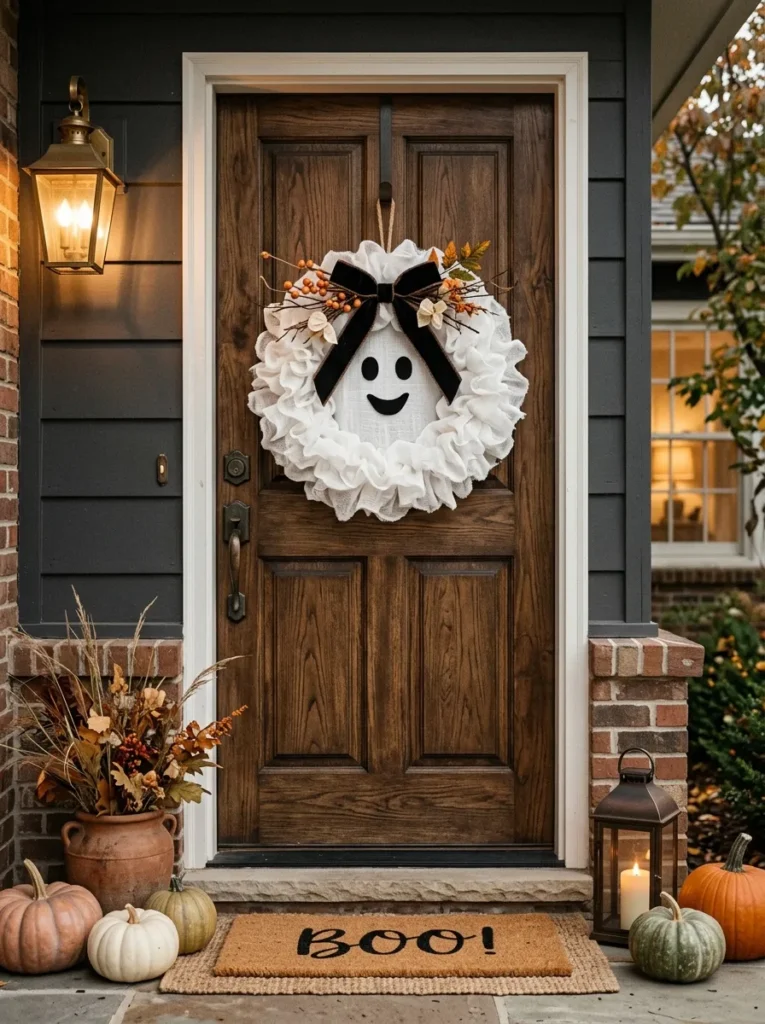
- A simple round wreath becomes a friendly Halloween accent with white fabric and black facial details.
- Layering gauzy material creates movement and makes the wreath look fuller.
- Black ribbon provides contrast against light-colored doors and trim.
- Use a removable wreath hanger when you want to protect the door surface.
A ghost-inspired wreath gives your front door a festive makeover while keeping the project inexpensive and approachable. Start with a basic round wreath form, then wrap or drape lightweight white fabric around it to create a soft, ghostly texture. Add two black eyes and a simple mouth near the center for an instantly recognizable design. This dollar tree halloween diy works especially well on black, navy, brown, or natural wood doors because the white material creates strong contrast. Finish the top with a black ribbon or small orange accent. Keep the shape slightly irregular so it looks handmade rather than perfectly manufactured.
The wreath can also be adapted to match different decorating styles around your home. For a cleaner farmhouse look, use white gauze with a simple black bow and minimal embellishments. For a more playful display, add tiny bats, spiders, or miniature pumpkins around the outer edge. In my experience, keeping most of the wreath white makes the smaller details easier to notice from the sidewalk. Make sure the materials are suitable for your outdoor conditions if the wreath will remain outside. A covered porch offers extra protection, while a sheltered entryway can help delicate fabric stay cleaner throughout the season.
Haunted Stair Rails
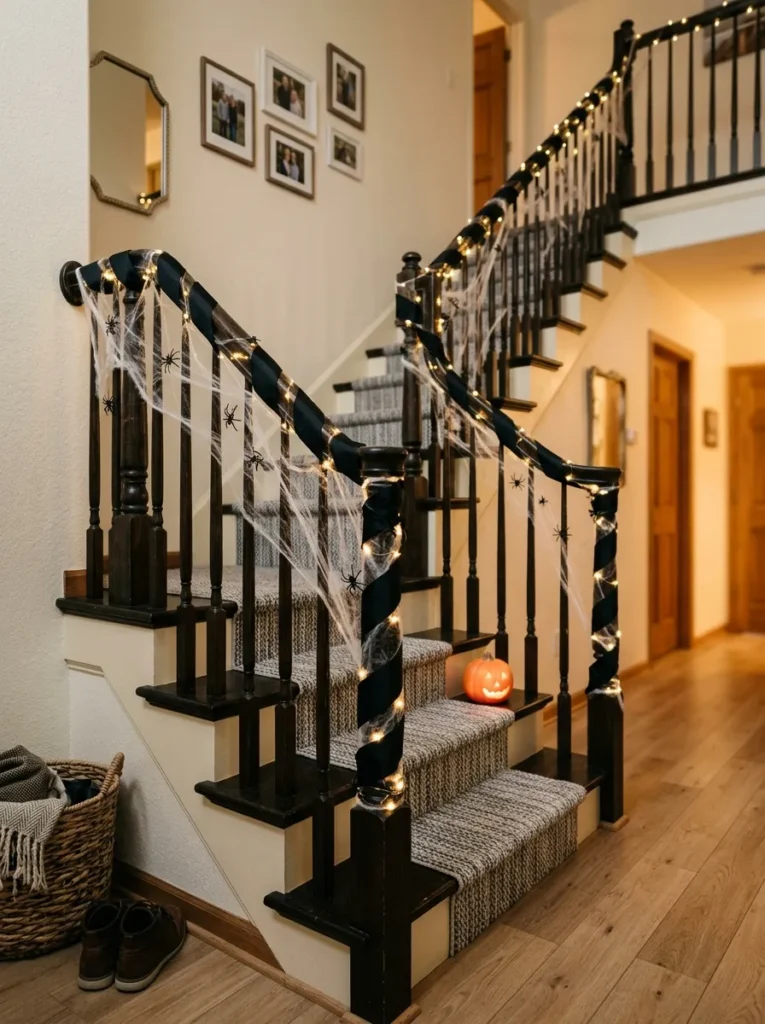
- Black ribbon and faux cobwebs can turn a plain stair railing into a strong Halloween feature.
- Small spiders placed along the rail create repeating visual details.
- Keep the handrail usable by concentrating decorations below or beside the gripping area.
- Warm string lights can add visibility and a softer evening appearance.
A staircase becomes a natural Halloween display when its railing is wrapped with simple dark accents. Use black ribbon, lightweight faux cobwebs, and small plastic spiders to decorate the rail without making it difficult to use. Begin near the newel post and work gradually along the railing, leaving enough clear space for hands. Let a few web strands hang loosely beneath the rail for added texture and movement. This setup creates a long visual line through the home, making even a basic staircase feel intentionally decorated. It is particularly effective when the surrounding walls remain neutral and uncluttered.
The key to decorating stair rails successfully is balancing atmosphere with everyday function. Keep thicker materials away from places where people regularly grip the railing, especially in busy family homes. Add a short strand of warm battery-powered lights beneath the rail if the staircase needs more evening visibility. I’ve noticed that repeating one or two decorations along the length looks more polished than using many unrelated pieces. Black spiders spaced several steps apart can create that repetition without overwhelming the staircase. Finish the nearby landing with one pumpkin or lantern so the rail connects naturally with the rest of your Halloween decor.
Witch Broom Corner
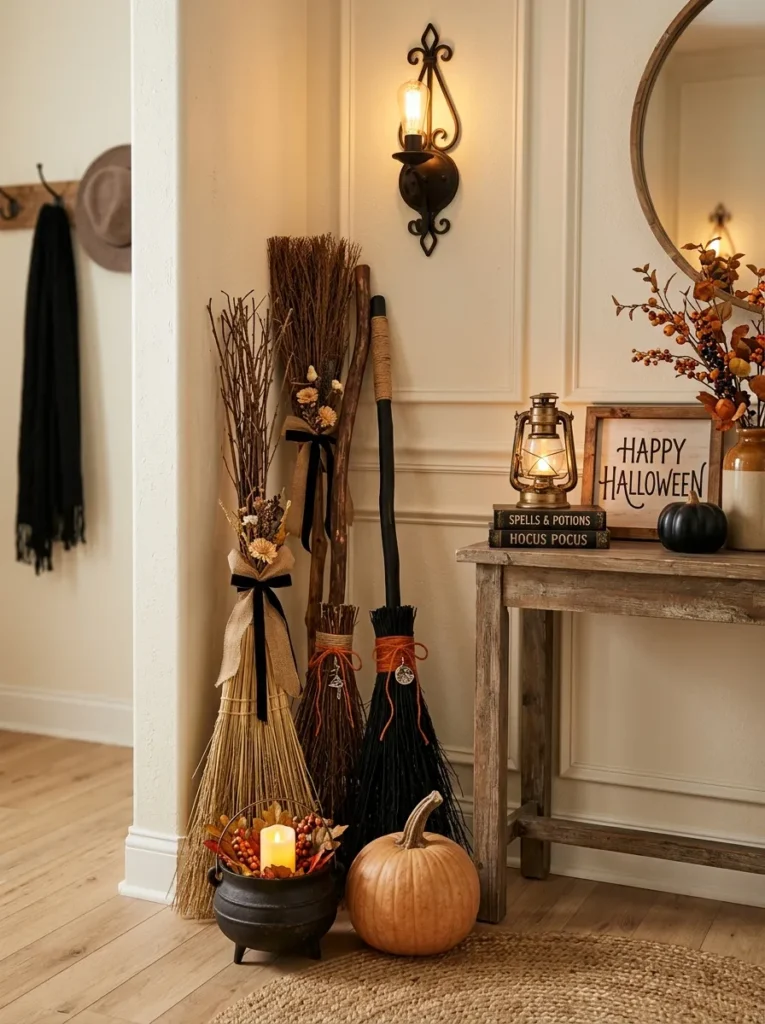
- A bundle of simple decorative brooms adds height to an empty corner without using much floor space.
- Black, brown, and natural straw tones create a rustic Halloween palette.
- Lean several brooms together for a casual arrangement that feels handmade.
- Place them beside a console, fireplace, or entry door for an easy seasonal accent.
An empty corner can become a Halloween feature with nothing more than a few decorative witch brooms. Choose brooms in natural straw, black, or brown finishes and lean them together at slightly different angles. Their tall shapes fill vertical space while keeping the floor area mostly open. This arrangement works especially well beside an entry console, fireplace, staircase, or front door. Add a small black cauldron or pumpkin at the base to anchor the display. The combination of rough straw texture and darker accents creates a rustic seasonal look that feels relaxed, inexpensive, and easy to recreate.
The biggest advantage of a broom display is how quickly it adds height to a room without requiring complicated decorating. Place the tallest broom toward the back and shorter pieces slightly forward for a layered silhouette. I’ve noticed that natural textures help inexpensive Halloween decorations blend especially well with farmhouse, cottage, and rustic interiors. Avoid packing too many accessories around the base because the brooms already provide plenty of visual interest. If the arrangement sits near an entryway, make sure it does not obstruct walking paths or doors. A simple orange pumpkin nearby can add just enough color without competing with the texture.
Cauldron Candy Station
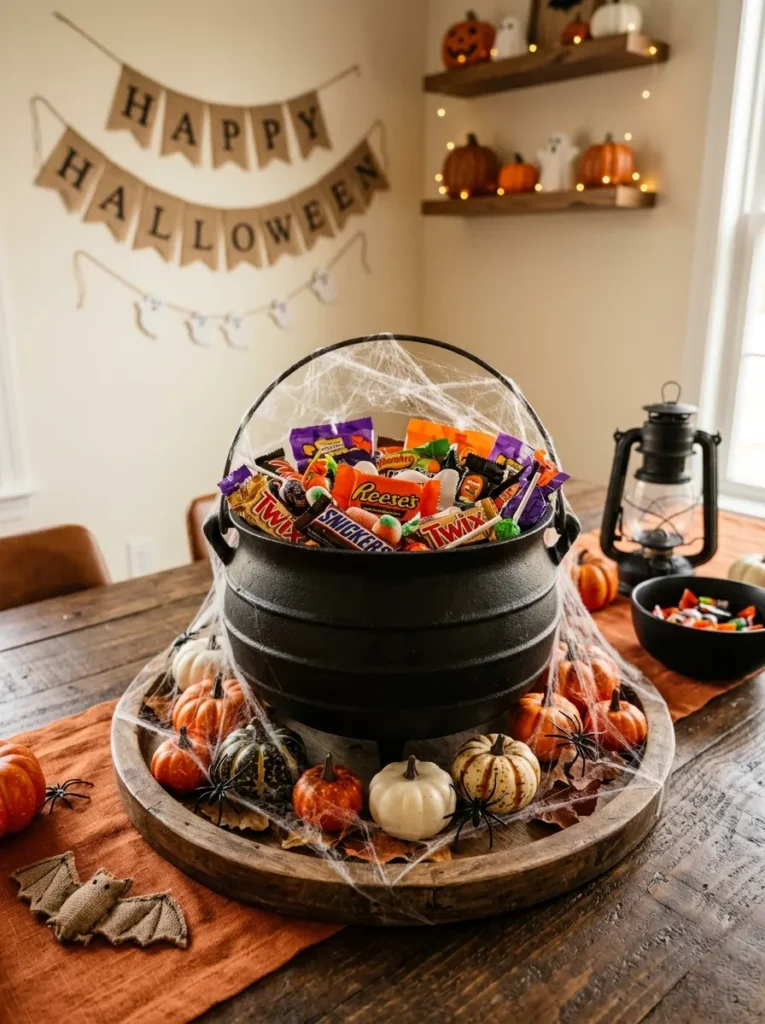
- A small black cauldron creates a playful serving station for wrapped Halloween treats.
- Layering candy at different heights makes the display more colorful and inviting.
- Add a small sign or faux spiderwebs to reinforce the seasonal theme.
- Use a tray underneath to contain crumbs and make cleanup easier.
A black cauldron filled with colorful wrapped treats can turn an ordinary tabletop into a fun Halloween station. Choose a lightweight decorative cauldron and fill it with individually wrapped candy, keeping the contents high enough to be easily visible. Place the cauldron on a tray with a few small pumpkins, plastic spiders, or faux cobwebs around the base. This simple display works in kitchens, dining rooms, entryways, or party areas where guests naturally gather. For a stronger visual effect, combine orange, purple, black, and white accents around the station. The result feels festive while remaining useful during Halloween gatherings.
A dedicated treat station keeps candy organized and gives guests an obvious place to help themselves. Choose a stable surface away from heat, water, and areas where the container could easily be knocked over. I’ve noticed that placing the cauldron slightly higher than nearby decorations makes the candy display easier to spot. Add a small handwritten sign for personality, or surround the base with a few battery-powered lights for evening gatherings. Keep decorative pieces outside the food container so everything stays clean. When the party is over, the tray makes the entire setup simple to lift, clear, and store.
Bat Wall Swarm
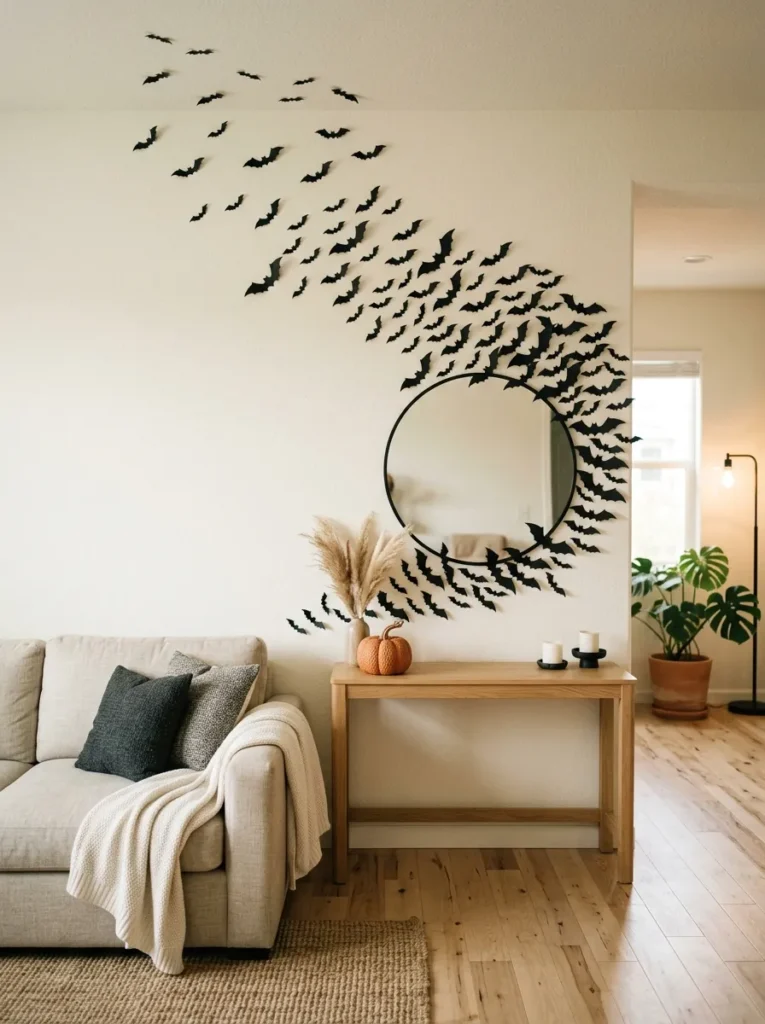
- Black paper or plastic bats create movement across an otherwise empty wall.
- Gradually increasing their spacing makes the swarm appear to travel upward.
- Concentrate the largest group near artwork, mirrors, or doorways for stronger visual direction.
- Removable adhesive helps protect painted surfaces while decorating temporarily.
A swarm of black bats can make a blank wall look dramatically different with very little material. Arrange lightweight bats in a loose pattern that begins with a dense cluster and gradually spreads upward or outward. This creates the illusion of movement while giving the wall a clear visual direction. Use different bat sizes when available, placing smaller pieces toward the edges and larger ones closer to the center. The contrast is especially strong against white, cream, gray, or pale-colored walls. This dollar tree halloween diy is also easy to remove after October, making it practical for temporary seasonal decorating.
The placement pattern matters more than the number of bats you use. Start near a mirror, doorway, mantel, or piece of artwork, then extend the swarm toward an open section of wall. I’ve noticed that slightly irregular spacing looks more natural than arranging every bat at exactly the same distance. Fold or gently bend some lightweight bats at the center if the material allows, giving them a subtle dimensional effect. Use removable adhesive suited to your wall finish and avoid placing decorations where they could interfere with switches or fixtures. Pair the swarm with one nearby orange pumpkin to introduce a small amount of seasonal color.
Mummy Door Decor
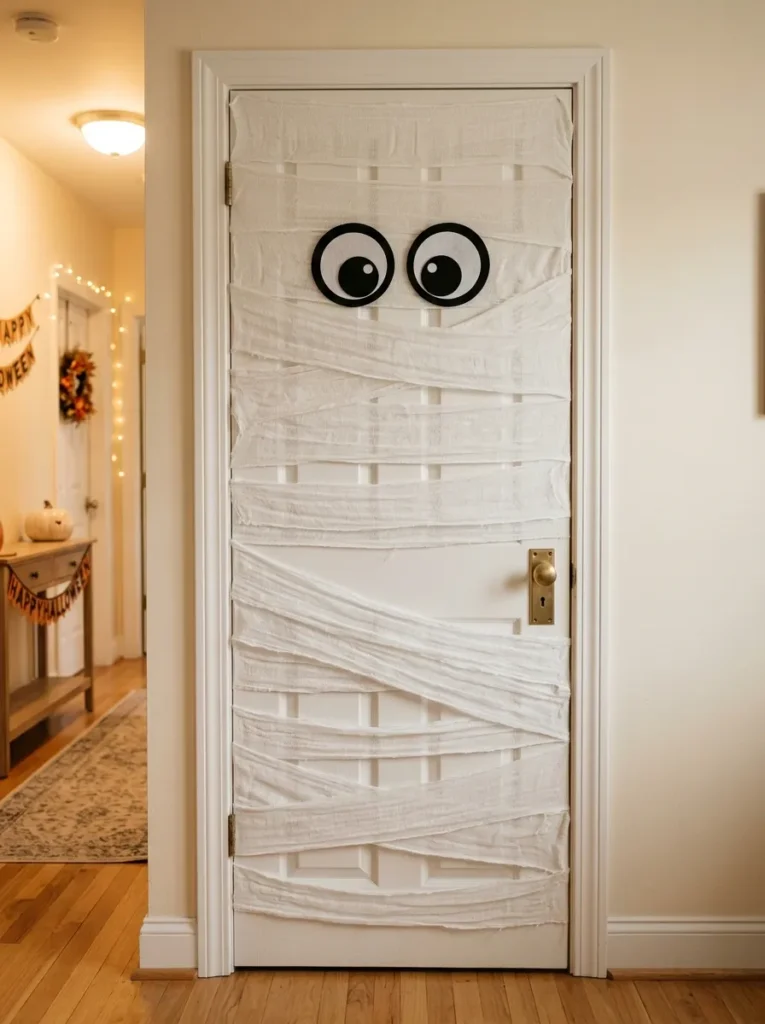
- White gauze strips can transform a plain door into a playful mummy face.
- Black paper eyes create strong contrast and remain easy to replace or reposition.
- Keep the strips loose enough to preserve the door’s handles and functional areas.
- This idea works especially well for family homes and children’s Halloween parties.
A plain interior door can become a playful Halloween character with a few strips of white gauze and oversized eyes. Wrap or attach the material horizontally across the door, leaving small gaps between sections so the underlying surface remains visible. Place two large black eyes around the upper third to create the recognizable mummy effect. This dollar tree halloween diy requires very little space and can instantly transform bedrooms, pantries, closets, or entry doors. Keep the design simple so the door remains functional. The contrast between white wrapping material and a dark or neutral door creates an especially clear visual effect.
The mummy design is easy to customize depending on the atmosphere you want. Use wider strips for a bold graphic appearance, or thinner pieces for a more textured, layered finish. I’ve noticed that slightly uneven strips make the character look more playful and handmade than perfectly aligned pieces. Leave the knob, hinges, and latch completely clear so the door continues working normally. Removable adhesive can help prevent unnecessary damage to painted surfaces. For a party, repeat the same eye style on several doors to create consistency. Keep nearby decorations minimal so the mummy face remains the main focus.
Creepy Picture Frames
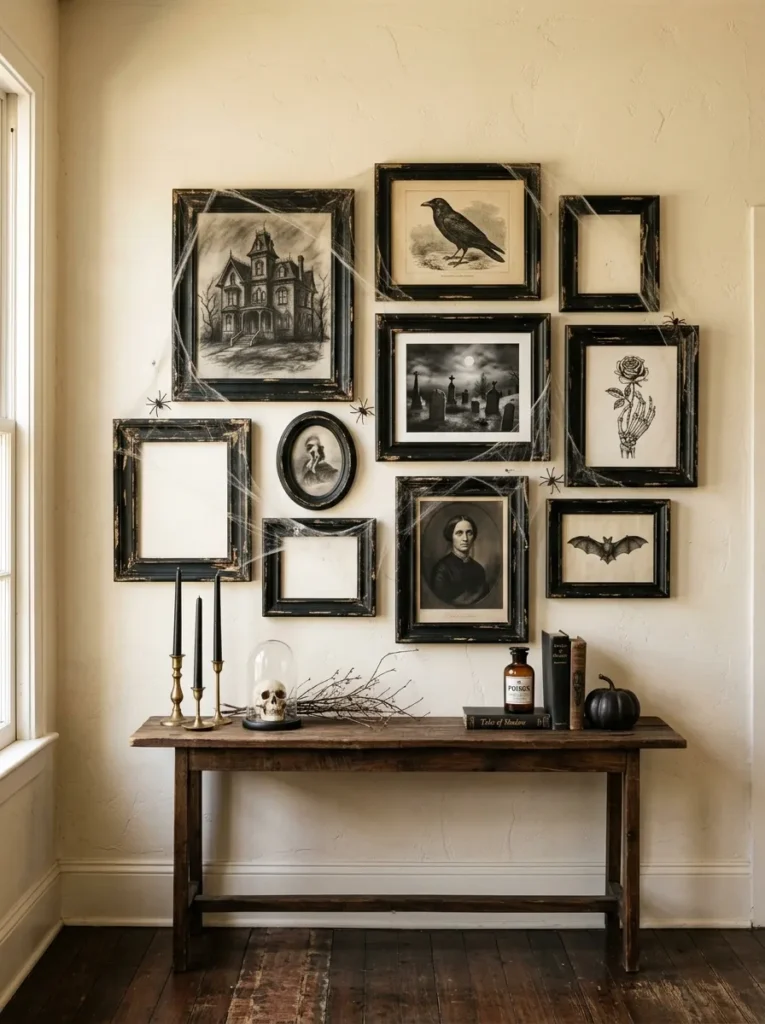
- Inexpensive frames become Halloween accents with black paint, dark ribbon, or faux cobwebs.
- Empty frames can be used alone as graphic wall decorations.
- Layering several frame sizes creates a more interesting gallery arrangement.
- Add a small skeleton or spider detail for contrast without overcrowding the display.
Old-looking picture frames can give a wall an instant haunted-house character without requiring complicated crafts. Start with inexpensive frames and finish them in matte black, distressed gray, or another dark neutral shade. Place them together in different sizes, leaving enough space between each frame to keep the arrangement readable. You can display spooky printed images inside or leave some frames empty for a more graphic effect. Add tiny faux cobwebs along selected corners rather than covering every surface. This simple decorating approach works beautifully above consoles, fireplaces, or shelves and can blend easily with existing black furniture and seasonal accents.
For more visual depth, combine frames with different finishes and orientations while keeping the overall color palette consistent. A narrow vertical frame beside a wider horizontal one creates useful variation without making the arrangement feel random. In my experience, leaving one or two frames empty often makes the entire grouping look more intentional because the negative space becomes part of the design. Add a small plastic spider to one corner or a black ribbon across another frame for subtle Halloween details. Avoid adding decorations to every frame; restraint helps inexpensive pieces feel more like a curated collection.
Rattling Skeleton Jars
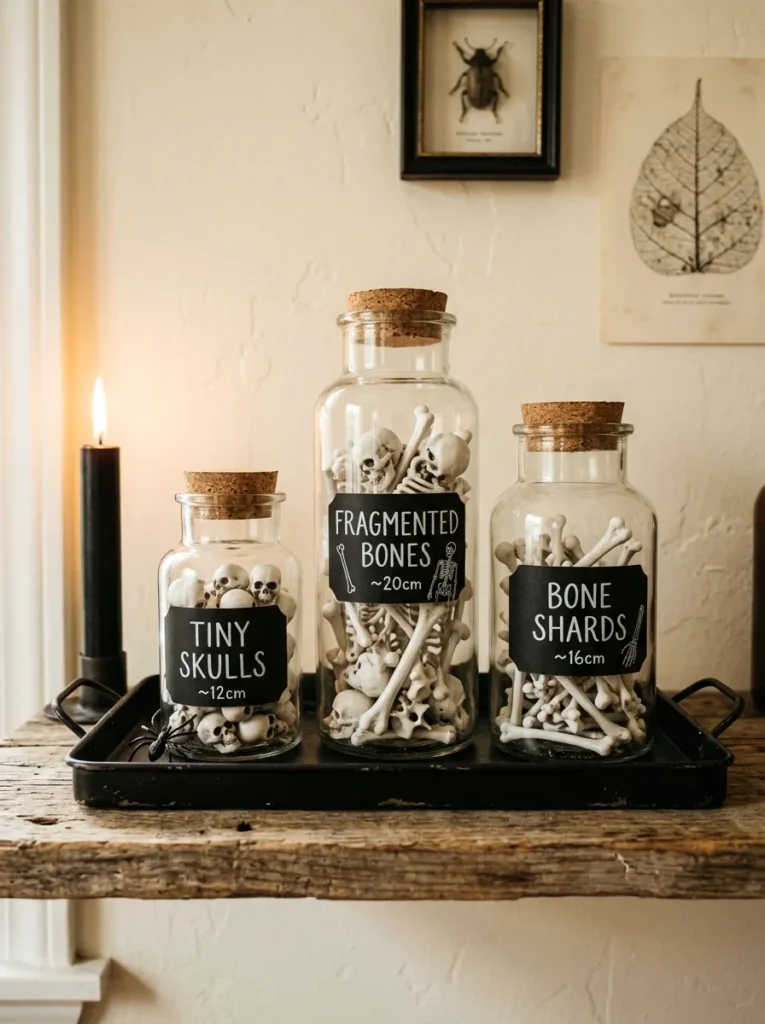
- Clear jars filled with miniature skeleton pieces create an unusual shelf or countertop display.
- White bones stand out clearly against dark backgrounds and black labels.
- Group jars in odd numbers for a more natural decorative arrangement.
- Keep the contents clearly decorative and use secure lids when placing jars around busy areas.
Clear jars filled with miniature decorative bones create an unusual Halloween display that immediately catches attention. Use transparent containers with secure lids and fill them with small plastic skeleton pieces or faux bones. Add black labels to the fronts for a simple laboratory-inspired appearance, then group several jars together on a tray. This setup works well on kitchen counters, bathroom shelves, bookcases, or party tables because the transparent containers provide visual interest without taking up much space. Place taller jars behind shorter ones so the contents remain visible. A dark tray or black cloth underneath can strengthen the contrast and define the display area.
The arrangement becomes more convincing when you vary the jar shapes and heights while keeping their labels visually consistent. Use simple white lettering on black paper for a clean, vintage-inspired look, or choose distressed labels for a more rustic appearance. I’ve noticed that three or five containers usually create enough repetition to feel substantial without covering an entire shelf. Keep the jars away from areas where they could be easily knocked over, especially in busy kitchens or homes with children. Add one small black candle or miniature skull nearby, leaving plenty of clear space around the jars for a tidy finish.
Haunted Lantern Glow
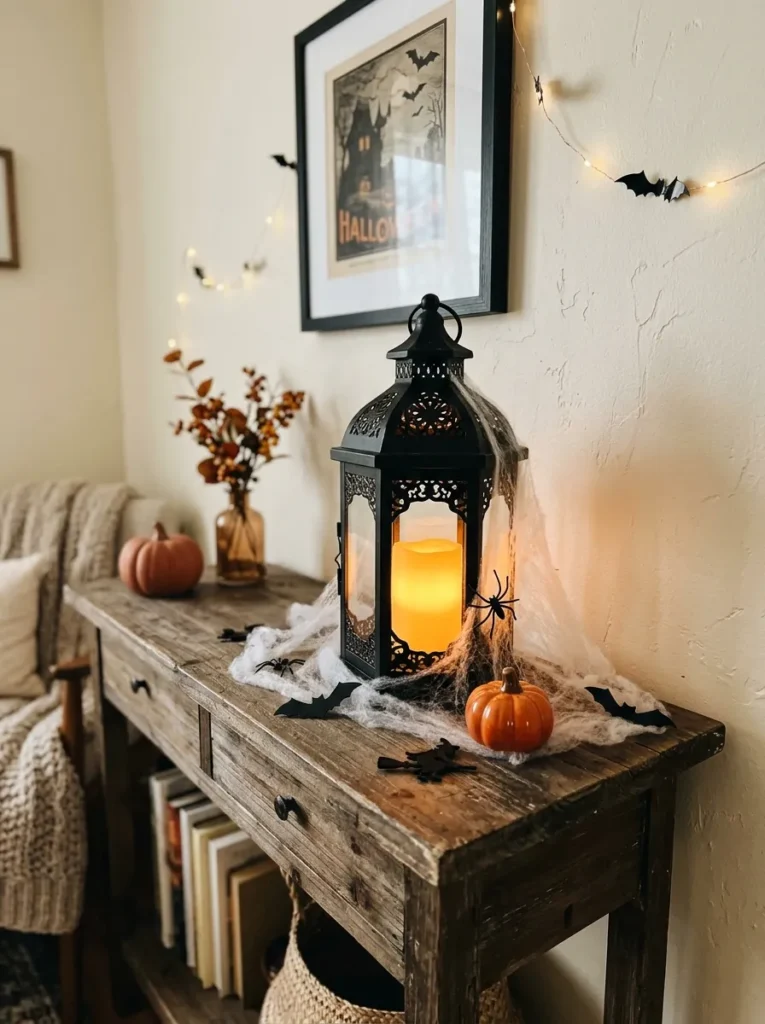
- A simple lantern becomes a spooky accent with black silhouettes, cobwebs, and a warm LED light.
- Battery-powered lighting provides a safer option for enclosed indoor displays.
- Place the lantern on a tray with small pumpkins for extra seasonal texture.
- Use frosted or tinted materials to soften the glow and create more atmospheric lighting.
A softly glowing lantern can make a Halloween display feel instantly warmer and more atmospheric. Start with an inexpensive lantern and place a battery-operated LED light inside, then add small black paper silhouettes, faux cobwebs, or a miniature skeleton around the exterior. The warm glow highlights the dark details without making the display look overly dramatic. Place the lantern on a console, mantel, side table, or covered entryway where it can become a small focal point. This dollar tree halloween diy works especially well with neutral interiors because the amber light adds seasonal warmth while the black accents provide contrast.
The beauty of a lantern display is that it combines decoration with practical evening lighting. Choose an LED light designed for decorative use and avoid placing flammable materials directly against a heat-producing bulb. Add a few small pumpkins or black decorative pieces around the base to create a compact vignette. I’ve noticed that grouping the lantern with objects of different heights makes a small arrangement look much more substantial. Keep the palette limited to black, cream, and muted orange for a polished appearance. On a covered porch, position the lantern somewhere protected from rain and strong wind.
Spiderweb Chandelier
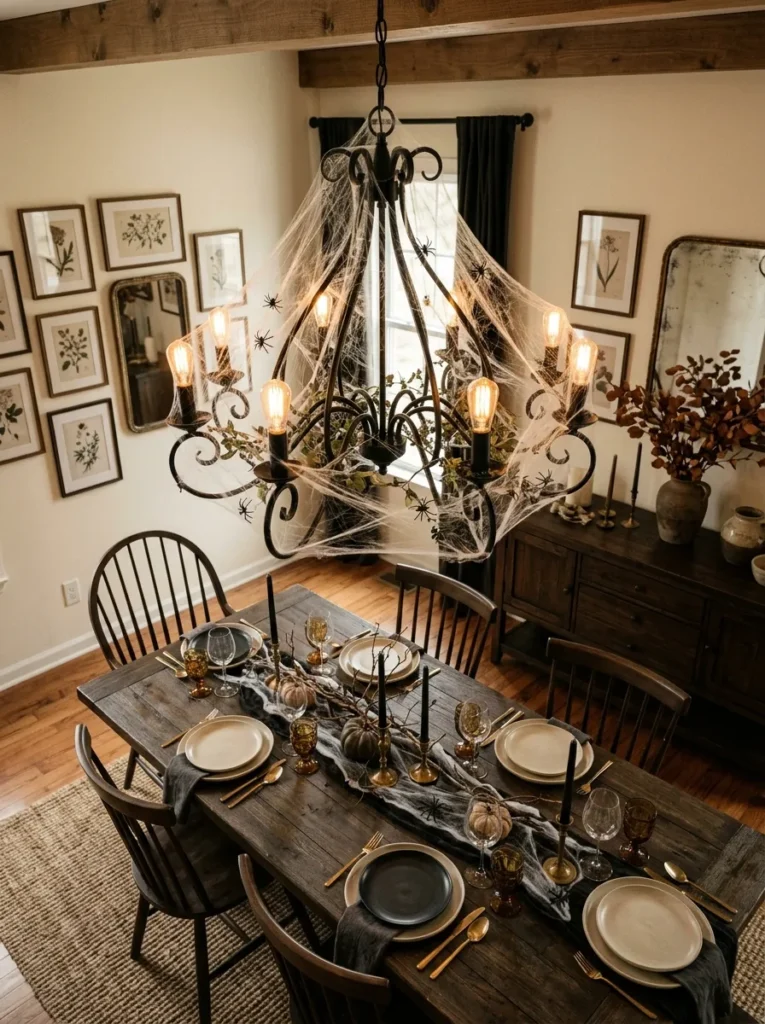
- Faux cobwebs draped lightly around an existing light fixture create instant Halloween texture.
- Small black spiders make the webbing easier to notice from across the room.
- Keep the web material away from bulbs and electrical components for safer decorating.
- Concentrate the decoration around the outer edges so the fixture remains visually functional.
An ordinary chandelier or pendant light can become a Halloween centerpiece with a light layer of faux spiderweb material. Stretch the webbing loosely around the outside of the fixture, allowing a few strands to extend downward for texture. Attach small black spiders to selected sections so the web remains visible from across the room. This idea works particularly well above dining tables, kitchen islands, or entry spaces where overhead lighting already attracts attention. Keep all decorative material safely away from hot bulbs and electrical components. The finished effect adds seasonal character without requiring a new light fixture or taking valuable space from tabletops.
The trick to making a web-covered fixture look stylish rather than cluttered is using less material than you initially expect. Pull the fibers apart until they become thin and irregular, then focus them around the outer edges of the light. I’ve noticed that three or four strategically placed spiders usually create enough detail without turning the fixture into a visual distraction. Choose warm-white bulbs or compatible lighting to complement the Halloween atmosphere. Before decorating, make sure the fixture is switched off and cool. Keep the dining surface underneath relatively simple so the chandelier remains the room’s primary seasonal statement.
Pumpkin Entry Tray
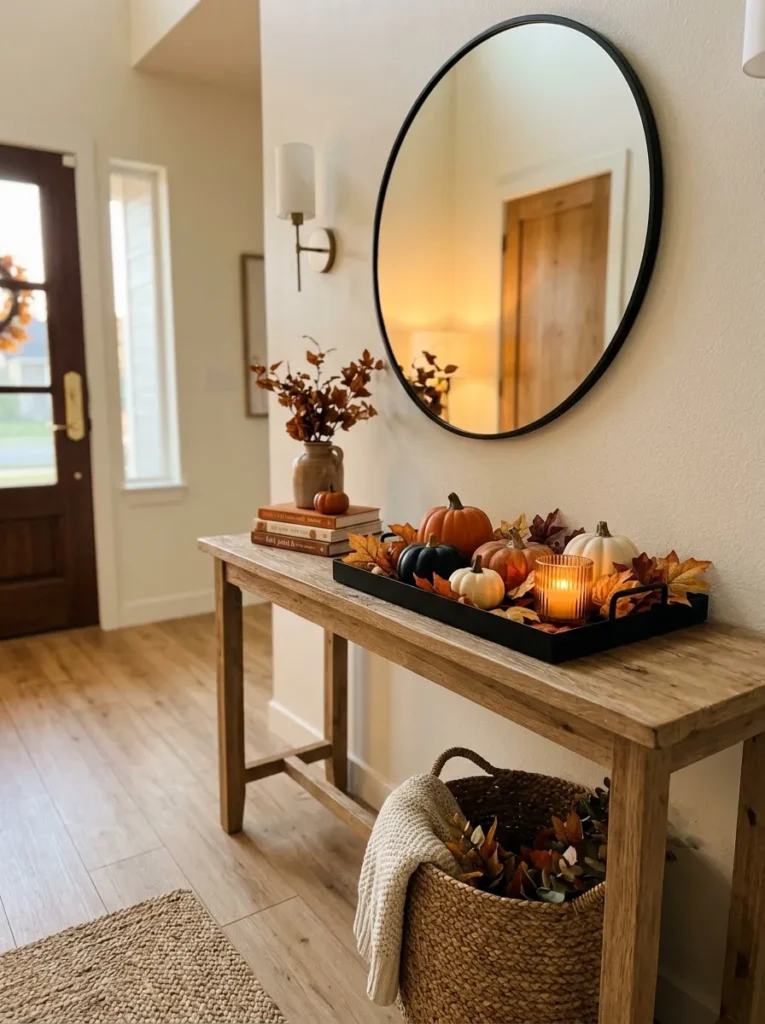
- A small collection of pumpkins creates an organized welcome display on an entry console.
- Mixing orange, black, and neutral pumpkins adds color without making the area feel busy.
- A shallow tray keeps smaller pieces together and makes seasonal decorating easier to move.
- Add a candle, tiny sign, or faux leaves for texture and a finished appearance.
A carefully arranged pumpkin tray can make an entryway feel festive the moment someone walks through the door. Choose several small pumpkins in orange, black, white, or muted neutral tones and arrange them on a shallow tray. Place the largest pumpkin toward the back, then layer smaller pieces around it to create depth. Add a small candle, faux leaves, or a simple Halloween sign without filling every open space. This arrangement is one of the easiest ways to bring seasonal style into a home because it works on narrow consoles, shelves, and side tables. The compact footprint also keeps everyday entryway functions intact.
A balanced entry display should look inviting while leaving enough room for keys, bags, and other daily essentials. Keep the decorative tray toward one side of the console if you regularly use the surface, then place practical items in a separate container nearby. In my experience, combining three different pumpkin finishes creates more interest than using many identical pieces. Try one matte black pumpkin, one traditional orange piece, and one cream or white accent for contrast. Add a small black candle or woven element for texture, but stop before the arrangement feels crowded. The finished vignette can easily be packed away after Halloween.
Conclusion
Halloween decorating does not have to mean spending a lot or filling every corner with expensive seasonal pieces. With these dollar tree halloween diy ideas, you can turn simple, affordable supplies into eye-catching decorations with personality and charm. Try starting with one small project, such as a pumpkin tray, ghost garland, or haunted lantern, then build your display from there. I’ve seen how a few thoughtful details can completely transform an ordinary space. Save this post on Pinterest for your next decorating project, try your favorite ideas at home, and share it with someone who loves creative Halloween decor.