21 Halloween Kitchen Decor Ideas for a Spooky Touch
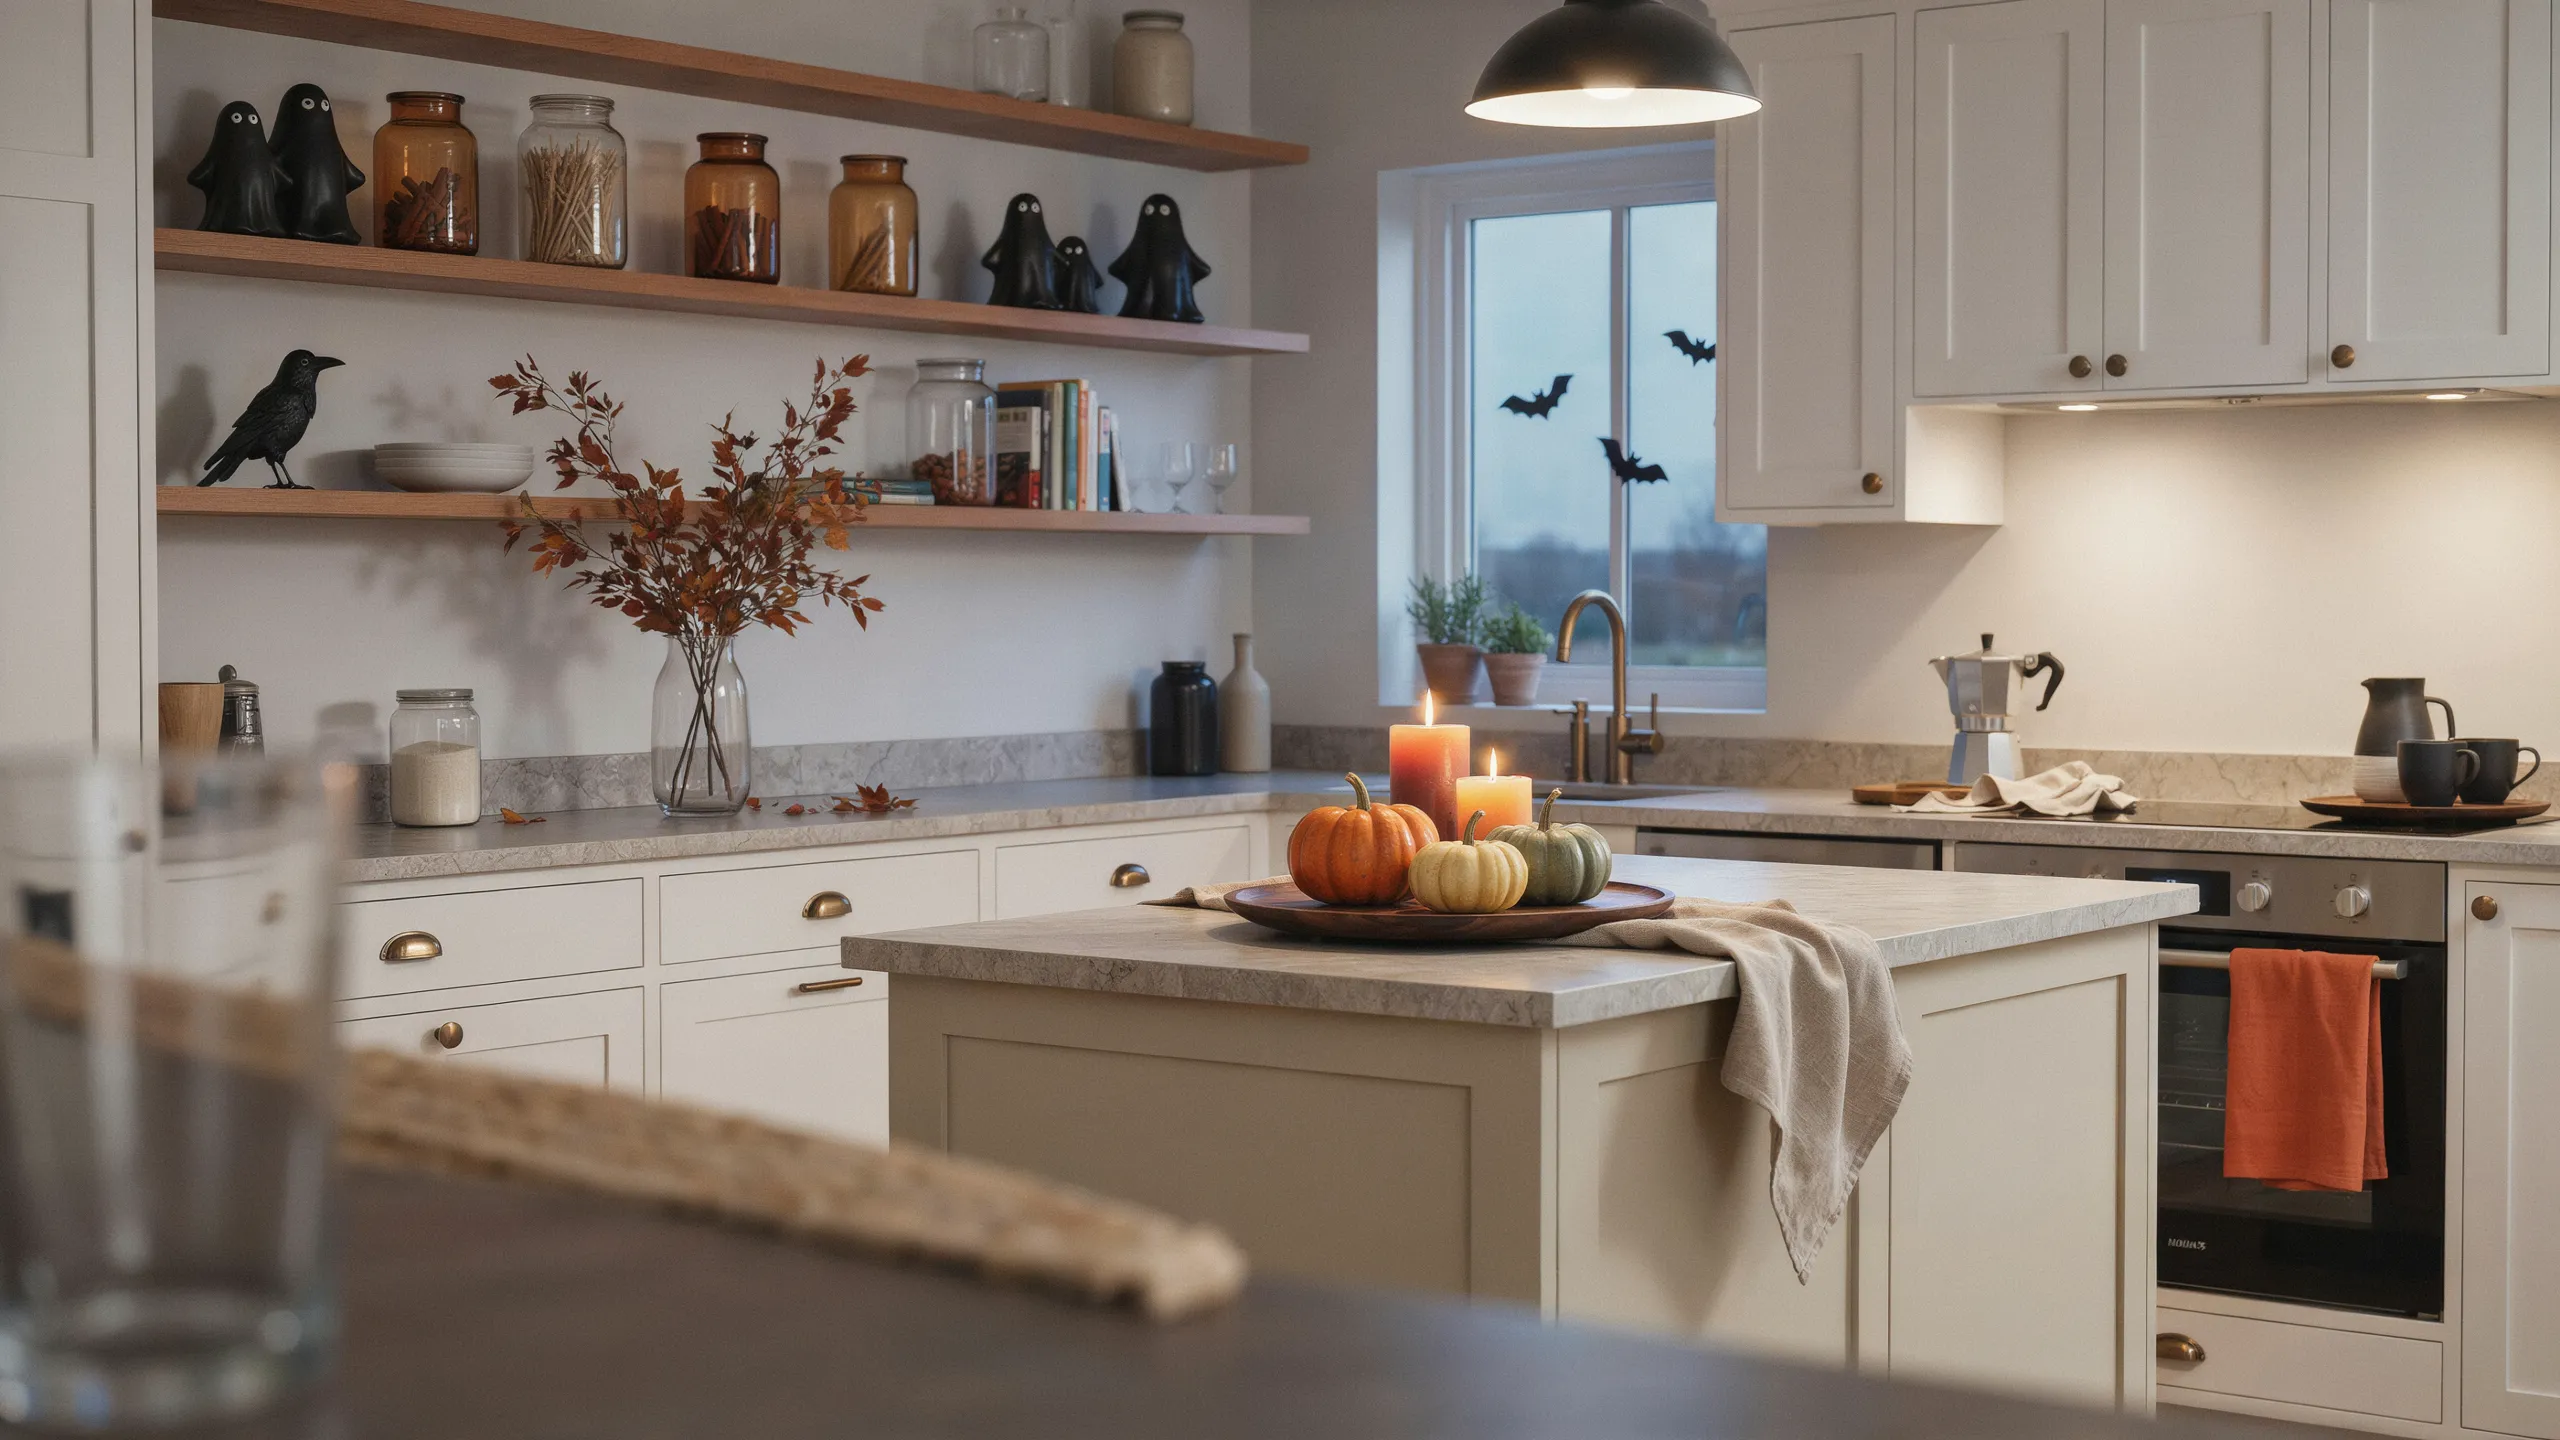
Ready to give your kitchen a spooky seasonal makeover without making it feel dark or cluttered? These halloween kitchen ideas make decorating simple, stylish, and fun.
From tiny pumpkins and ghost mugs to moody shelves, festive towels, and charming table settings, this collection shows how small changes can create a completely different atmosphere. You don’t need a big budget or a full kitchen makeover to make the space feel special for October. Many ideas use everyday areas you already have, such as counters, shelves, windows, and breakfast nooks. In my experience, the most successful seasonal decorating comes from adding a few intentional details rather than filling every surface. Explore these ideas, choose your favorites, and create a kitchen that feels festive, welcoming, and uniquely yours.
Pumpkin Counter Display
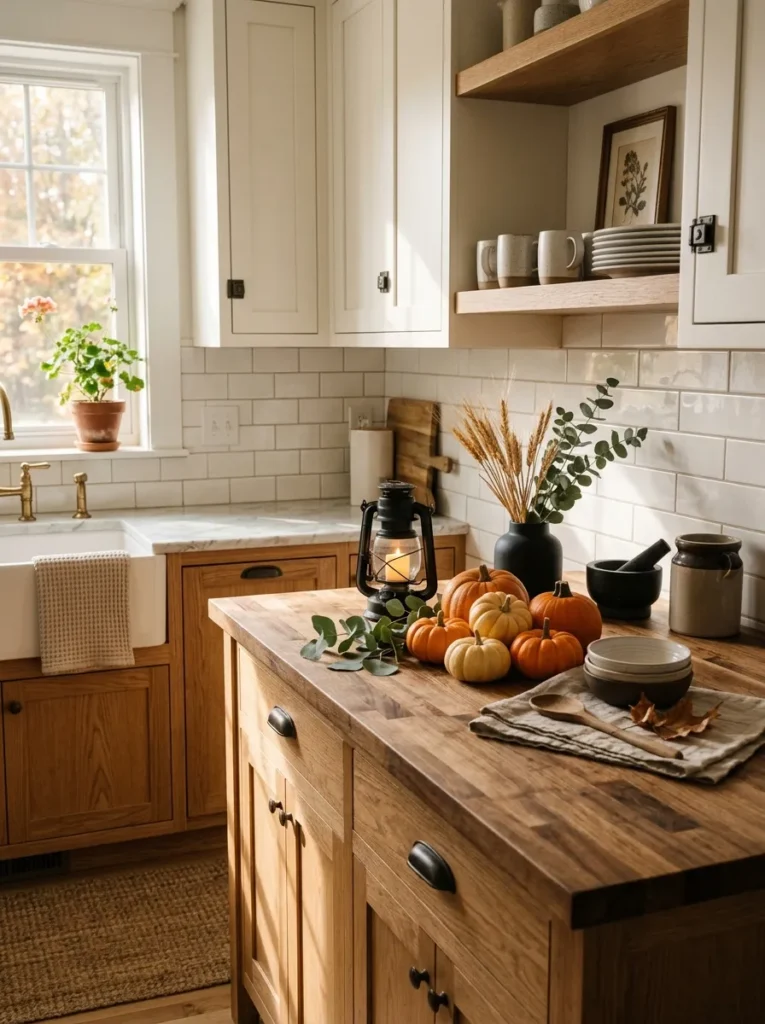
- Group small pumpkins at different heights for an effortless layered display.
- Mix orange, cream, and muted green tones to keep the counter balanced.
- Leave useful prep space open so the decor feels practical, not crowded.
- A small tray makes seasonal pieces easier to rearrange or remove.
A pumpkin display can make an ordinary counter feel instantly ready for Halloween without taking over the workspace. Choose three to five pumpkins in different sizes and arrange them on a wooden tray near a coffee station, window, or empty corner. Mixing real pumpkins with ceramic versions adds texture while keeping the arrangement reusable. In my experience, varied heights make a small display look much fuller than placing everything in one straight line. Add one warm-toned lantern or a few dried stems, and the arrangement gains depth without requiring expensive seasonal accessories or major changes.
For a polished halloween kitchen, keep the surrounding surfaces relatively quiet so the pumpkins become the visual focal point. White cabinets, natural wood, stone counters, and simple hardware provide an easy background for stronger autumn colors. If your counter is narrow, use miniature pumpkins instead of large ones and arrange them inside a shallow bowl. This keeps the work area functional while still creating a festive corner. You can also repeat one pumpkin color elsewhere, such as on a shelf or dining table, to connect the seasonal details throughout the room without making the decor feel overly themed.
Witchy Coffee Station
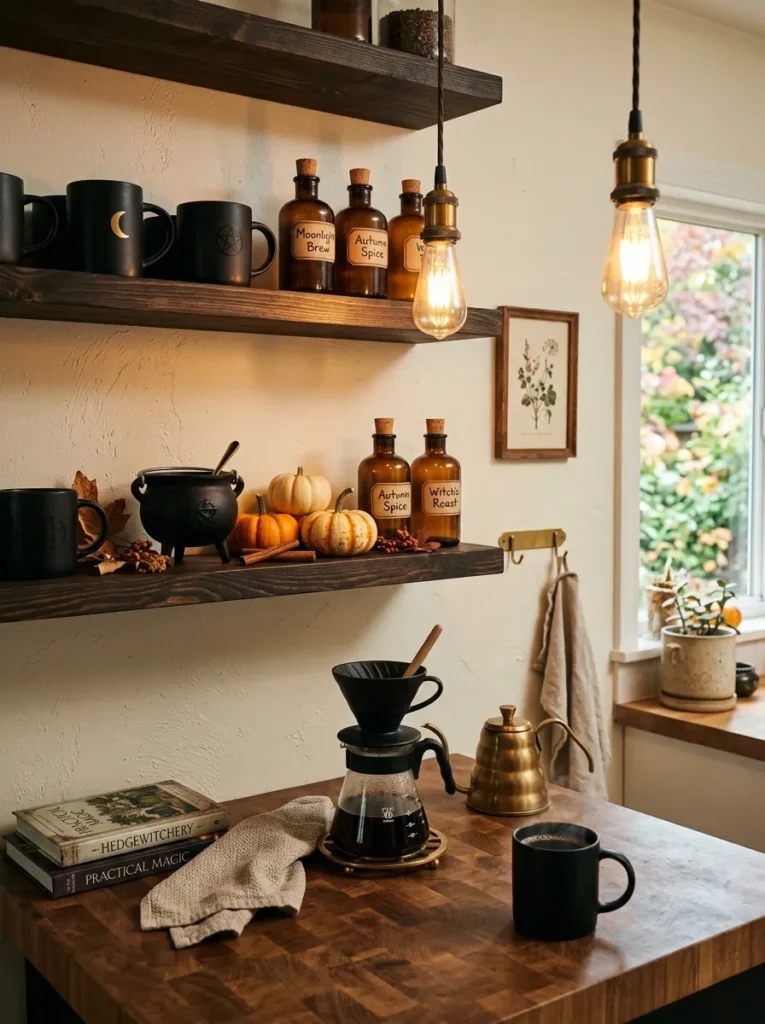
- Turn an existing coffee corner into a seasonal focal point with minimal effort.
- Black mugs and amber accessories create contrast without overwhelming the room.
- Use a small tray to keep coffee essentials organized and visually connected.
- Add one or two playful witch details instead of filling every surface.
A simple coffee station becomes much more memorable when a few dark seasonal accents are added around everyday essentials. Start with a black or wooden tray, then arrange your coffee maker, favorite mugs, a small pumpkin, and one witch-inspired accessory nearby. Amber jars or brown glass containers can hold sugar, coffee beans, or tea while reinforcing the autumn palette. I’ve noticed that practical objects work especially well as decor because they remain useful throughout the season. The result feels intentional rather than staged, giving your morning routine a subtle Halloween update without sacrificing convenience or counter space.
Keep the color palette focused on black, warm brown, cream, and small touches of orange for a sophisticated look. A handwritten-style label, vintage spoon, or tiny broom can add personality without making the station look like a costume display. If the area is small, use vertical space with a narrow shelf or hanging mug rail. Soft under-cabinet lighting can make darker accessories easier to see after sunset. This approach works particularly well in modern kitchens because the contrast between clean cabinetry and moody seasonal details creates a stylish focal point while keeping the overall room comfortable.
Black And Orange Shelves
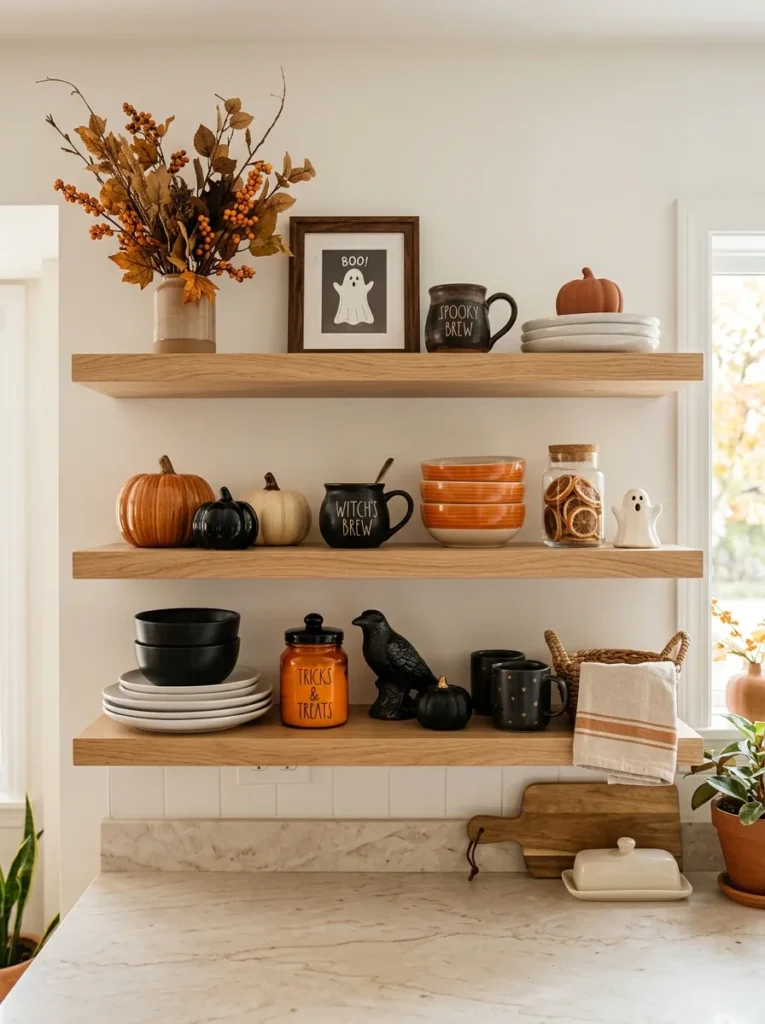
- Alternate dark and bright pieces to create rhythm across open shelving.
- Keep everyday plates and bowls visible so the shelves remain functional.
- Use small seasonal objects between practical items for an easy update.
- Repeat orange in several locations rather than concentrating it in one cluster.
Open shelves are perfect for adding seasonal personality because even a few carefully chosen pieces can change the entire wall. Pair black mugs with orange bowls, ceramic pumpkins, neutral plates, and small autumn prints to create contrast without making the arrangement chaotic. Place larger pieces toward the back and smaller accents near the front for natural depth. In my experience, repeating colors across two or three shelves makes seasonal styling feel much more cohesive. You can also keep most everyday dishes in place and simply replace a handful of accessories, making the transformation affordable and easy to refresh.
For a balanced halloween kitchen, avoid filling every inch of shelf space with themed decorations. Leave some open areas so the eye has somewhere to rest and the practical items remain easy to reach. Try placing an orange jar beside dark mugs, then adding a small pumpkin or dried branch on the next shelf. This creates visual movement while keeping the palette consistent. If your kitchen has white or light-colored walls, black accents will provide definition, while orange brings warmth. The finished display feels festive, organized, and Pinterest-ready without requiring permanent changes to your shelving.
Ghost Mug Collection
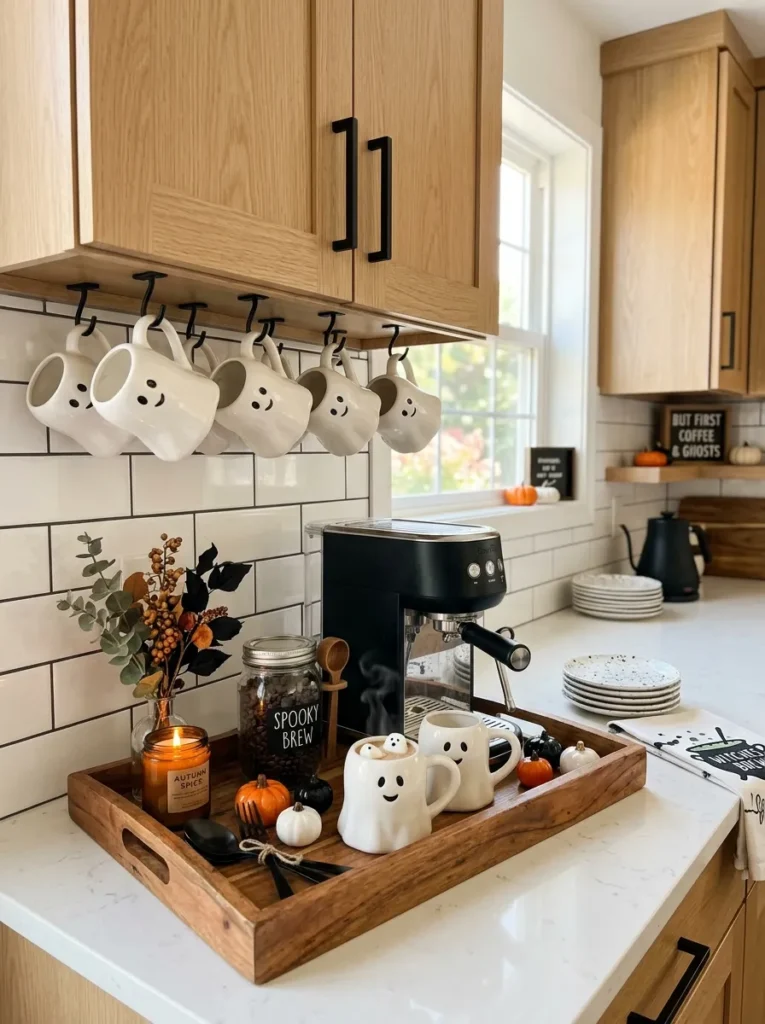
- White ghost mugs add playful character without making the room feel overly dark.
- Hang matching mugs where they are easy to reach and naturally visible.
- Pair them with small orange accents for contrast against light cabinetry.
- Choose ceramic pieces with simple faces for a cleaner, more modern look.
Nothing makes a seasonal coffee corner feel more playful than a row of ghost mugs waiting beside the coffee maker. Choose white ceramic mugs with simple ghost faces, then hang them from hooks beneath a cabinet or arrange them neatly on a small shelf. The pale color keeps the display bright while tiny facial details provide the Halloween theme. A few miniature pumpkins can add warmth without competing with the mugs. This idea works especially well in compact kitchens because the decoration uses existing storage space instead of taking valuable room from counters or food preparation areas.
For a cohesive halloween kitchen, repeat the black and orange palette through smaller accessories rather than adding more ghost decorations everywhere. A black spoon holder, orange tea towel, or wooden tray can connect the coffee station to the rest of the room. If you have children, this setup can also become a fun everyday detail they look forward to using during October. I’ve seen simple themed dishware make seasonal decorating feel much more natural because it serves a real purpose. After the season, store the mugs together and replace them with your regular collection.
Spooky Window Styling
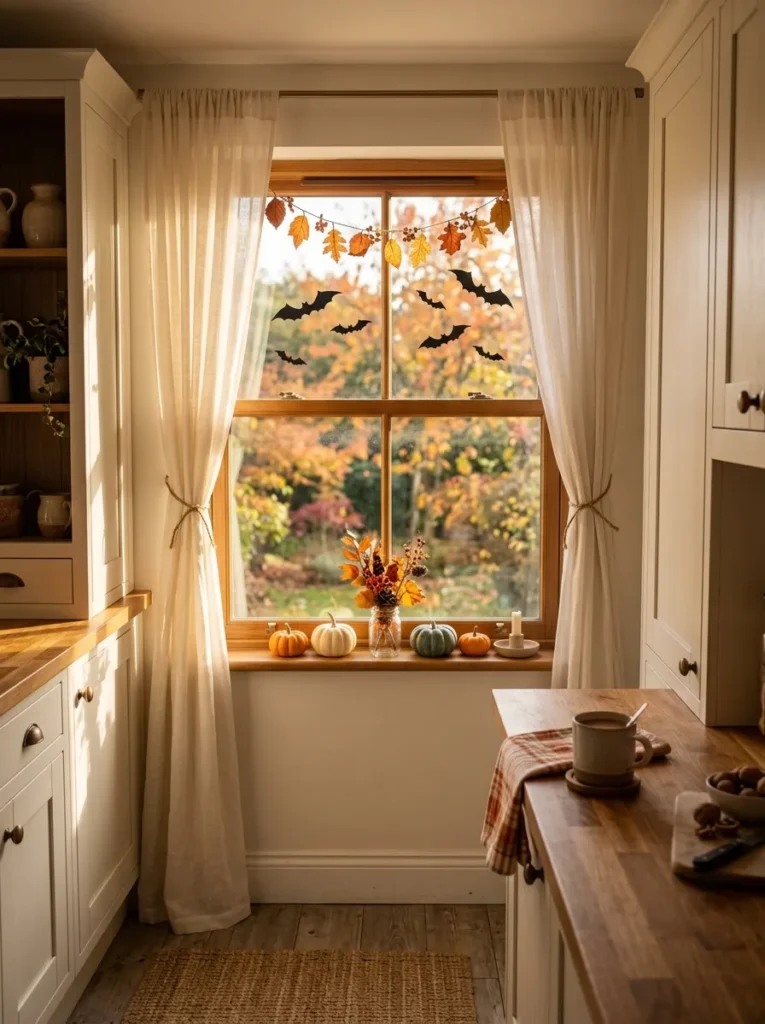
- Use removable window decorations for an easy seasonal transformation.
- Keep the sill lightly styled so natural daylight remains the main feature.
- Black bats create striking contrast against bright outdoor light.
- Add pumpkins or dried leaves to connect the window with nearby autumn decor.
A kitchen window can become a surprisingly strong Halloween focal point with only a few lightweight decorations. Try arranging removable black bat silhouettes around the glass rather than covering the entire window. Add two or three miniature pumpkins along the sill, leaving enough space for curtains, plants, or other everyday items. Natural daylight will highlight the shapes and create subtle shadows throughout the room. This approach is especially useful for renters because removable decals and lightweight decorations can usually be taken down without changing the permanent finishes. The result feels seasonal while keeping the kitchen bright and welcoming.
When styling a halloween kitchen window, think about visibility from both inside and outside the room. A simple arrangement of bats, leaves, and pumpkins can look polished from different angles when the pieces are spaced unevenly but intentionally. Avoid placing tall decorations directly in front of the glass because they can block useful daylight. Instead, keep the tallest item toward one side and gradually lower the surrounding pieces. Warm lighting in the evening can then create a cozy glow around the window, making this small decorating area feel connected to the rest of your autumn-inspired kitchen.
Vintage Halloween Signs
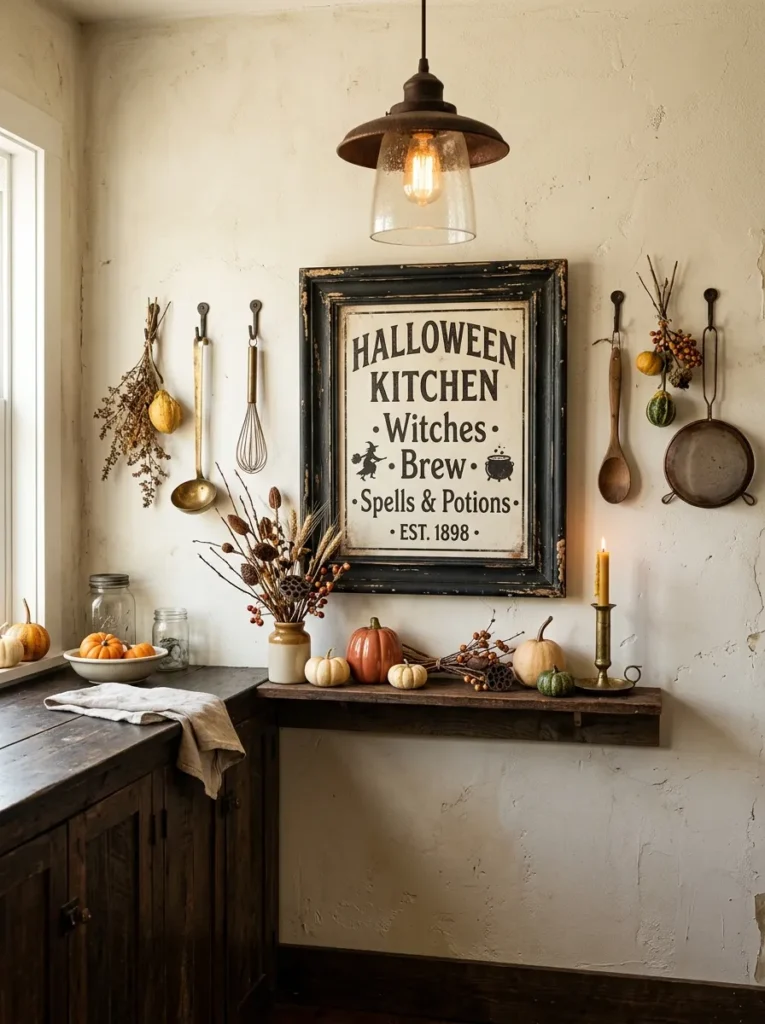
- A single vintage sign can fill an empty wall without adding visual clutter.
- Choose distressed wood or aged metal for authentic seasonal character.
- Place the sign near existing shelves or counters for a connected look.
- Keep surrounding decorations simple so the lettering remains easy to notice.
An empty kitchen wall can feel completely different when you add one well-chosen vintage Halloween sign. Look for distressed wood, aged metal, faded lettering, or an old-fashioned illustration that complements your existing decor. A sign works particularly well above a coffee station, beside open shelving, or near a pantry door where it naturally becomes part of the room. Instead of covering the wall with multiple messages, let one larger piece provide the main visual statement. This creates a cleaner display and makes the seasonal decoration feel intentional rather than like a collection of unrelated accessories.
For a more sophisticated halloween kitchen, choose artwork with colors already present in the room. Black lettering can echo dark cabinet handles, while warm cream and brown tones can connect with wood counters or flooring. I’ve noticed that vintage-style pieces look especially convincing when paired with one or two authentic-looking kitchen objects, such as an old cutting board or brass utensil. Keep the surrounding area uncluttered so the sign has breathing room. This simple combination adds personality to an otherwise overlooked wall while giving the entire kitchen a subtle seasonal identity that photographs beautifully for Pinterest.
Pumpkin Spice Corner
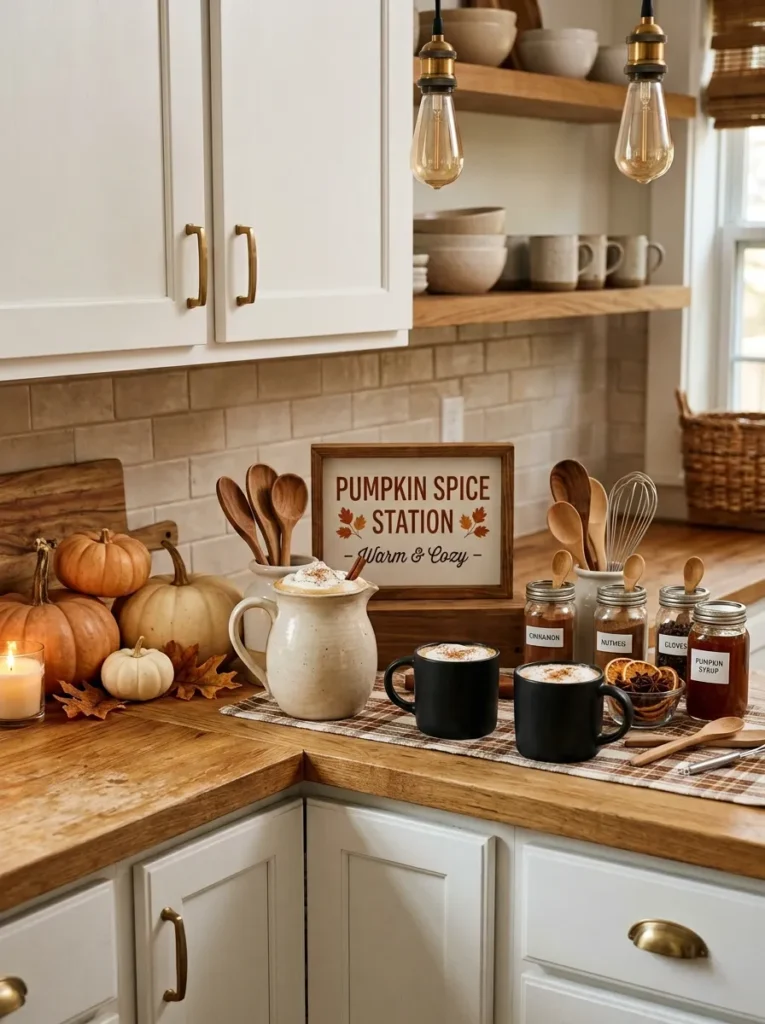
- Create a dedicated drink area around coffee, tea, or seasonal beverages.
- Use cinnamon, pumpkin, and warm brown shades for a cozy autumn palette.
- Keep syrups, spices, and mugs together for easy everyday access.
- Add one small seasonal sign to strengthen the focal point.
A pumpkin spice corner can turn a small section of your counter into a cozy seasonal destination. Start with the items you already use, such as a coffee maker, mugs, cinnamon, and favorite syrups, then add a few autumn accents around them. A wooden tray helps visually group everything while keeping the counter organized. Small pumpkins, dried stems, or an amber jar can introduce color without creating clutter. This arrangement works because it combines decoration with function. Every item has a purpose, so the display remains useful throughout October while still giving the room a distinctly festive character.
For a welcoming halloween kitchen, keep the drink station visually warm rather than relying only on traditional spooky decorations. Cream ceramics, natural wood, burnt orange, and deep brown create an autumn-inspired foundation that feels comfortable beyond Halloween. Add a black mug or small black sign for contrast. If your counter space is limited, use a two-tier stand to create more vertical storage without spreading objects across the work surface. I’ve noticed that seasonal stations feel more inviting when everything is easy to reach, especially during busy mornings. A practical arrangement can still look carefully styled and Pinterest-ready.
Bat Wall Accents
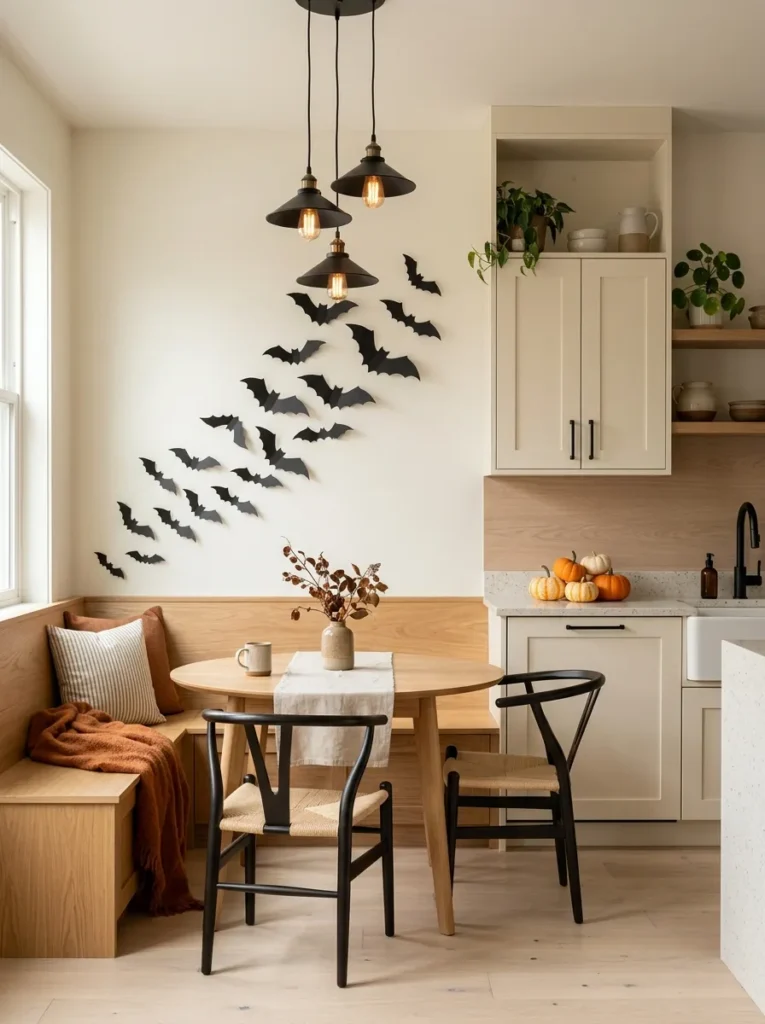
- Arrange bats in a rising pattern to create movement across an empty wall.
- Use removable cutouts when you want a temporary seasonal update.
- Keep the surrounding furniture simple so the silhouette pattern stands out.
- Combine black bats with tiny orange accents for balanced contrast.
Black bat silhouettes are one of the easiest ways to add Halloween character without changing your furniture or permanent finishes. Arrange several removable bats in a loose upward pattern so they appear to move across the wall. Start with smaller shapes near the lower edge and gradually increase the spacing as the group rises. This creates a sense of motion while keeping the composition visually light. A blank wall above a breakfast nook, pantry, or counter is an ideal location. The dark silhouettes stand out beautifully against white, cream, or pale gray walls without requiring complicated decorating skills.
In a modern halloween kitchen, the key is restraint. Rather than covering the entire wall, create one focused cluster that becomes a visual accent. You can place a few miniature pumpkins on the nearby counter to introduce warm color and connect the wall with other seasonal details. If you are decorating a rental, removable adhesive options make this idea especially convenient. I’ve seen simple silhouette arrangements make a stronger impression than crowded displays because the negative space gives the shapes room to breathe. After Halloween, the wall can return to its everyday appearance in minutes.
Dark Floral Arrangement
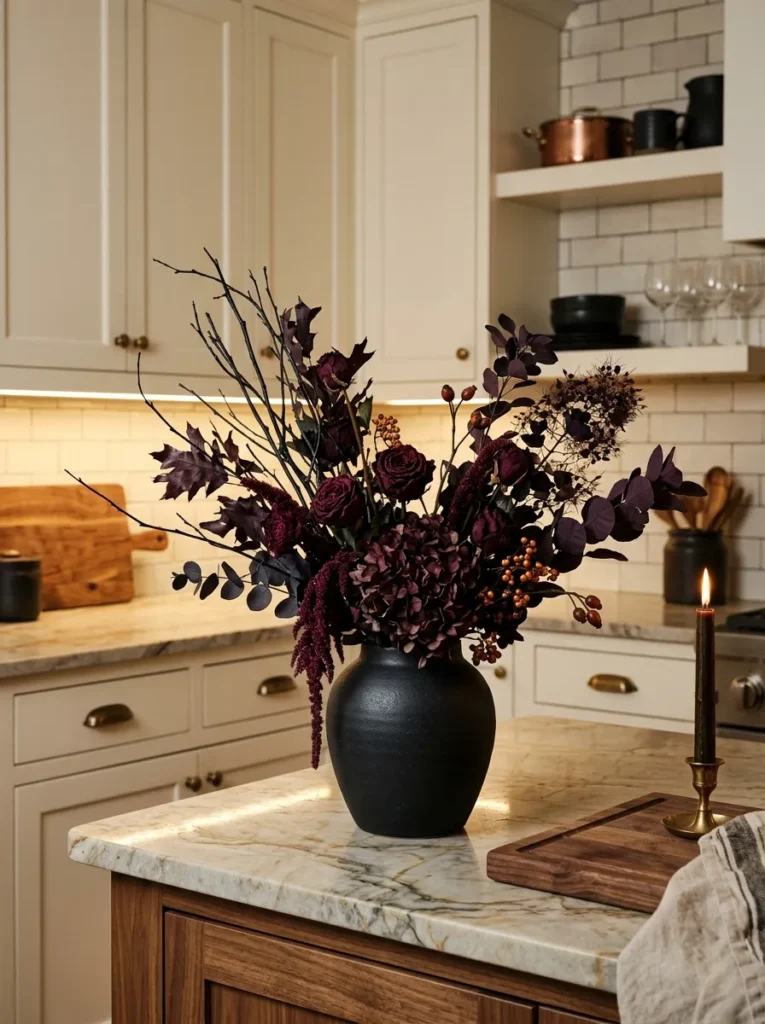
- Dark flowers bring a sophisticated Halloween mood without obvious novelty decorations.
- Combine burgundy, black, plum, and muted orange for visual depth.
- Use dried stems for a longer-lasting arrangement with minimal maintenance.
- Place the vase in an unused corner to add height without crowding the workspace.
A dark floral arrangement offers a more refined way to bring Halloween style into the kitchen. Instead of relying on cartoon ghosts or bright decorations, use dried branches, burgundy flowers, deep purple foliage, and a few muted orange stems. Place everything in a matte black, charcoal, or warm ceramic vase to create a strong vertical focal point. The arrangement works beautifully on a kitchen island, dining table, or unused counter corner. Because the colors are naturally autumnal, the display can transition smoothly from early fall decorating into Halloween without requiring a complete seasonal makeover.
To keep the arrangement practical, choose dried or preserved stems that need little maintenance and can remain in place throughout the season. In a halloween kitchen with neutral cabinetry, darker foliage adds contrast while preserving an elegant appearance. Avoid making the arrangement too wide if it sits near a food preparation area. A tall, narrow silhouette provides height without taking much counter space. Warm under-cabinet lighting or a nearby pendant can emphasize the textures after sunset. This combination creates a sophisticated seasonal accent that feels atmospheric, mature, and easy to recreate with affordable materials.
Haunted Herb Garden
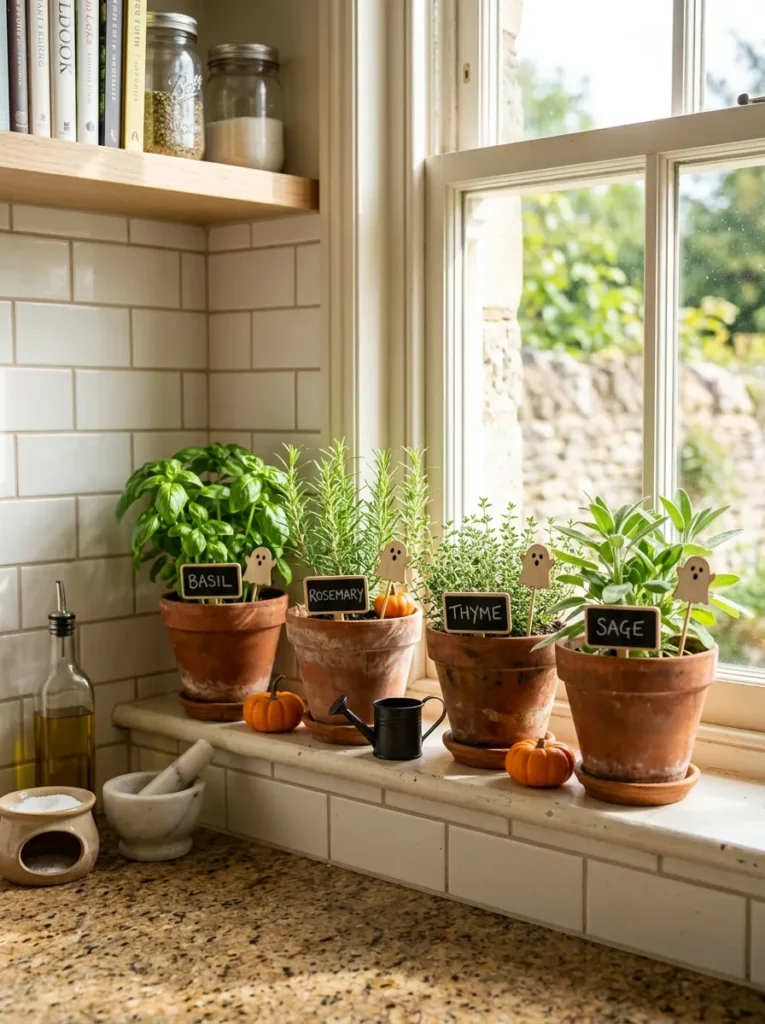
- Give an everyday herb collection a playful seasonal makeover.
- Use tiny signs or decorative picks instead of bulky Halloween accessories.
- Keep living herbs in their usual containers for easy cooking access.
- Add miniature pumpkins to bring warm seasonal color to the windowsill.
Your everyday herb collection can become one of the cutest seasonal details in the kitchen with almost no effort. Arrange rosemary, basil, mint, or other useful herbs in matching pots, then add tiny ghost picks, black labels, or miniature pumpkins between them. A sunny windowsill is ideal because the greenery remains useful while becoming part of the decor. Choose terracotta, cream, or matte black containers to keep the arrangement cohesive. This idea works especially well when you want Halloween character without sacrificing the fresh, natural feeling that plants bring to a busy kitchen.
For a practical halloween kitchen, keep the herbs where they receive appropriate light and remain easy to reach while cooking. Avoid placing decorations directly inside the soil if they could interfere with watering or plant growth. Instead, use lightweight accents around the pots or attach removable labels to the containers. I’ve noticed that greenery softens darker seasonal colors and prevents a Halloween display from feeling too heavy. A few orange pumpkins can complete the arrangement without overwhelming the plants. The finished windowsill feels lively, useful, and festive while requiring very little extra space or maintenance.
Skull Serving Tray
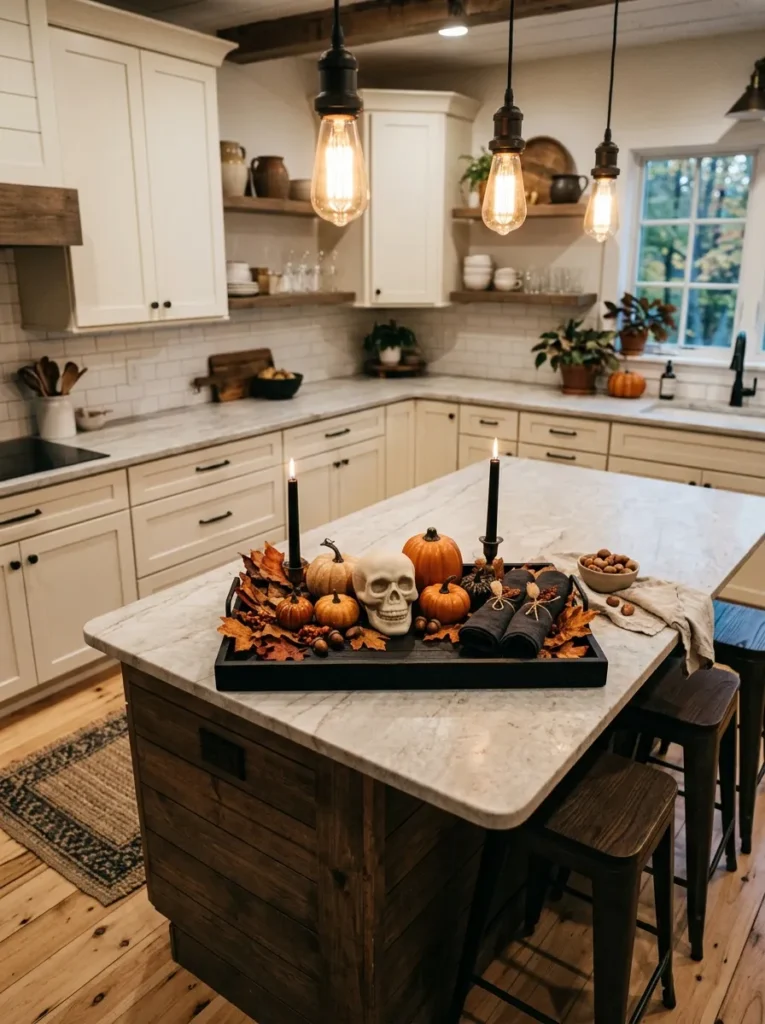
- Use a decorative tray to create one organized seasonal focal point.
- Combine skull accents with pumpkins for a balanced black-and-orange palette.
- Keep candles and serving pieces arranged neatly for practical entertaining.
- Choose a tray with raised edges to make seasonal pieces easier to move.
A serving tray can turn scattered Halloween accessories into one polished centerpiece that is easy to move whenever you need the counter space. Start with a black or dark wood tray, then add a ceramic skull, miniature pumpkins, folded napkins, and one or two autumn accents. Keep the tallest piece toward the back and smaller objects toward the front so everything remains visible. This arrangement works particularly well on a kitchen island because it creates a defined decorating zone. When guests arrive, you can quickly move the entire display to another surface without rearranging each item individually.
In my experience, grouping several small decorations on a tray makes seasonal styling look more intentional and prevents a kitchen from feeling cluttered. Choose materials that complement your existing finishes, such as black wood with brass hardware or natural wood with cream cabinetry. If you use candles, select stable holders and keep flames away from curtains, paper, and other decorations. A simple skull can provide the spooky element, while pumpkins and dried leaves add warmth. The finished display feels festive but still sophisticated enough for everyday cooking, coffee breaks, and casual entertaining.
Spooky Cutting Boards
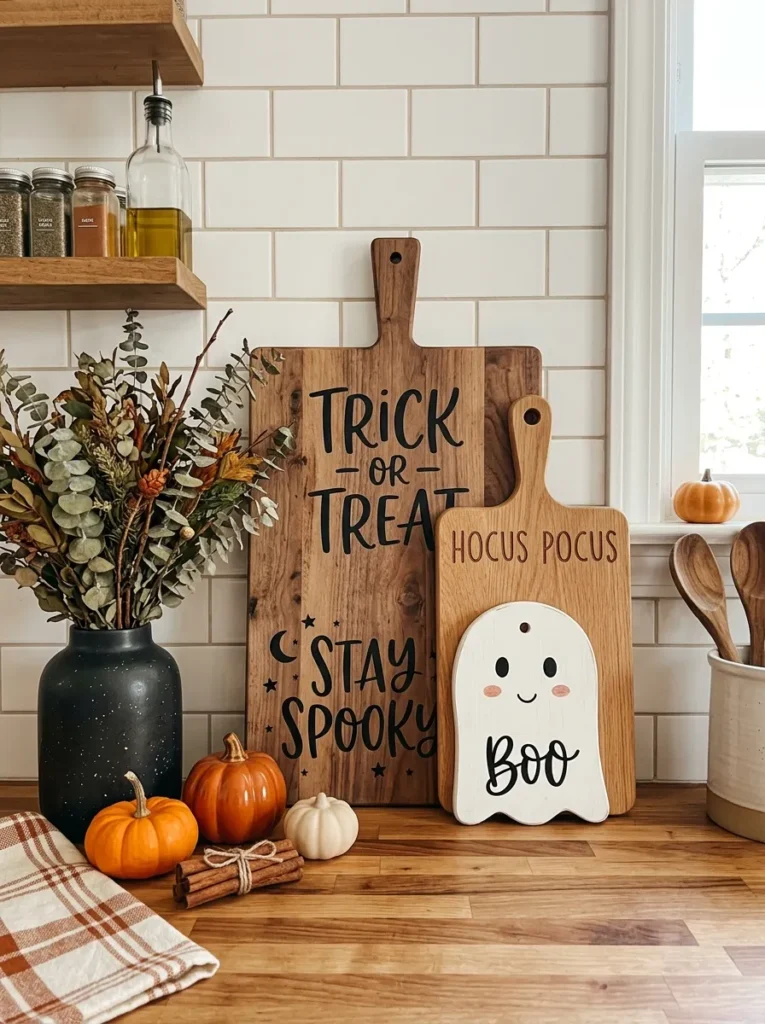
- Lean decorative cutting boards against the backsplash for instant visual height.
- Mix natural wood with one black or painted seasonal board.
- Layer different sizes to create depth without adding countertop clutter.
- Keep functional boards separate from decorative pieces when preparing food.
Decorative cutting boards can add warmth and Halloween personality while using an item that already belongs in the kitchen. Lean two or three boards against the backsplash, choosing different sizes and finishes for a layered look. A natural wood board can sit behind a smaller black board with simple seasonal lettering, while a tiny ghost-shaped board adds a playful detail in front. This arrangement works beautifully near a coffee station, sink, or empty counter corner. The wood texture also helps soften stronger black and orange accents, creating a display that feels welcoming rather than overly themed.
For a polished halloween kitchen, treat the cutting boards as part of the room’s architecture rather than simply placing them wherever there is space. Keep the largest board closest to the wall and angle smaller pieces slightly forward. Add one miniature pumpkin or dried stem at the base to connect the arrangement with other autumn decorations. If you regularly use the boards for food preparation, keep decorative painted surfaces separate from food-contact areas unless they are specifically designed for that purpose. This small styling detail adds texture, height, and seasonal character without requiring permanent changes.
Halloween Bar Cart
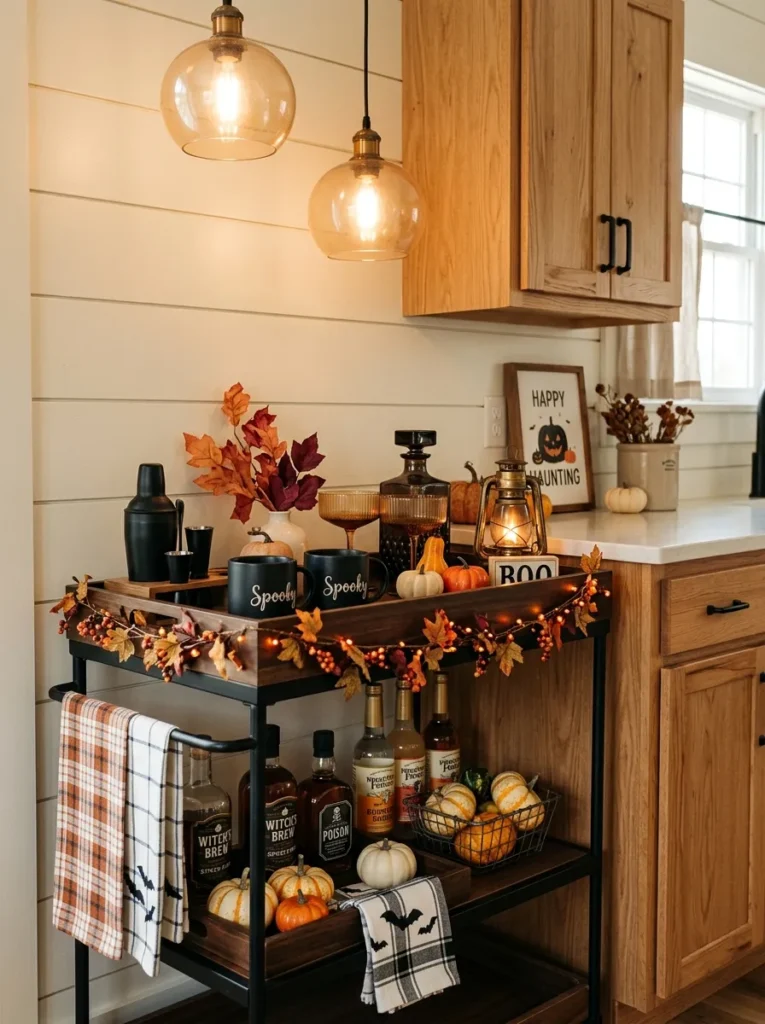
- Turn an existing cart into a seasonal display without changing its main function.
- Use black, amber, and wood tones for a sophisticated autumn palette.
- Keep frequently used glasses and mugs easy to reach.
- Add one lantern or pumpkin cluster for a simple focal point.
A small bar cart can become a striking Halloween feature when everyday drinkware is mixed with a few seasonal accents. Start with black mugs, amber glasses, or dark serving pieces, then add miniature pumpkins and dried autumn stems around them. Use the bottom shelf for larger decorative objects while keeping the top shelf practical for drinks. This approach works particularly well in kitchens where counter space is limited because the cart creates another decorating zone without taking over the worktops. A wooden tray can also keep smaller pieces organized and make the entire display easier to move.
For a stylish halloween kitchen, avoid filling the cart with novelty decorations that compete with your drinkware. Instead, choose two or three seasonal details and let the existing items provide most of the visual interest. A vintage lantern can add warmth after sunset, while amber glass catches the light beautifully. If the cart has wheels, position it beside an island, dining area, or coffee station where it feels connected to the room. I’ve noticed that functional displays often look more natural because they become part of daily routines rather than feeling like decorations placed only for photographs.
Candy Jar Display
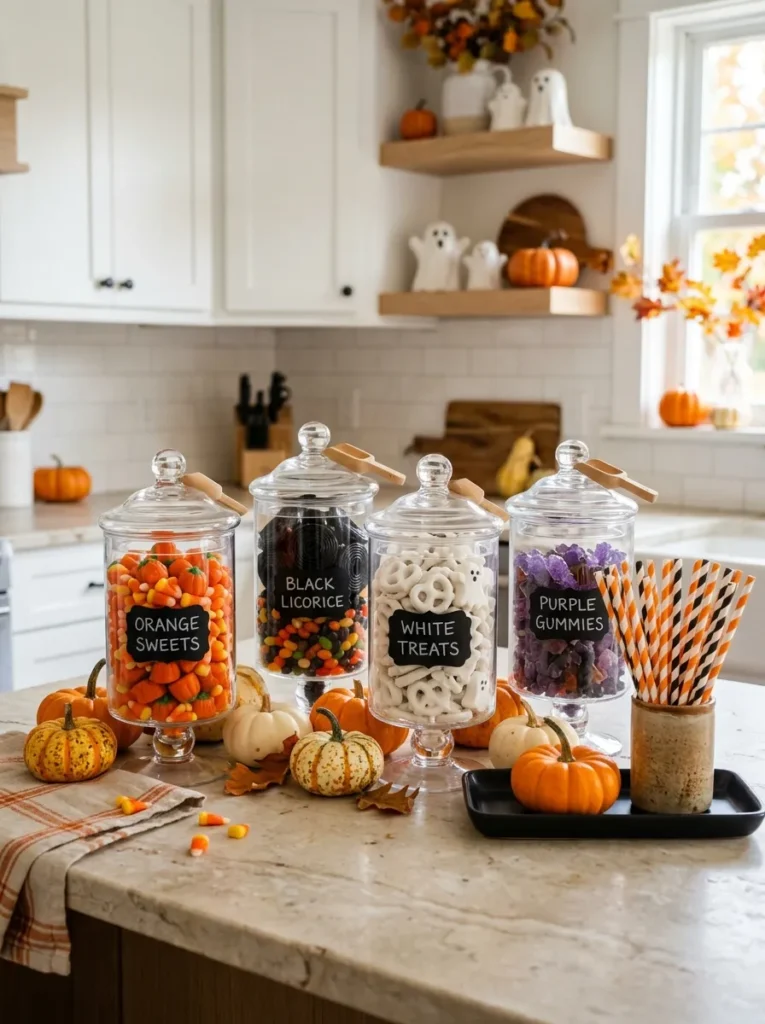
- Use clear jars to make colorful candy part of the visual display.
- Choose sweets in coordinated Halloween colors for a cleaner appearance.
- Place jars at different heights to create an attractive countertop arrangement.
- Keep the display near a coffee or snack station for everyday convenience.
Colorful candy jars can turn a simple kitchen corner into a playful Halloween display while keeping treats easy to find. Choose clear glass containers in different sizes and fill them with sweets in orange, black, white, or purple tones. Arrange the tallest jar toward the back and smaller containers in front to create layers. A few miniature pumpkins or striped paper straws can complete the setup without overcrowding the counter. This idea is especially useful for families because the decoration doubles as an accessible snack station, giving the seasonal display a practical purpose instead of making it purely decorative.
A well-planned halloween kitchen can feel festive without relying on large decorations, and candy jars are an easy example of that balance. Place them on a small tray near the breakfast area, coffee station, or pantry so they remain organized and easy to refill. If young children have access to the sweets, choose sturdy jars with secure lids and position them safely away from hot appliances. For a more grown-up look, use neutral glass containers and limit the color palette. The result adds cheerful seasonal color while keeping the countertop tidy, functional, and visually appealing.
Gothic Table Setting
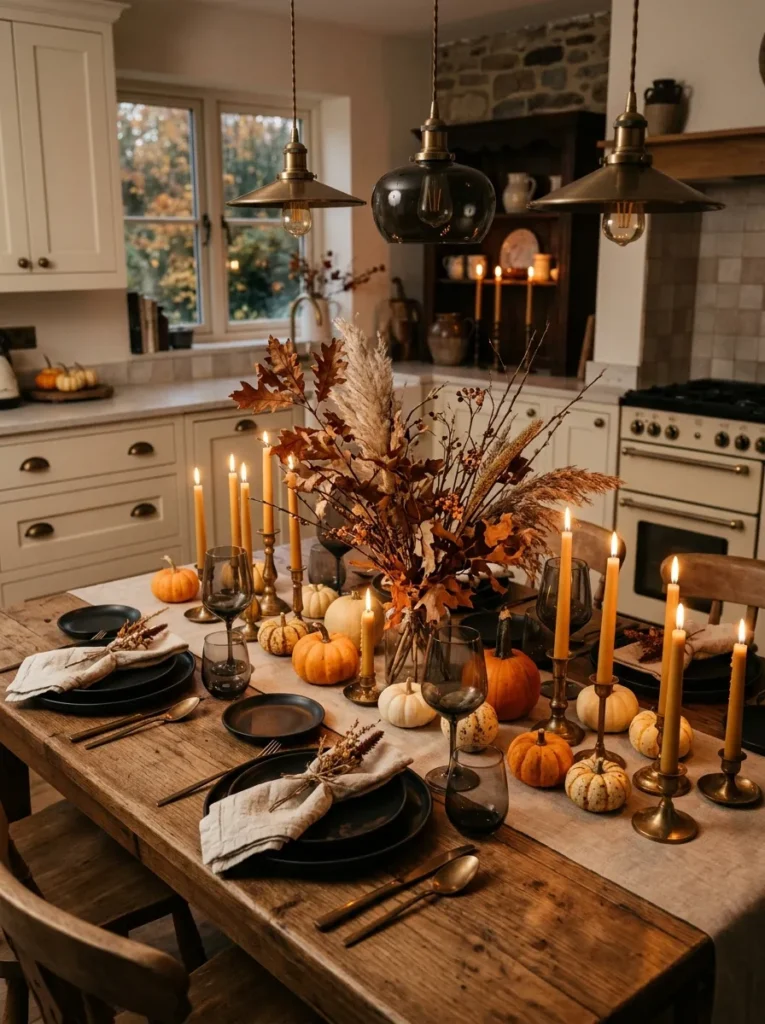
- Use dark tableware to create instant contrast against a light kitchen.
- Combine black, cream, brass, and natural wood for a refined palette.
- Add small pumpkins instead of filling the table with novelty decorations.
- Keep the centerpiece low enough for comfortable conversation and serving.
A gothic table setting can bring a dramatic Halloween mood to the kitchen without making the space feel like a costume party. Start with matte black plates, cream napkins, dark glasses, or simple brass utensils, then add a few miniature pumpkins as accents. A natural wood table provides warmth and prevents the darker pieces from feeling too heavy. Keep the centerpiece low and compact so guests can still see across the table comfortably. This setup is especially effective for autumn dinners because the same neutral pieces can remain useful even after Halloween decorations are removed.
For a sophisticated halloween kitchen, focus on contrast and texture rather than adding more themed objects. Pair smooth black ceramics with woven napkins, natural wood, aged brass, or lightly textured linens to create depth. A few flameless candles can provide a warm evening glow while keeping the arrangement practical around food and children. In my experience, restrained table settings often photograph better because each element remains visible instead of blending into a crowded centerpiece. Repeat one or two colors from nearby counters or shelves, and the dining area will feel naturally connected to the rest of the seasonal decor.
Raven Accent Shelf
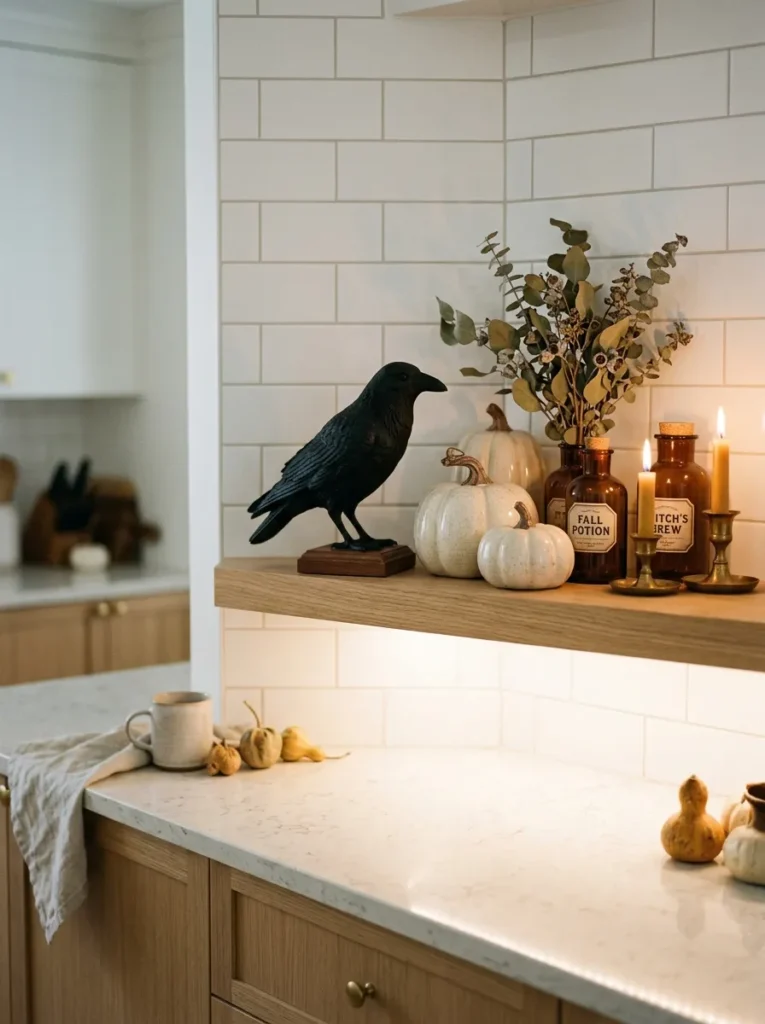
- A single raven creates a dramatic focal point without overwhelming the room.
- Pair black accents with cream ceramics to keep the display balanced.
- Use dried greenery to soften darker decorative pieces.
- Style a narrow shelf when countertop space is limited.
A black raven figurine can add a mysterious Halloween touch while keeping the overall kitchen decor sophisticated. Place one sculptural raven on an open shelf or countertop, then surround it with cream pumpkins, amber glass, dried greenery, or a small brass object. The darker centerpiece becomes more noticeable when placed against a light backsplash or pale cabinetry. Keep the arrangement intentionally simple so the raven remains the star. This works especially well for anyone who prefers subtle seasonal decorating because the design feels atmospheric without filling the room with obvious Halloween characters or bright novelty pieces.
To create visual balance, place the tallest object slightly off-center and use smaller pieces around it to create a gentle layered arrangement. Black, cream, warm brown, and muted green create a palette that feels autumnal rather than overly colorful. Soft lighting can make the raven’s silhouette even more striking in the evening. If you have open shelving, repeat one material, such as brass or wood, elsewhere on the shelf to connect the display. This small styling trick helps the seasonal arrangement look intentional and integrated with the kitchen instead of appearing like a temporary decoration.
Orange Tea Towels
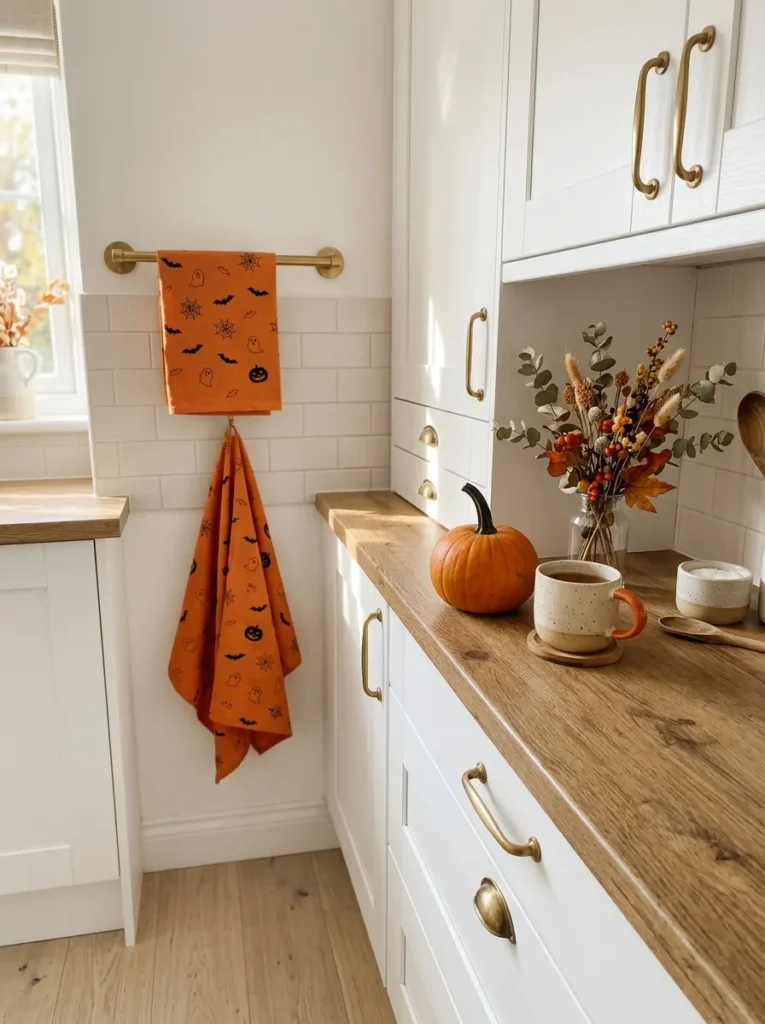
- Replace everyday towels with orange textiles for an instant seasonal update.
- Choose subtle patterns when you prefer a sophisticated Halloween look.
- Repeat the orange shade in small accessories for visual connection.
- Keep towels near the sink or oven where they remain genuinely useful.
Sometimes the smallest textile change can make an entire kitchen feel ready for the season. Swap your everyday tea towels for burnt orange, pumpkin, or rust-colored versions with subtle black details. Hang one beside the sink and fold another neatly over an oven handle or open shelf. Because towels naturally belong in the room, they add seasonal color without creating extra clutter. This is also an inexpensive way to refresh the space when you do not want to purchase large decorations. Choose washable fabrics so the update remains practical during everyday cooking, baking, and cleaning.
For a cohesive seasonal palette, repeat the towel color through one or two small accessories rather than adding orange everywhere. A ceramic pumpkin, amber jar, or dried floral arrangement can echo the same warm shade beautifully. I’ve noticed that textiles are particularly effective in neutral kitchens because they introduce color without changing the permanent finishes. If your cabinets are dark, choose a lighter pumpkin shade for contrast. If the room is already bright, deeper rust or burnt orange can create warmth. The result is simple, functional, and easy to change when the season ends.
Candlelit Counter Nook
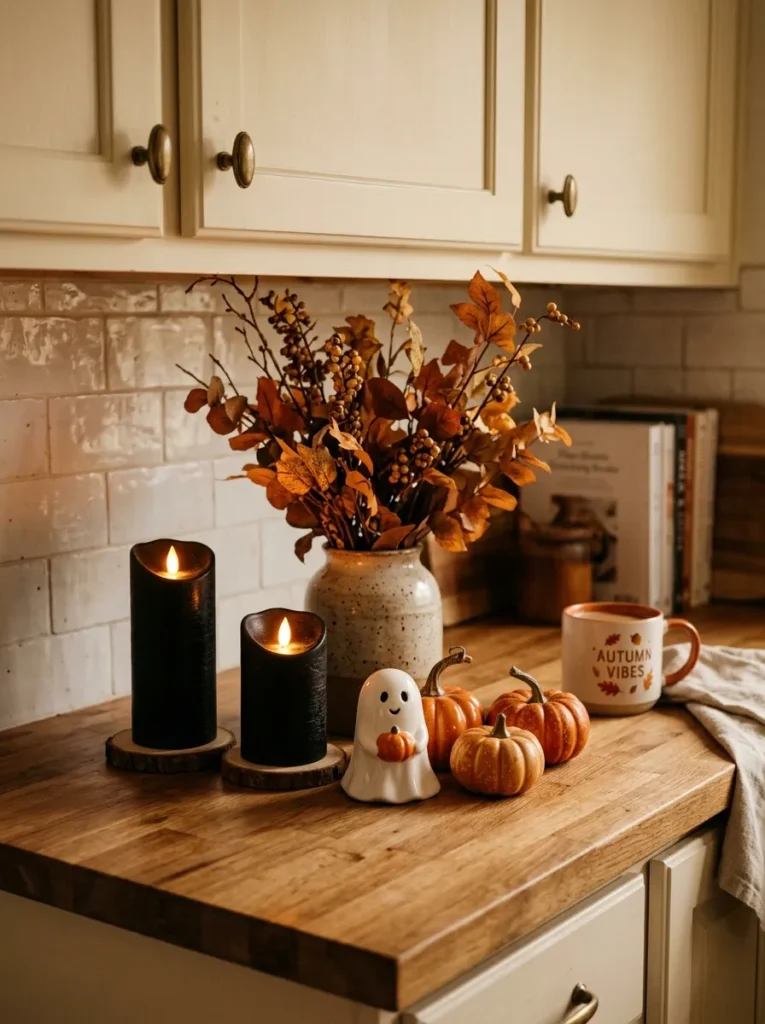
- Create a warm focal point in an unused counter corner.
- Choose flameless candles for a safer everyday seasonal display.
- Mix different candle heights to create visual depth.
- Add pumpkins or dried stems for texture and autumn color.
An unused counter corner can become a cozy seasonal nook with a few candles and carefully chosen autumn accents. Arrange flameless pillar candles at different heights, then place miniature pumpkins and dried branches around their bases. A small ceramic ghost can add one playful detail without changing the sophisticated mood. This setup works especially well in the evening when the soft glow becomes the main visual feature. Use a shallow tray underneath everything to define the arrangement and make it easy to move whenever you need the counter for food preparation or entertaining.
When styling a halloween kitchen with candlelight, prioritize safe placement and avoid positioning decorations near stovetops, hot appliances, curtains, or paper goods. Flameless candles provide the same warm atmosphere without an open flame, making them a practical choice for busy households. Choose holders in black, brass, ceramic, or natural wood to complement existing finishes. Keep the surrounding counter relatively clear so the glow remains noticeable. A restrained arrangement usually feels more inviting than a crowded display, especially in smaller rooms where too many dark accessories can quickly make the space appear visually heavy.
Pumpkin Sink Styling
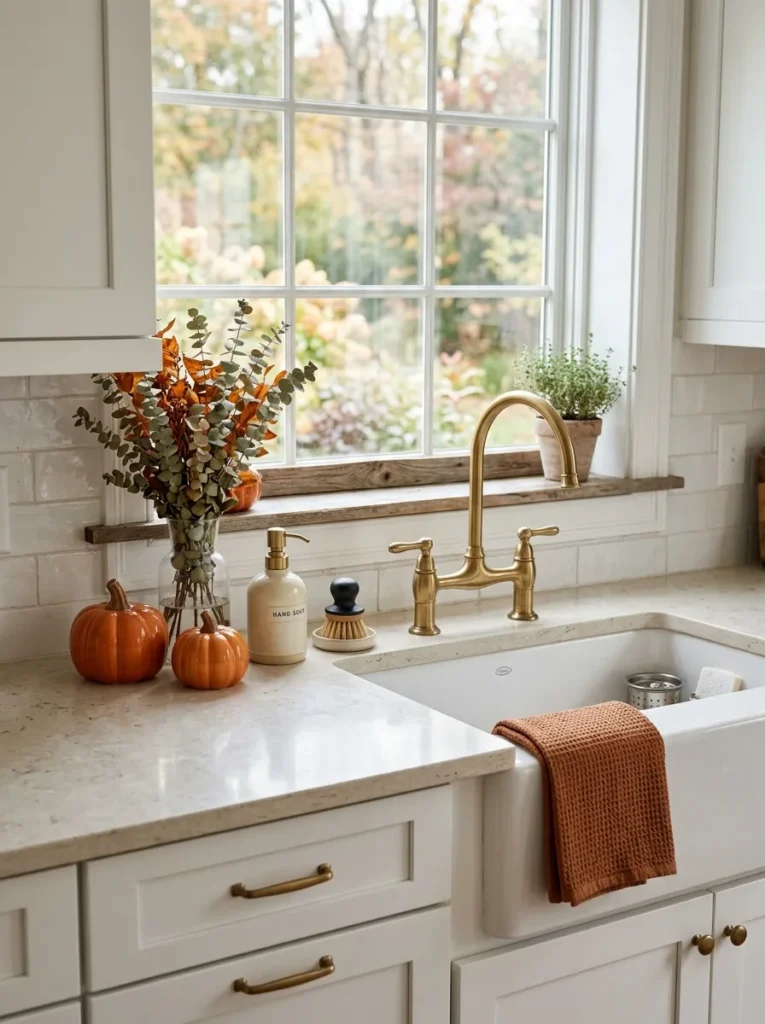
- Add seasonal accents around the sink without blocking everyday essentials.
- Use small pumpkins to bring warmth to an otherwise overlooked area.
- Coordinate towels and accessories for a polished, connected appearance.
- Keep the faucet and soap dispenser completely accessible for daily use.
The sink area is often overlooked when decorating, yet a few small details can make it feel surprisingly festive. Place two or three miniature pumpkins beside the soap dispenser, then add a folded rust-colored towel or a small vase of dried greenery nearby. Keep everything positioned away from the faucet and main washing area so the setup remains practical. This idea works especially well in kitchens with neutral finishes because the warm orange tones create an immediate seasonal contrast. The result is subtle enough for everyday use but noticeable enough to make the whole room feel refreshed.
For a cohesive autumn look, repeat one color or material from the surrounding counters, cabinets, or textiles. A brushed brass faucet can pair beautifully with warm orange pumpkins, while black accessories provide stronger contrast against white cabinetry. Avoid placing decorative items where water can regularly splash them or where they interfere with cleaning. I’ve noticed that small styling moments near functional areas often make a room feel more thoughtfully decorated because they blend naturally into daily routines. A simple sink arrangement can therefore add personality without sacrificing the convenience and cleanliness you need from the space.
Skeleton Breakfast Nook
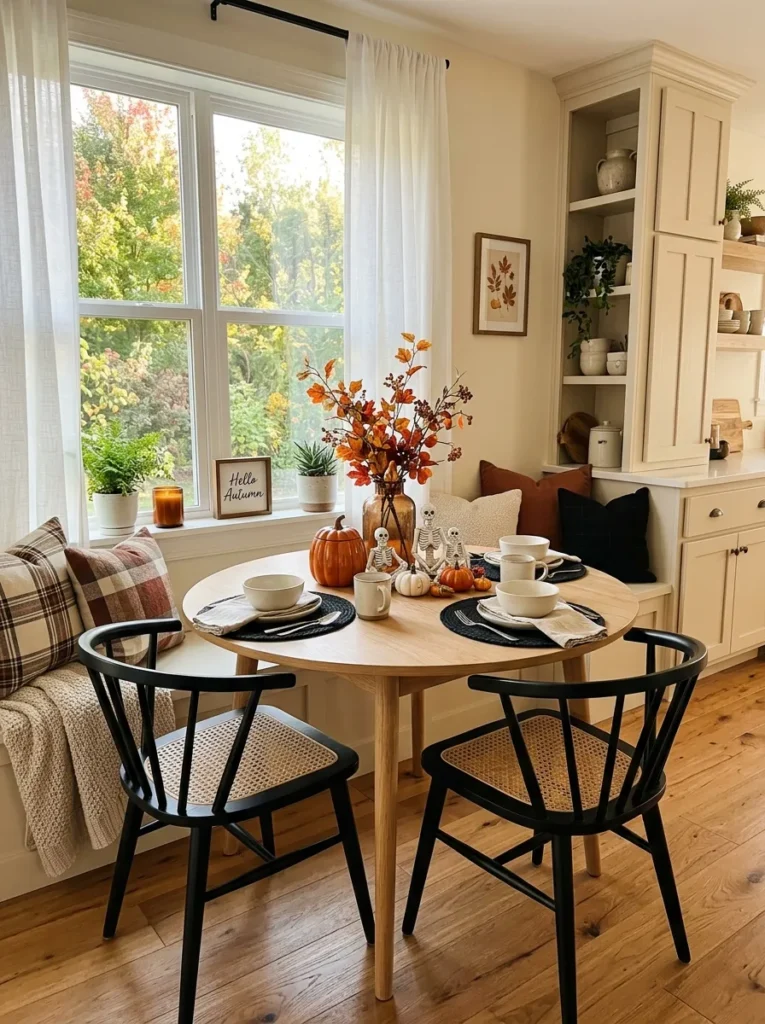
- Add small skeleton figures to an existing breakfast area for playful character.
- Keep the table centerpiece low so the space remains comfortable for meals.
- Mix black, white, orange, and natural wood for balanced seasonal contrast.
- Use everyday dining pieces as the foundation of the display.
A breakfast nook can become one of the most inviting seasonal areas with a few playful skeleton accents. Keep your everyday table and chairs in place, then add small white skeleton figures, miniature pumpkins, black placemats, or a simple autumn centerpiece. Natural wood provides warmth while black and orange introduce classic Halloween contrast. Because the nook already has a clear purpose, the decorations feel naturally integrated rather than randomly placed. This is an especially useful approach for smaller homes where every surface needs to remain functional while still offering opportunities for seasonal personality and visual interest.
Keep the centerpiece low enough that people can comfortably see across the table during breakfast or dinner. A small ceramic bowl filled with miniature pumpkins can provide the main focal point, while one or two skeleton figures add playful details around it. For a more polished look, repeat the same black or orange accent on napkins, mugs, or placemats. In my experience, decorating an existing dining zone is often easier than creating a completely separate display because the furniture already provides structure. The finished nook feels festive, useful, and welcoming without becoming overly crowded.
Black Cabinet Accents
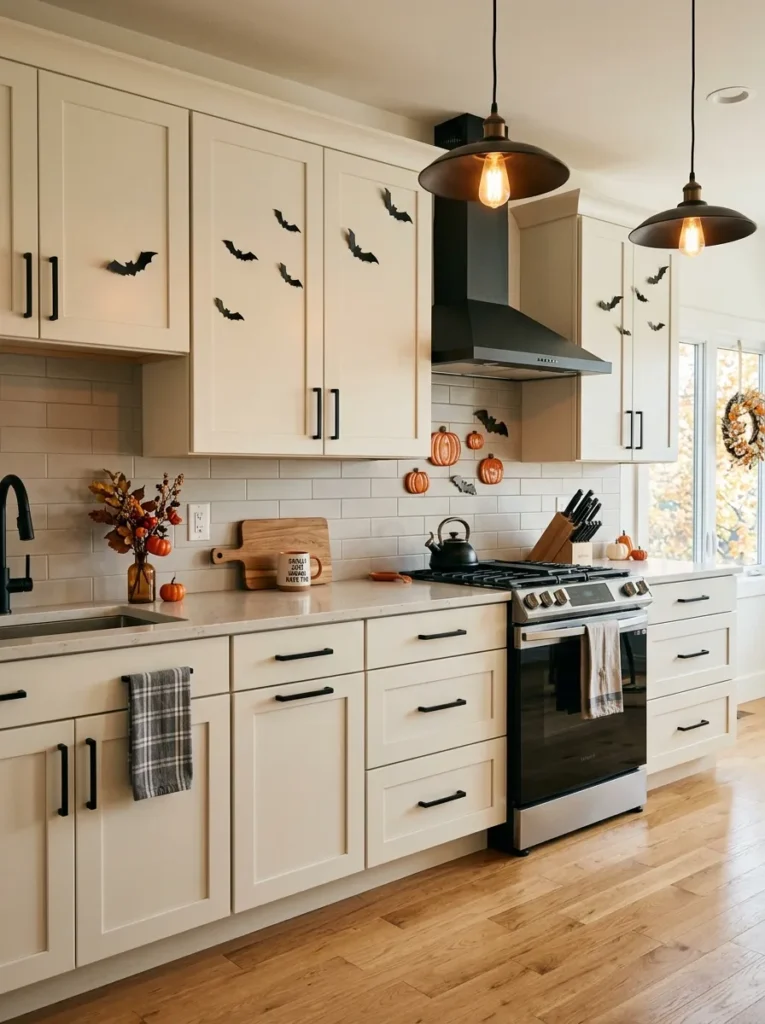
- Use removable accents to change plain cabinet fronts without permanent alterations.
- Combine black details with small orange pieces for visual contrast.
- Keep decorations limited to selected doors for a cleaner appearance.
- Choose lightweight, removable pieces that will not interfere with cabinet use.
Plain cabinet doors can become an easy seasonal canvas with a handful of removable black accents. Try small bat shapes, pumpkin magnets, ghost silhouettes, or simple Halloween symbols on selected doors rather than decorating every cabinet. This creates repetition without making the room feel visually busy. Light-colored cabinetry provides an especially effective background because dark details stand out immediately. Keep handles, hinges, and opening areas clear so the decorations do not interfere with normal use. The approach is inexpensive, temporary, and easy to customize, making it ideal for renters or anyone who enjoys changing seasonal decor.
For a polished seasonal kitchen, choose one consistent style of accent rather than mixing too many unrelated shapes. Matte black bats can look modern, while simple pumpkin magnets create a friendlier farmhouse effect. Repeat a small amount of orange through a towel, bowl, or countertop pumpkin to connect the cabinet details with the rest of the room. I’ve noticed that selective decorating usually looks more intentional than covering every available surface. Once Halloween is over, remove the accents and return the cabinets to their everyday appearance without changing the room’s permanent finishes.
Conclusion
Halloween decorating doesn’t have to mean covering every surface with spooky decorations. With the right colors, textures, and small seasonal accents, your halloween kitchen can feel festive while remaining practical and inviting. Try a pumpkin display, add playful mugs, style an open shelf, or create a cozy candlelit corner. Even one simple change can make the room feel completely refreshed. Save this post on Pinterest so you can return to your favorite ideas when decorating time arrives. Try one or two looks in your own space, and share this collection with someone who loves creating a festive home. Your perfect Halloween kitchen is just a few creative touches away.