22 Cardboard Halloween Decorations DIY for Spooky Fun
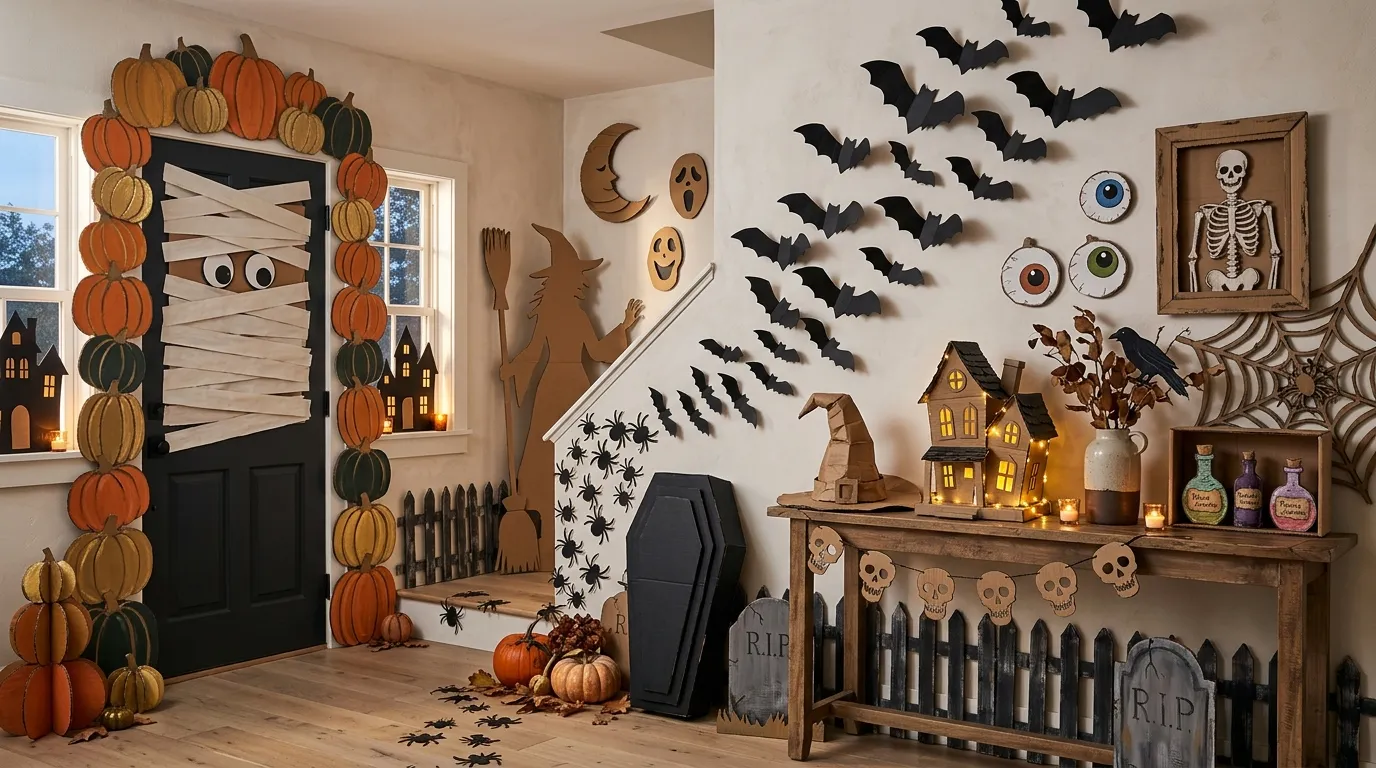
Ready to make your home feel spooky without spending a fortune on Halloween decor? These cardboard halloween decorations diy ideas turn simple materials into eye-catching seasonal displays.
From haunted windows and creepy tombstones to playful monsters, bats, pumpkins, and potion shelves, this collection is packed with creative projects that can transform ordinary corners into memorable Halloween scenes. Cardboard is lightweight, affordable, easy to customize, and surprisingly versatile, making it a practical choice for beginners and experienced decorators alike. In my experience, the most effective Halloween displays often use a few bold handmade pieces instead of filling every surface. Whether you are decorating a small apartment, family home, porch, hallway, or entryway, these ideas can help you create a festive look with plenty of personality.
Cardboard Haunted Windows
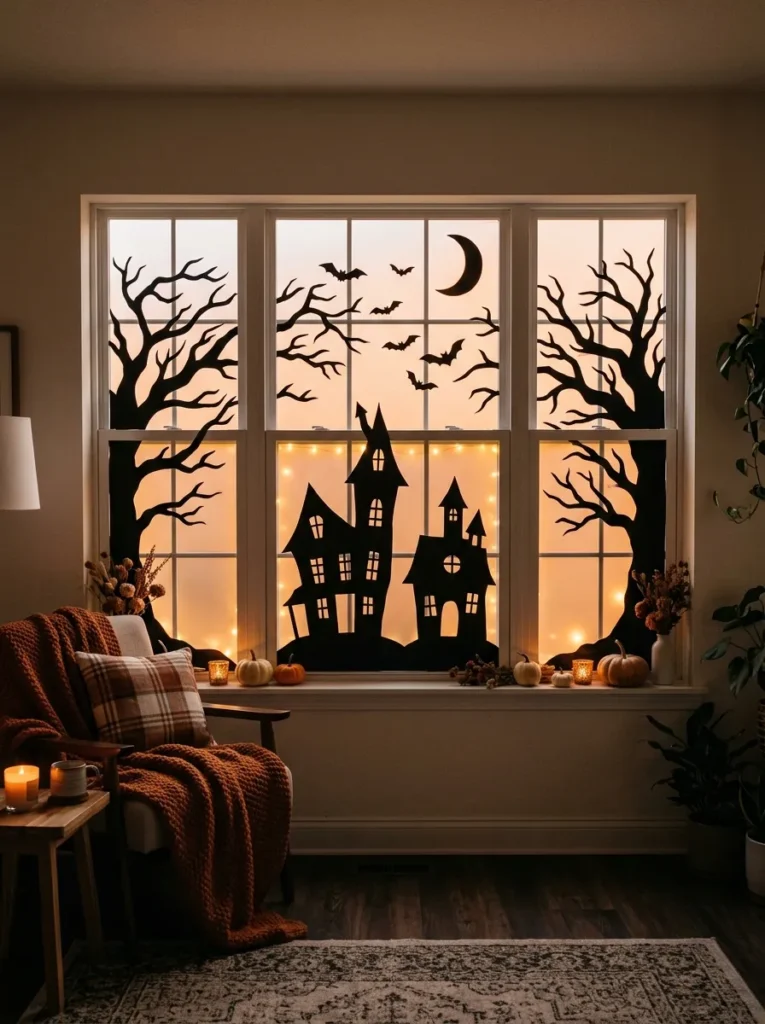
- Creates an instant haunted-house effect without permanent changes.
- Works especially well on plain windows or glass doors.
- Black cardboard gives strong contrast against warm indoor lighting.
- Cutout shapes can be reused for future Halloween displays.
The right window treatment can completely change a room after sunset. Cut black cardboard into crooked houses, bare trees, flying bats, and tiny moon shapes, then arrange the pieces across a window for an instant haunted silhouette. Leave some glass uncovered so warm indoor light shines around the cutouts and makes every shape easier to recognize. I’ve noticed this works especially well in living rooms where simple furniture might otherwise feel unchanged for Halloween. Use removable tape on the glass or frame, and keep the arrangement slightly uneven for a more natural, old-fashioned haunted-house appearance.
This cardboard display adds atmosphere without making the room feel crowded or overly decorated. During daylight, the silhouettes look graphic and artistic, while evening lighting creates a stronger spooky effect from outside and inside. For a polished finish, combine different silhouette sizes instead of repeating one shape across the entire window. A few bats flying upward can guide the eye toward the moon, while crooked rooftops create visual height. This is one of those cardboard Halloween decorations DIY projects that feels surprisingly impressive despite using inexpensive materials. In smaller homes, it can create a dramatic focal point without taking up floor or shelf space.
Cardboard Coffin Prop
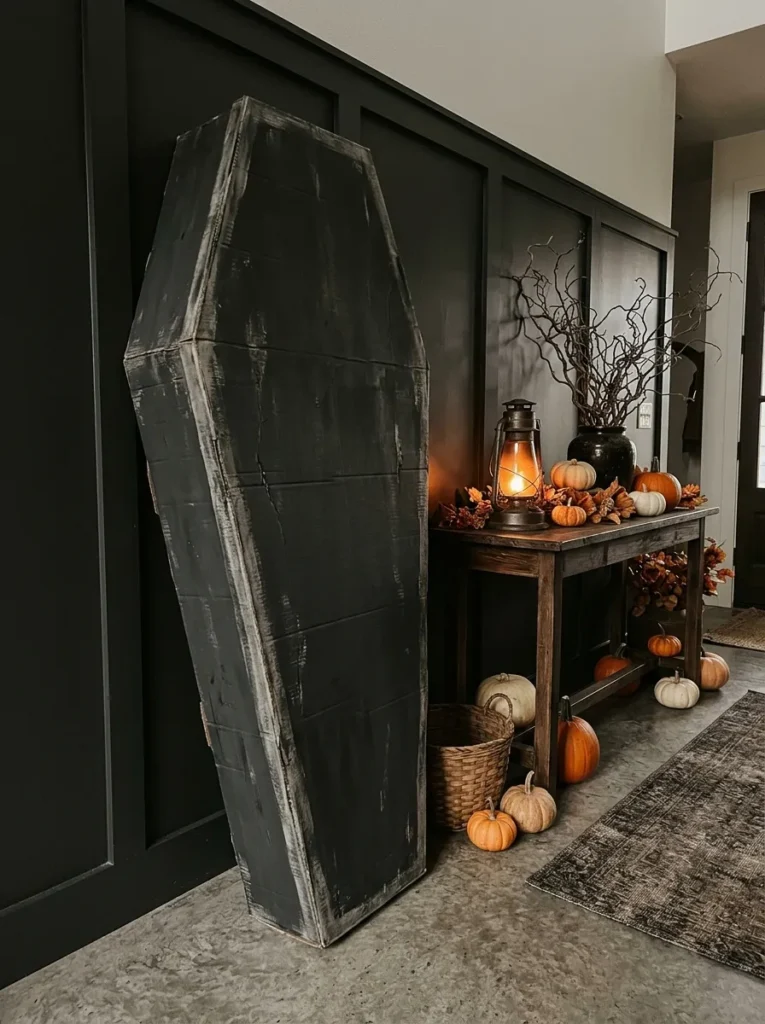
- Adds a dramatic focal point to an entryway or porch.
- Layered cardboard edges make the prop look more dimensional.
- Matte black paint gives the shape a convincing aged finish.
- A simple leaning position keeps the display easy to arrange.
A simple coffin shape can turn an empty corner into a Halloween statement piece. Cut several cardboard panels into matching coffin outlines, stack them together, and glue the layers to create extra thickness around the edges. Paint the surface matte black or deep charcoal, then lightly brush gray over the corners for an aged appearance. Lean the finished prop against an entryway wall beside a console table, or place it on a covered porch. The layered construction makes this project look more substantial than ordinary flat cardboard, while remaining lightweight enough to move whenever your decorating layout changes.
The best part is how easily the coffin can become part of a larger spooky display. Add a few pumpkins, dried branches, battery lanterns, or faux cobwebs nearby without covering the main shape. In my experience, leaving some empty space around a large prop makes it look more intentional and helps the silhouette stand out. If the cardboard edges look too plain, draw simple panel lines with gray paint or a chalk marker. Keep the finish slightly distressed rather than perfectly smooth, because small imperfections help the handmade prop feel like an old haunted-house decoration.
Cardboard Bat Swarm
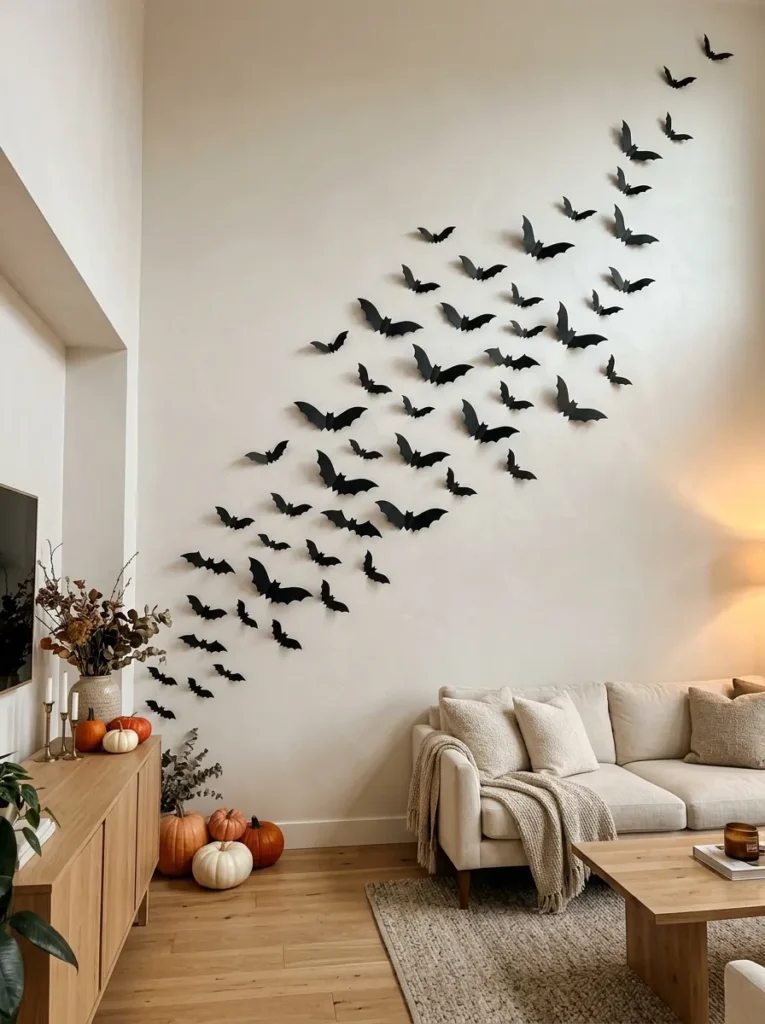
- Fills blank walls with movement and visual energy.
- Different bat sizes create a more realistic flying pattern.
- Black shapes look striking against light-colored walls.
- The pieces are easy to reposition as the display grows.
A wall can become the most exciting part of your Halloween setup with a simple swarm of cardboard bats. Cut several bat silhouettes in different sizes, then gently fold each one along the center so the wings angle outward slightly. Arrange the smallest shapes near the starting point and gradually increase their size as they move across the wall. This creates the illusion of motion instead of a flat row of decorations. Use removable adhesive so you can adjust the pattern easily, especially when you want the swarm to curve around furniture, artwork, or a doorway.
The finished arrangement brings movement into spaces that often feel overlooked during seasonal decorating. Light-colored walls provide the strongest contrast, but the same idea can work beautifully against soft gray, beige, or muted green paint. I’ve seen this work well above a sofa, fireplace, staircase, or hallway because the bats naturally lead the eye through the room. For a fuller effect, mix a few upside-down bats with others flying upward. Keep the spacing irregular rather than perfectly measured, which makes the display feel more playful, dimensional, and naturally scattered across the wall.
Cardboard Graveyard Fence
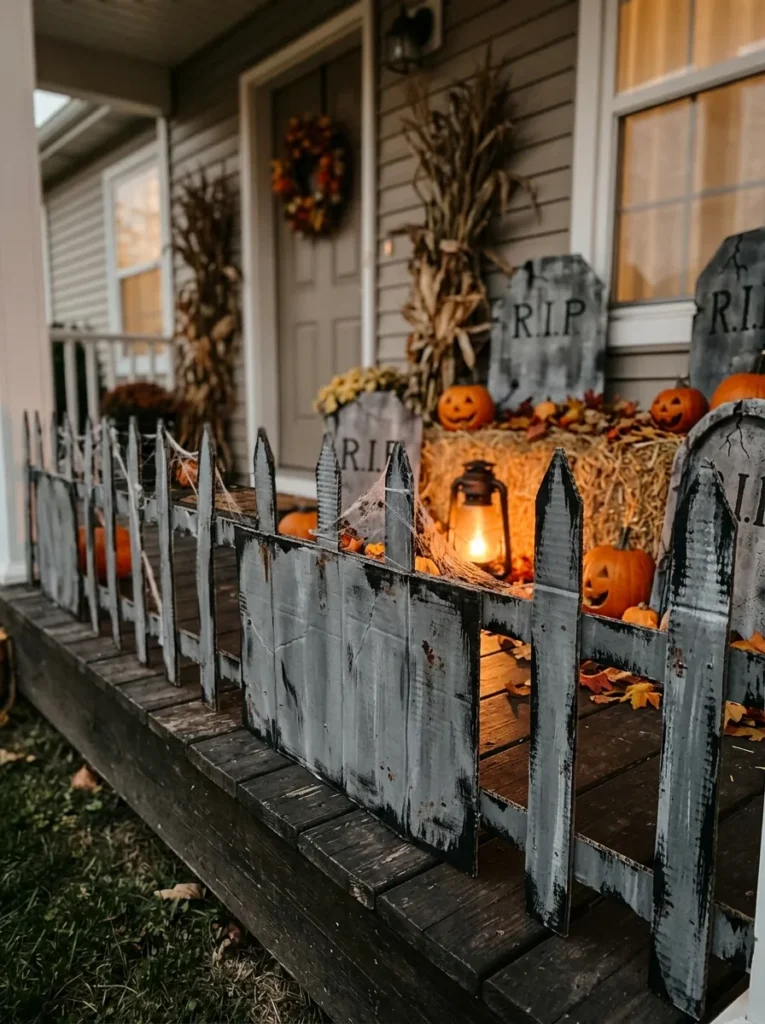
- Creates a spooky boundary around a porch, yard, or indoor display.
- Pointed fence tops add instant haunted-house character.
- Gray and black paint make plain cardboard look weathered.
- Lightweight panels are easy to move and rearrange.
A homemade graveyard fence can make even a small Halloween display feel like a complete scene. Cut cardboard into narrow vertical panels with pointed tops, then connect them with horizontal strips behind the pieces for support. Paint everything charcoal gray before adding uneven black brush marks to create a weathered finish. Place the fence around pumpkins, cardboard tombstones, or a small skeleton display so it feels like a defined haunted area. In my experience, slightly uneven fence heights look more convincing than perfectly matching panels because the irregular shapes give the setup an older, abandoned appearance.
This idea works especially well when you want Halloween atmosphere without filling the entire porch or room with decorations. Use removable supports indoors, or position the panels behind heavier objects so they stay upright in sheltered outdoor areas. A few warm lanterns placed behind the fence can cast interesting shadows and make the cardboard details stand out after dark. Keep the surrounding decorations simple so the fence remains visible. You can also reuse the panels next year by changing the paint finish or adding small cardboard warning signs, making this project both decorative and practical.
Cardboard Ghost Faces
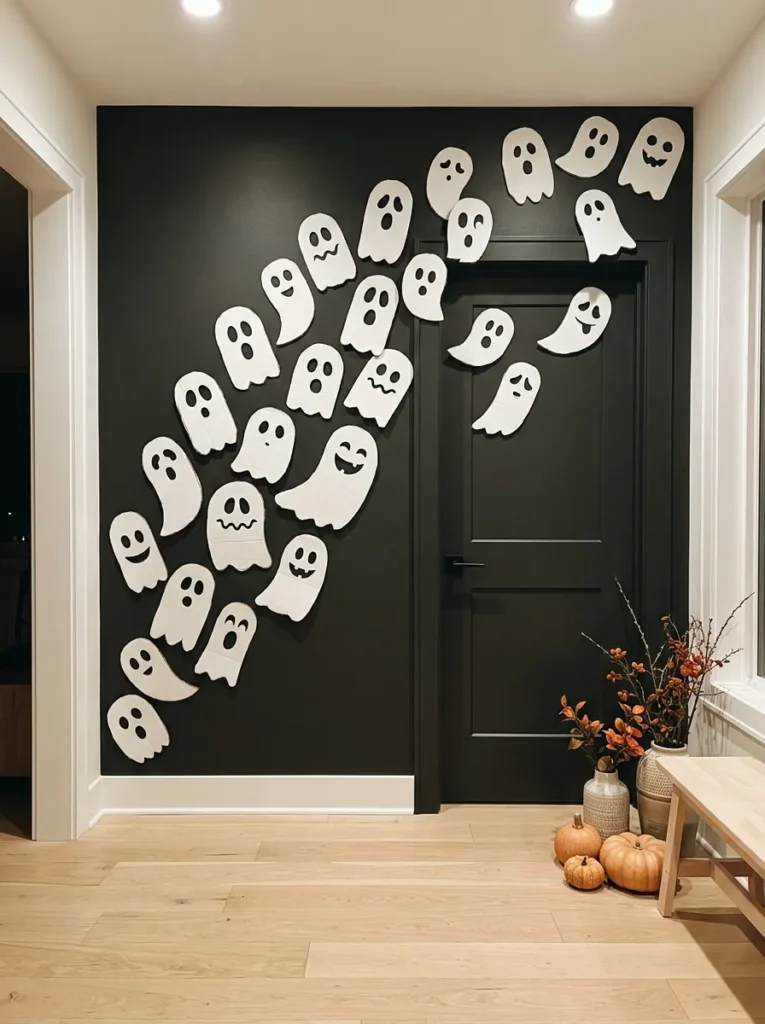
- Turns plain doors, walls, or windows into playful spooky surfaces.
- Simple facial cutouts are beginner-friendly and inexpensive.
- White and black contrast keeps the display bright and recognizable.
- Different expressions prevent the arrangement from looking repetitive.
Blank walls and doors can become surprisingly charming with a collection of simple cardboard ghost faces. Cut rounded ghost shapes from lightweight cardboard, then give each one a different expression using black paper or painted eyes and mouths. Some can look surprised, while others appear sleepy, silly, or slightly spooky. Hang them at different heights across a hallway, bedroom door, or living room wall. The white shapes create a bright contrast against darker backgrounds, while their simple faces keep the display playful rather than frightening. This is an easy project for beginners because small cutting imperfections can actually add handmade character.
For a more polished arrangement, vary the sizes and leave enough space between the faces so each ghost remains easy to recognize. A narrow hallway can hold a vertical group, while a larger wall works better with a loose scattered arrangement. I’ve noticed that adding just a few orange or black accents nearby helps connect the ghosts with the rest of the Halloween decor. If you want extra dimension, gently bend the cardboard at the center before attaching it. That small curve creates shadows around the edges and makes the flat shapes feel more substantial.
Cardboard Pumpkin Stack
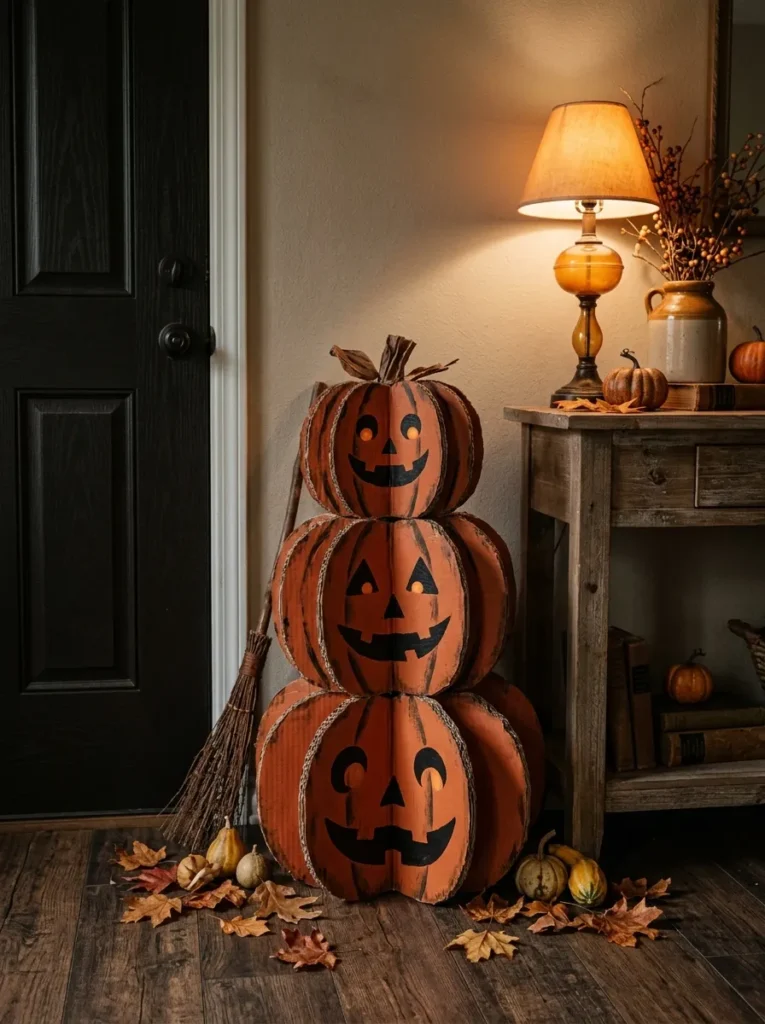
- Adds height without requiring heavy seasonal decorations.
- Works beautifully beside doors, shelves, or entryway furniture.
- Layered cardboard creates a simple dimensional pumpkin effect.
- Warm orange paint makes the display feel instantly festive.
A stacked pumpkin display brings color and height to a Halloween corner without requiring bulky decorations. Cut several pumpkin shapes from sturdy cardboard, then layer smaller pieces over larger bases to create raised ridges and dimension. Paint the pumpkins in warm orange shades, adding darker lines between sections and simple brown stems on top. Stack three different sizes beside an entryway table, fireplace, or front door. The vertical arrangement uses very little floor space while creating a noticeable seasonal focal point. This makes it especially useful for apartments, narrow hallways, and homes where every decorating area needs to work harder.
To make the pumpkins look less flat, slightly bend the outer layers or add narrow cardboard strips underneath selected sections. This creates shadows that become more visible under warm lighting. Keep the color palette simple with orange, charcoal, and muted brown so the handmade texture remains the main feature. You can also place a small lantern or faux leaves beside the stack for extra depth. This type of display is easy to customize, and changing the pumpkin sizes or arrangement can give the same basic materials a completely different look each Halloween.
Cardboard Witch Silhouette
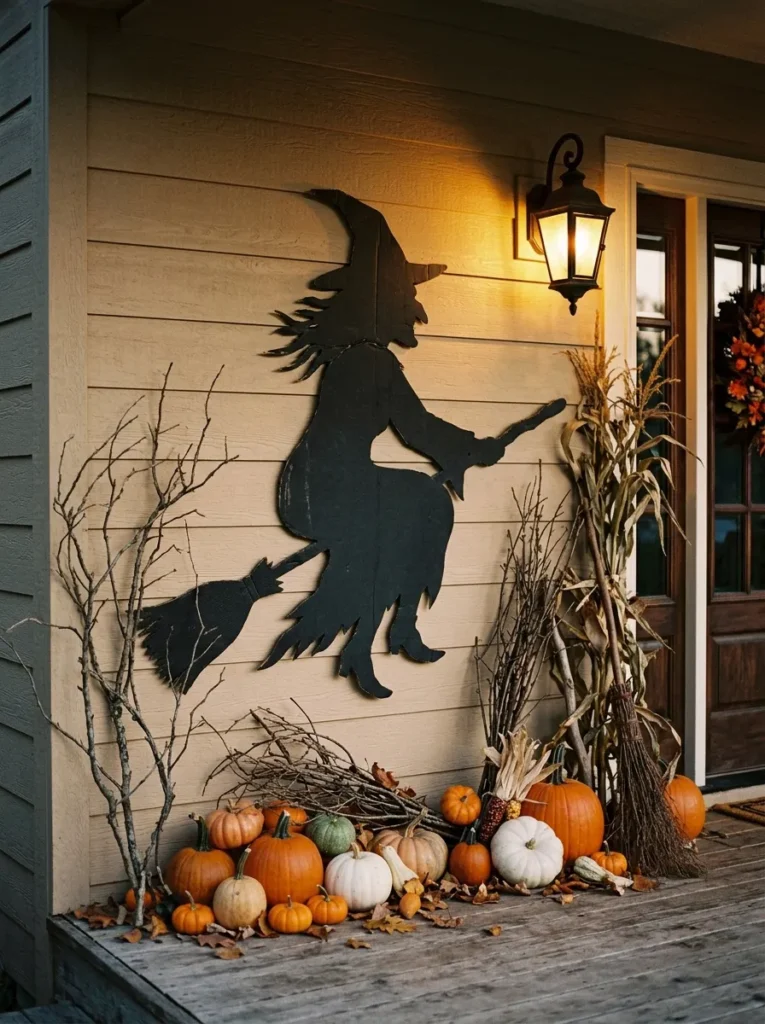
- Creates a striking focal point on a wall, window, or porch.
- A tall silhouette adds height without taking up floor space.
- Black cardboard keeps the design simple and dramatic.
- A pointed hat and broom make the shape instantly recognizable.
A tall witch silhouette can give an ordinary wall an instant Halloween makeover. Trace a simple witch shape onto large cardboard, including a pointed hat, flowing dress, outstretched arm, and crooked broom, then carefully cut around the outline. Paint the entire piece matte black so the shape reads clearly from across the room. Place it beside a front door, on a porch wall, or near an entryway table where the height naturally draws attention. Keep the silhouette relatively simple because recognizable shapes usually create a stronger visual impact than tiny details that disappear from a distance.
The design becomes even more effective when surrounded by a few carefully chosen accents. Add pumpkins at the base, dried branches along one side, or a warm lantern positioned nearby to create soft shadows behind the figure. I’ve noticed that placing a silhouette slightly off-center makes a display feel more natural and gives the surrounding decorations room to breathe. If the cardboard is thin, reinforce the back with narrow strips before painting. For indoor use, removable adhesive can keep the witch securely in place while making cleanup easier after the Halloween season ends.
Cardboard Spider Web
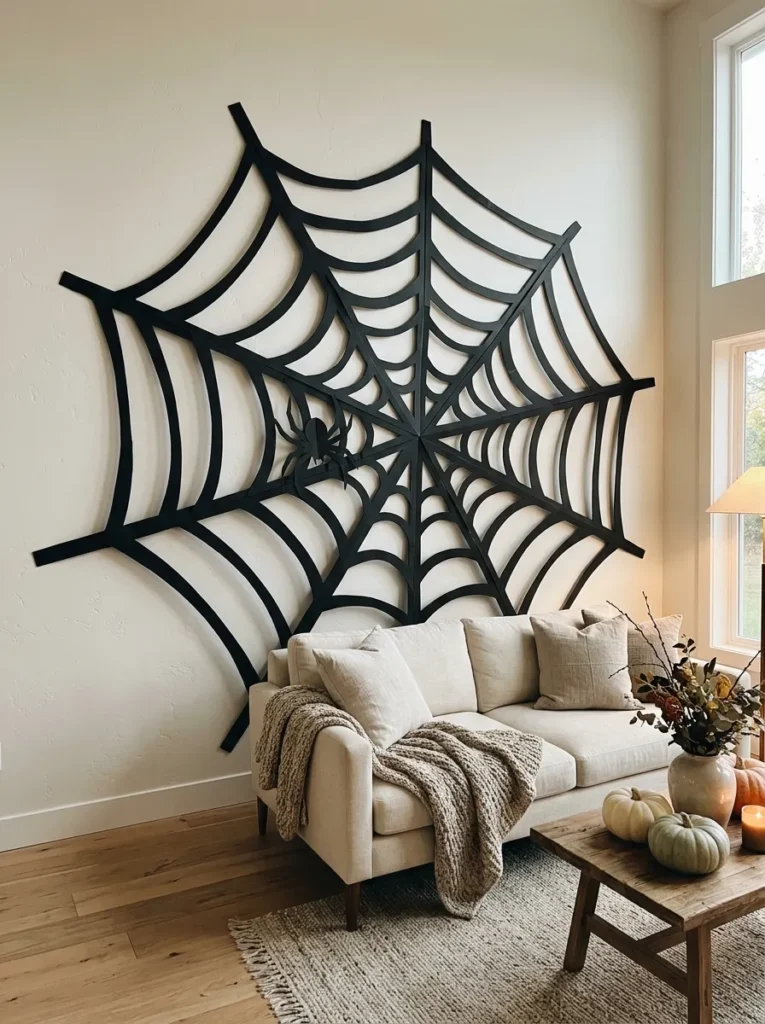
- Fills large blank walls with an oversized spooky detail.
- Open cutout patterns keep the decoration lightweight.
- Black cardboard creates strong contrast on pale surfaces.
- The design works around doors, mirrors, and furniture.
An oversized spider web can transform a plain wall into a dramatic Halloween backdrop with surprisingly little material. Draw a large web pattern onto cardboard, keeping the main lines thick enough to remain sturdy after cutting. Carefully remove the spaces between the strands, then attach the finished piece to a wall, doorway, or large mirror. A small cardboard spider placed near the center completes the design without overwhelming it. This open structure is particularly useful because it adds a strong Halloween shape while allowing the original wall color and surrounding furniture to remain visible.
For a more dimensional finish, create two slightly different web shapes and overlap them around one corner rather than placing a single piece in the middle of the wall. Dark cardboard looks especially crisp against cream, white, beige, or pale gray surfaces. In my experience, oversized decorations often make a stronger statement than many small pieces scattered around the room. Keep the rest of the display restrained with one or two pumpkins and warm lighting. The result feels intentional, graphic, and easy to photograph, making it a strong backdrop for seasonal decorating.
Cardboard Tombstones

- Creates a miniature haunted cemetery in small spaces.
- Layered edges make flat cardboard look more substantial.
- Hand-painted lettering adds personality to every piece.
- Different heights create depth across the display.
A few cardboard tombstones can turn an ordinary corner into a miniature haunted cemetery. Cut each stone in a different shape, such as rounded, arched, or slightly crooked tops, then reinforce the backs with folded cardboard supports. Paint them gray and add darker edges, cracks, or simple lettering to create an aged stone effect. Arrange the tallest piece toward the back and shorter ones in front so the display has visible depth. This setup works on a covered porch, beside a doorway, or even indoors around a console table when you want a compact Halloween scene.
The handmade finish is what makes these tombstones especially appealing. Instead of trying to make every surface perfectly smooth, allow a few cardboard lines and uneven paint marks to remain visible. Add faux moss, dried leaves, small pumpkins, or battery-operated lanterns around the base for extra texture. That’s why many decorators favor layered cardboard for seasonal props: it is inexpensive, lightweight, and easy to customize. You can write funny names, spooky phrases, or simple symbols on each stone, giving the display a personal touch while keeping the overall arrangement cohesive and easy to store.
Cardboard Monster Door
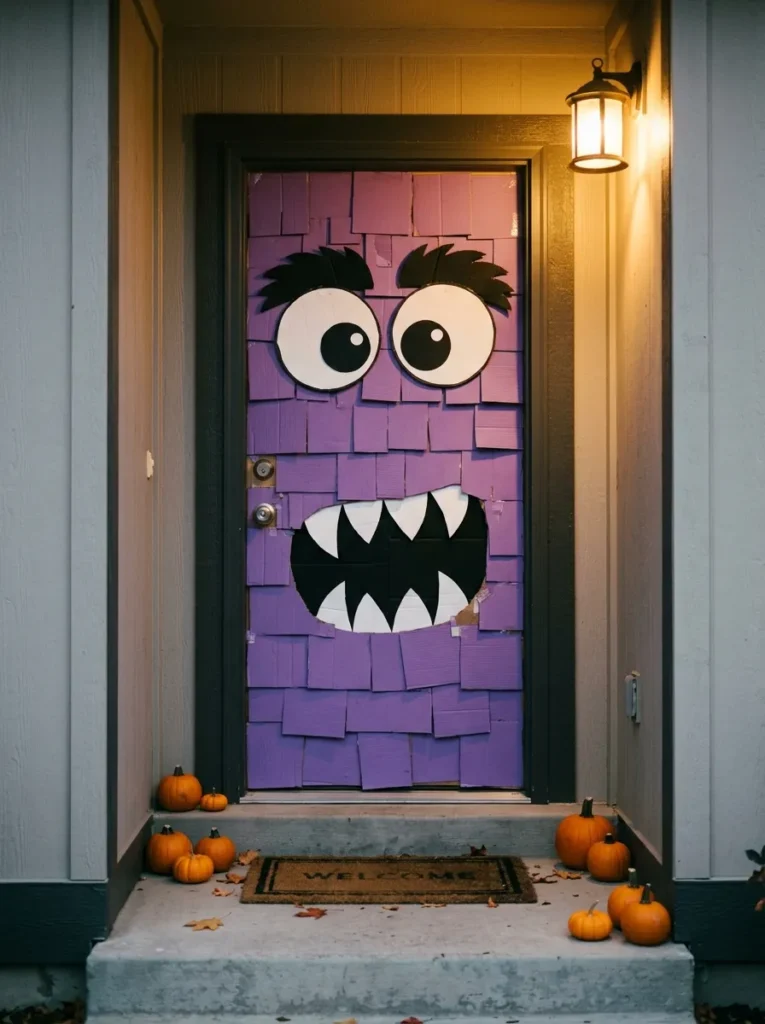
- Turns an ordinary door into a playful Halloween centerpiece.
- Oversized eyes create an immediate visual transformation.
- Bright colors make the display friendly for children.
- Lightweight cardboard pieces are easy to remove afterward.
Give an ordinary door a giant personality with a playful cardboard monster face. Cover the door with large colored cardboard panels, then add oversized eyes, expressive eyebrows, and a wide mouth filled with simple white teeth. Purple, green, orange, or deep blue can create a fun Halloween palette without making the entrance look too dark. Keep the features large and uncomplicated so they remain recognizable from the sidewalk. This design is especially useful when you want something family-friendly that feels festive without relying on scary imagery or expensive store-bought decorations.
The biggest visual impact comes from getting the proportions right. Make the eyes slightly uneven and let the eyebrows angle differently so the monster feels expressive rather than perfectly symmetrical. Use removable adhesive on painted doors and avoid covering handles, locks, or other hardware. A few pumpkins at the base can anchor the design and connect the bright cardboard colors with the rest of the porch. I’ve seen this approach work particularly well for family homes because children immediately understand the character, while adults can still appreciate the clean, oversized Halloween styling.
Cardboard Haunted House
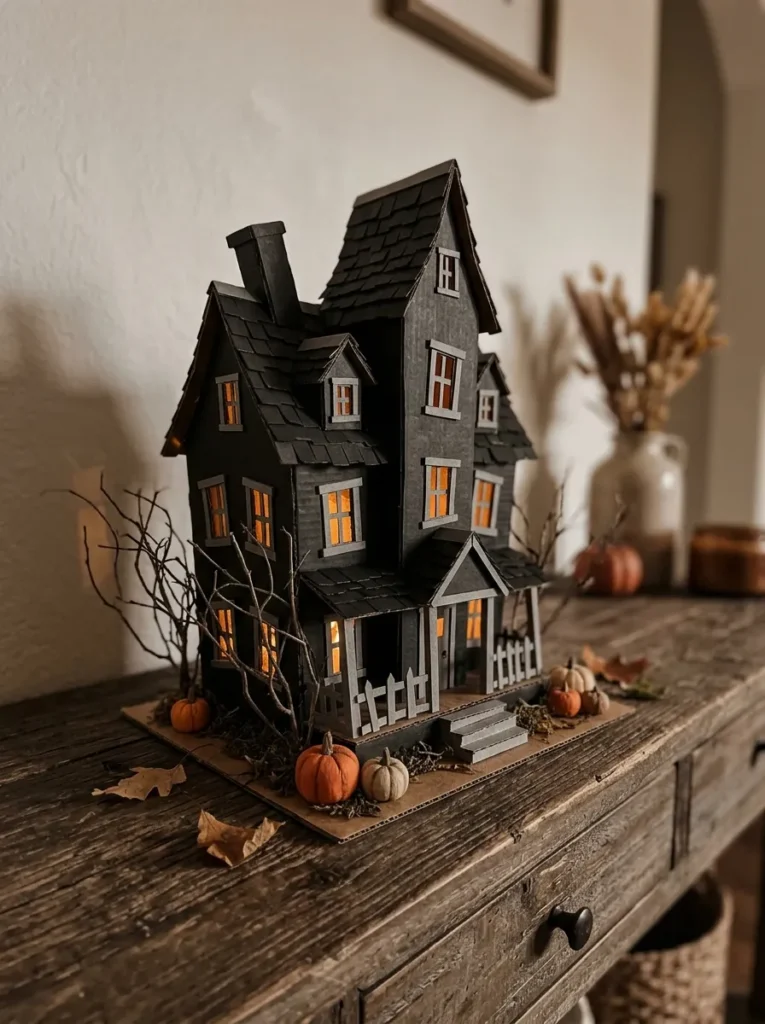
- Creates a miniature haunted scene for shelves or tables.
- Layered windows and doors add convincing depth.
- Dark colors make small details stand out.
- Fits easily into compact decorating spaces.
A miniature haunted house makes a wonderful centerpiece when floor space is limited. Cut cardboard panels for the front, sides, roof, windows, and door, then assemble them into a simple house shape with a slightly crooked roofline. Paint the exterior charcoal or deep gray and add black trim around the windows. Small openings can reveal warm battery lights placed inside, creating a soft glow after sunset. Because the structure is compact, it works beautifully on a console table, bookshelf, mantel, or entryway surface where a larger Halloween prop would feel overwhelming.
Add personality through small architectural details rather than covering the entire house with decorations. Uneven windows, a leaning chimney, tiny cardboard shutters, or a crooked door can make the miniature structure look wonderfully old and mysterious. In my experience, warm lights are especially effective inside dark cardboard displays because they create depth that paint alone cannot provide. Surround the house with a few miniature pumpkins or bare branches, but leave enough tabletop visible to keep the arrangement from feeling crowded. The finished scene becomes a small focal point that guests naturally stop to examine.
Cardboard Skull Garland

- Adds Halloween detail across mantels, shelves, and doorways.
- Repeating skull shapes create a strong visual rhythm.
- Simple cutouts keep the project beginner-friendly.
- Black-and-white colors pair easily with existing decor.
A skull garland can add just the right amount of Halloween detail without taking over an entire room. Cut repeated skull shapes from thin cardboard, then paint them white or leave the natural cardboard surface for a softer handmade look. Add black eyes, noses, and simple teeth with paint or paper cutouts. Punch small holes near the top of each skull and connect them with black ribbon, twine, or string. Drape the finished garland across a mantel, shelf, console table, doorway, or staircase railing where the repeated shapes create an attractive seasonal border.
Keep the skulls slightly different in size or expression so the garland feels handmade rather than mechanically repeated. For a warmer Pinterest-style arrangement, combine the black-and-white skulls with muted orange pumpkins, dark greenery, or dried branches. I’ve noticed that garlands look best when they are allowed to curve naturally instead of being pulled completely straight. Leave a little extra length at each end so the skulls hang at different angles. This small styling detail creates movement and makes the decoration look fuller without requiring more materials or complicated construction.
Cardboard Witch Hat
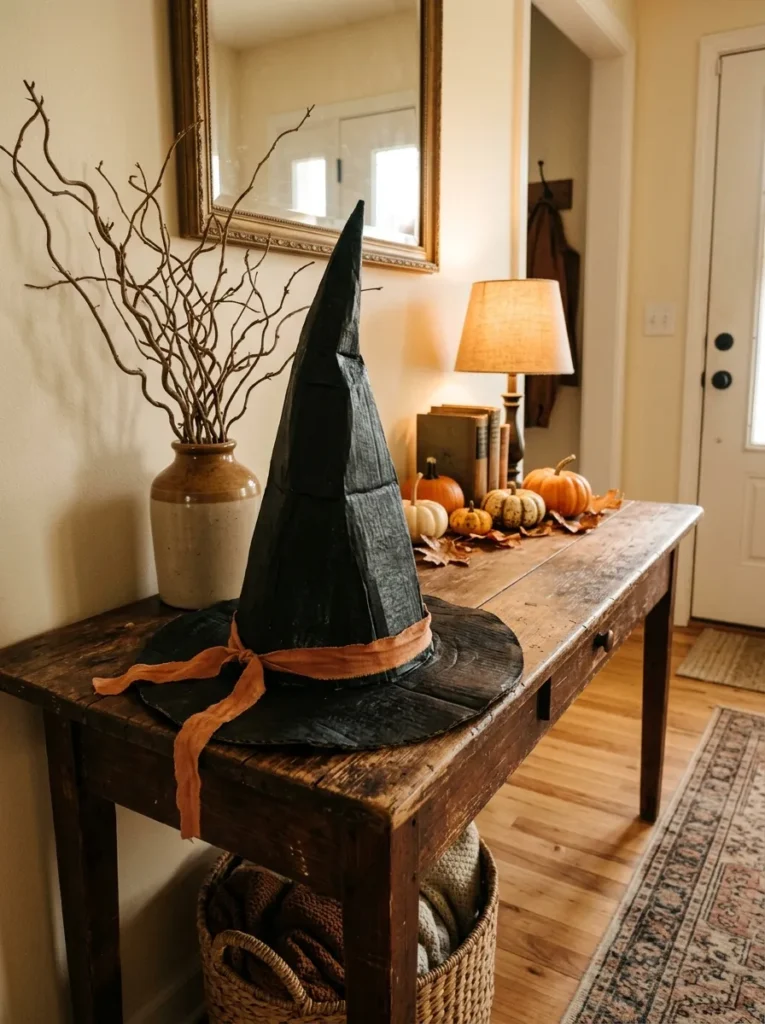
- Adds height to mantels, tables, and entryway displays.
- A simple cone shape is easy for beginners to build.
- Black texture gives the decoration a classic Halloween look.
- Can be styled alone or grouped with pumpkins.
A tall cardboard witch hat can add instant height to a Halloween display without requiring a complicated build. Create the cone from a large curved cardboard panel, then attach it to a wide circular brim. Paint both pieces matte black and add a simple orange or dark purple ribbon around the base. Place the finished hat on a mantel, console table, shelf, or covered porch where its pointed shape naturally draws the eye upward. The lightweight construction also makes it easy to move when you want to refresh your seasonal arrangement.
For a more interesting handmade finish, gently bend the tip of the cone instead of leaving it perfectly straight. A slightly curled point gives the hat a playful, classic witchy appearance. Surround it with pumpkins, dried branches, or a small lantern, but avoid covering too much of the brim. In my experience, one oversized seasonal object often creates more visual impact than several small decorations competing for attention. You can also make two smaller versions and group them at different heights, creating a layered arrangement that works especially well on larger mantels or wide entryway tables.
Cardboard Eyeball Wall
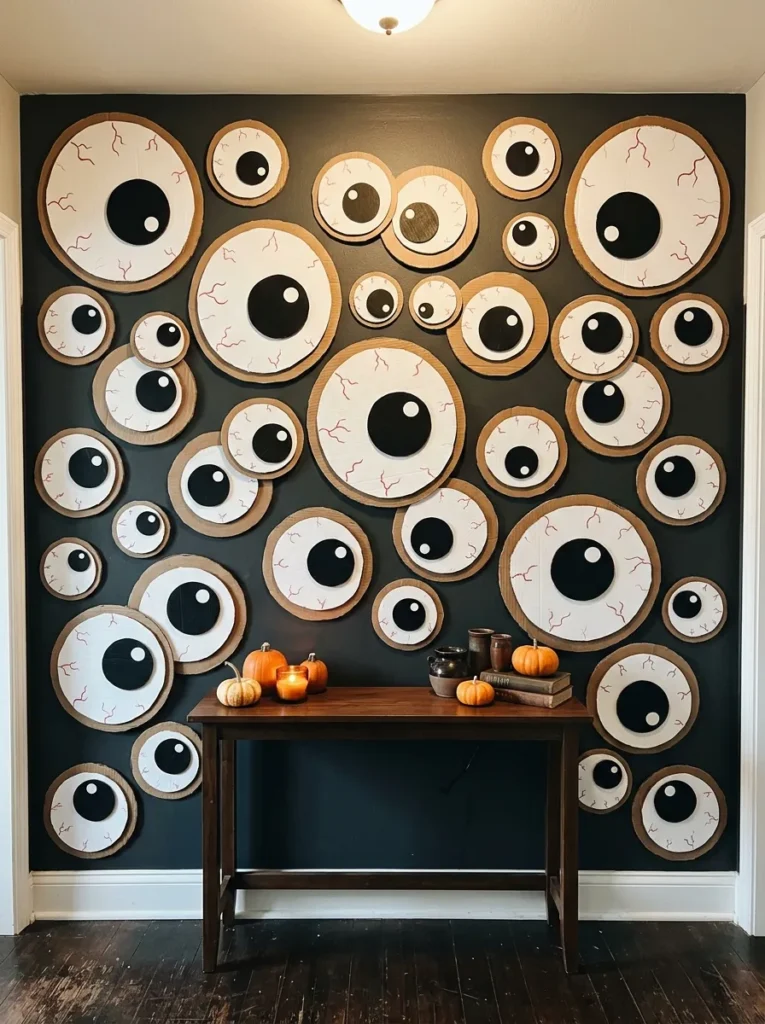
- Turns a plain wall into an unexpected Halloween feature.
- Oversized eyes create instant visual interest.
- White, black, and red details provide strong contrast.
- Different sizes make the arrangement feel lively.
Turn a blank wall into a quirky Halloween feature with oversized cardboard eyeballs. Cut large circles from sturdy cardboard and paint each one white before adding black pupils and subtle red lines around the edges. Make several sizes so the eyes can be arranged like a scattered collection rather than a rigid grid. Place them across a hallway wall, above a console table, or around a doorway where guests will notice them as they move through the home. The bold circular shapes are simple to recognize and create a playful spooky effect without complicated construction.
For the strongest result, angle the pupils in different directions so the eyes appear to be watching different parts of the room. Keep the background relatively simple because the repeated shapes already create plenty of visual activity. I’ve noticed that this kind of display works particularly well in transitional spaces, where a surprising decoration can make an otherwise forgotten wall feel intentional. Add a few small pumpkins or dark branches below the arrangement if needed, but avoid overcrowding the area. Removable adhesive makes repositioning easy when you want to adjust the composition.
Cardboard Raven Perch
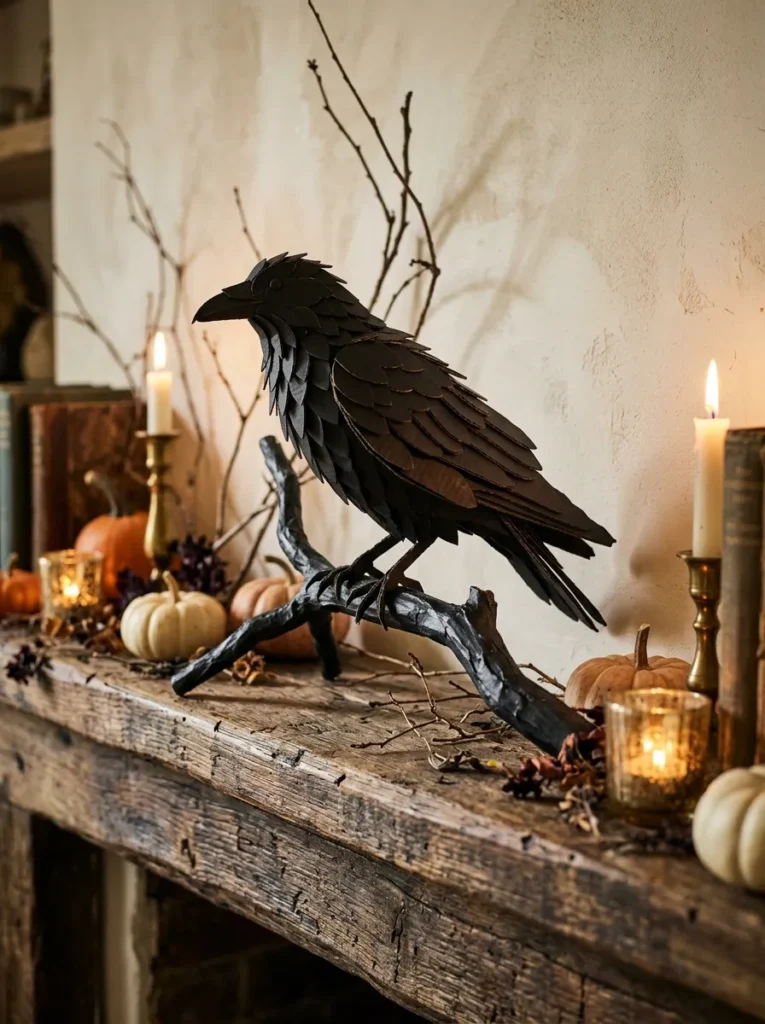
- Adds a mysterious silhouette to shelves or mantels.
- Layered wings create more dimension than a flat cutout.
- Black paint gives the bird a dramatic appearance.
- Works beautifully with candles, branches, and vintage accents.
A perched cardboard raven can bring a subtle gothic touch to a Halloween mantel or shelf. Cut a raven silhouette with a curved beak, rounded body, and layered wing shapes, then reinforce the body with a second cardboard piece for stability. Paint the bird matte black and attach it to a crooked cardboard branch or sturdy decorative stick. Position it above a console, fireplace, or bookshelf where the silhouette can stand clearly against a lighter wall. The result feels mysterious and refined while using simple materials that are easy to find around the house.
Small styling details can make the raven feel much more convincing. Add layered feather strips along the wing, a tiny painted eye, or uneven tail feathers for extra character. Place dried branches, battery candles, or muted pumpkins nearby to create a darker seasonal vignette. That’s why layered cardboard works so well for Halloween props: even a flat silhouette can gain convincing depth with just a few additional pieces. Keep the surrounding colors restrained so the black raven remains the main focal point and the display feels atmospheric rather than cluttered.
Cardboard Moon Scene
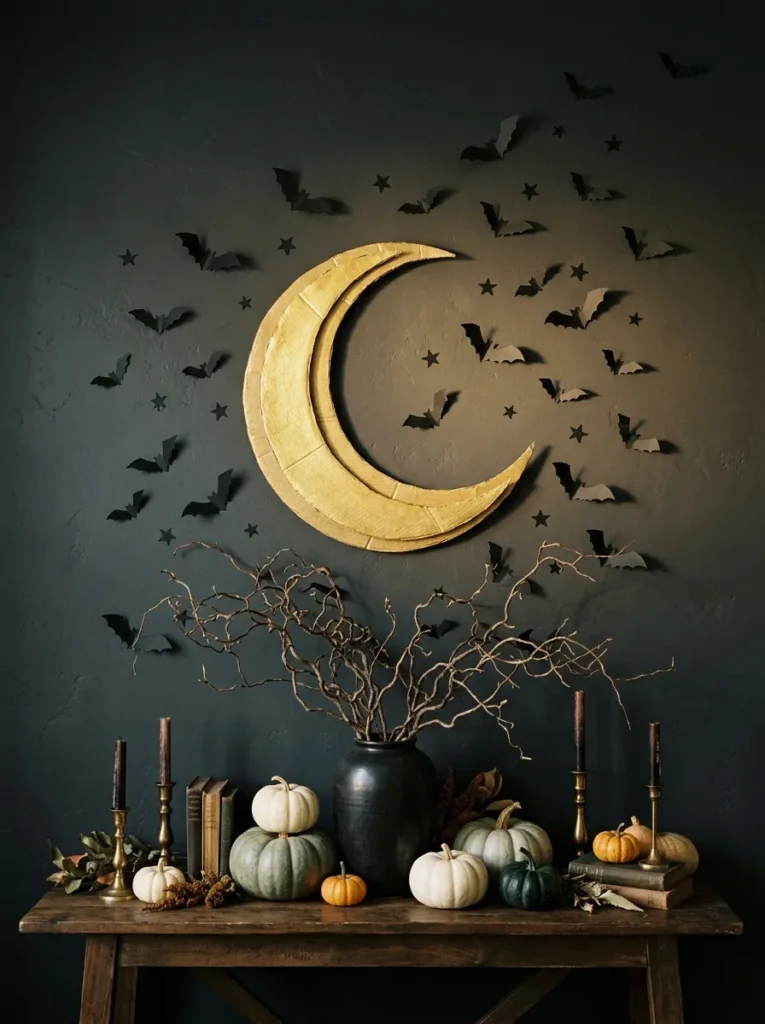
- Creates a dreamy focal point for walls or windows.
- Layered shapes add depth to a simple silhouette.
- Black and gold details create a striking contrast.
- Works well with bats, stars, and dark branches.
A glowing moon scene can give your Halloween display a softer, more magical direction. Cut a large crescent moon from sturdy cardboard, then create a second slightly smaller crescent to layer over the first. Paint the main shape muted gold, warm cream, or pale yellow, and add small black stars around it. Mount the moon on a dark wall where the contrast makes its curved shape stand out. A few cardboard bats flying outward can connect the moon with the rest of your Halloween theme while keeping the overall design simple and balanced.
This idea works especially well when you want something spooky without making the room feel frightening. Place a warm light below the moon to create gentle shadows around the layered edges, or position a small lamp nearby for a soft evening glow. In my experience, metallic-looking paint can make cardboard appear much more expensive than it actually is. Keep the surrounding furniture neutral and add only a few pumpkins or dried branches underneath. The finished scene feels decorative enough for a living room, bedroom, or hallway while still capturing the unmistakable atmosphere of Halloween.
Cardboard Skeleton Frame
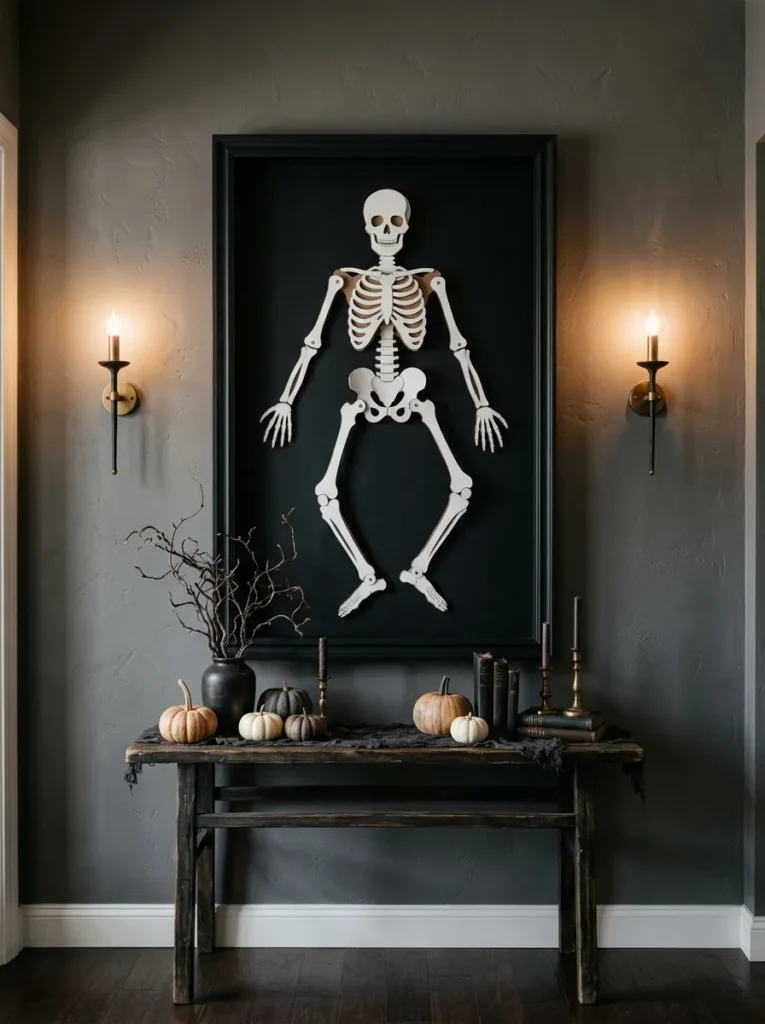
- Creates a playful skeletal accent for empty wall space.
- Simple bone shapes make the project easy to customize.
- Black and white colors create strong visual contrast.
- Works as a standalone feature or larger gallery display.
A cardboard skeleton can become a surprisingly eye-catching wall feature when arranged like artwork. Cut individual bone shapes for the skull, arms, ribs, hands, legs, and feet, then attach them loosely inside a large cardboard frame. Paint the bones off-white and the frame matte black for a strong contrast. Instead of making every piece perfectly proportioned, focus on clear recognizable shapes and comfortable spacing. Hang the finished display above a console table, beside a doorway, or along a hallway where the framed composition can be appreciated from several angles.
You can make the skeleton playful, spooky, or slightly vintage depending on the surrounding decor. Add tiny cardboard bats to the frame corners or place a small pumpkin underneath to connect it with other seasonal pieces. I’ve noticed that leaving visible space between individual bones gives the arrangement a cleaner, more artistic appearance. If the skeleton feels too flat, layer a second cardboard piece behind the skull, ribs, and major joints to create subtle shadows. This small upgrade adds dimension without making the project significantly harder or heavier.
Cardboard Spider Cluster
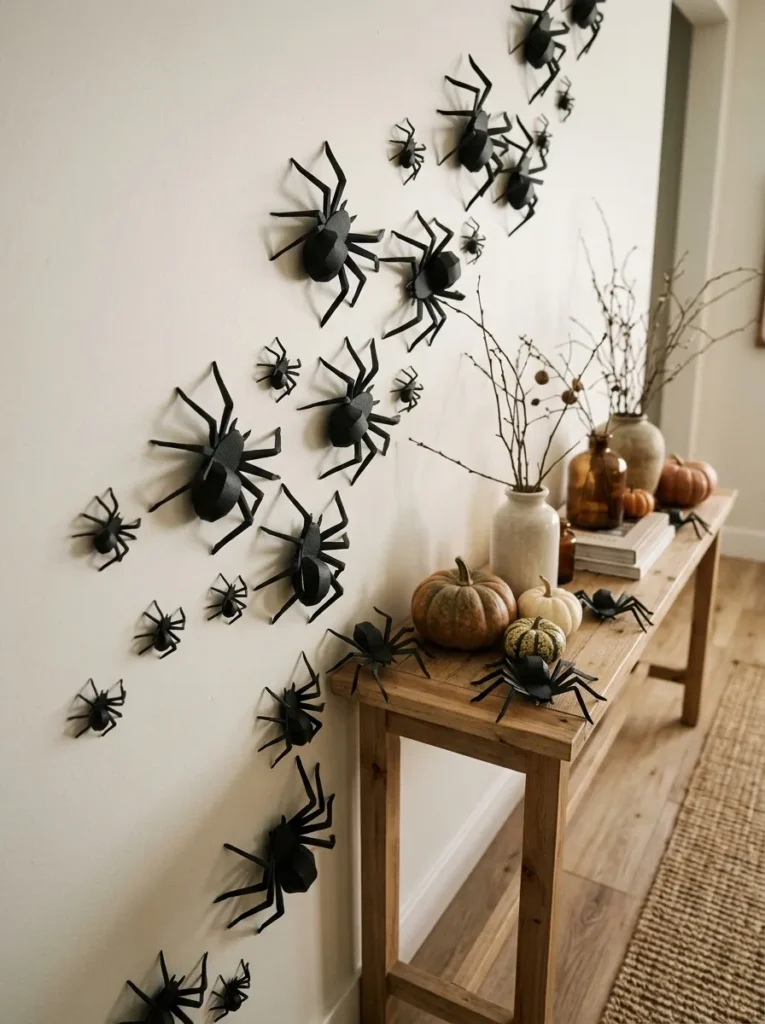
- Brings dramatic texture to corners and unused surfaces.
- Different spider sizes create a natural crawling pattern.
- Folded legs add dimension to flat cardboard shapes.
- Looks striking against pale walls and furniture.
A cluster of cardboard spiders can turn an overlooked corner into one of the most memorable Halloween details in your home. Cut simple oval bodies and narrow leg shapes from black cardboard, then fold the legs slightly outward so each spider has dimension. Make several different sizes and arrange them as though they are crawling upward from a console table toward the wall. The uneven pattern creates movement and makes the decoration feel more natural than placing identical spiders in a straight line. Use removable adhesive so the cluster can be adjusted without damaging painted surfaces.
The key is to vary the spacing and direction of the spiders. Some can face upward while others angle sideways, creating the impression of a small swarm moving across the surface. I’ve noticed that a pale wall provides the strongest contrast, but cream furniture and light wood also work beautifully. Add a few small pumpkins or dried branches nearby if the display needs more seasonal color. Avoid placing too many spiders in one area; leaving open space between clusters makes each silhouette easier to see and keeps the overall arrangement visually clean.
Cardboard Pumpkin Arch
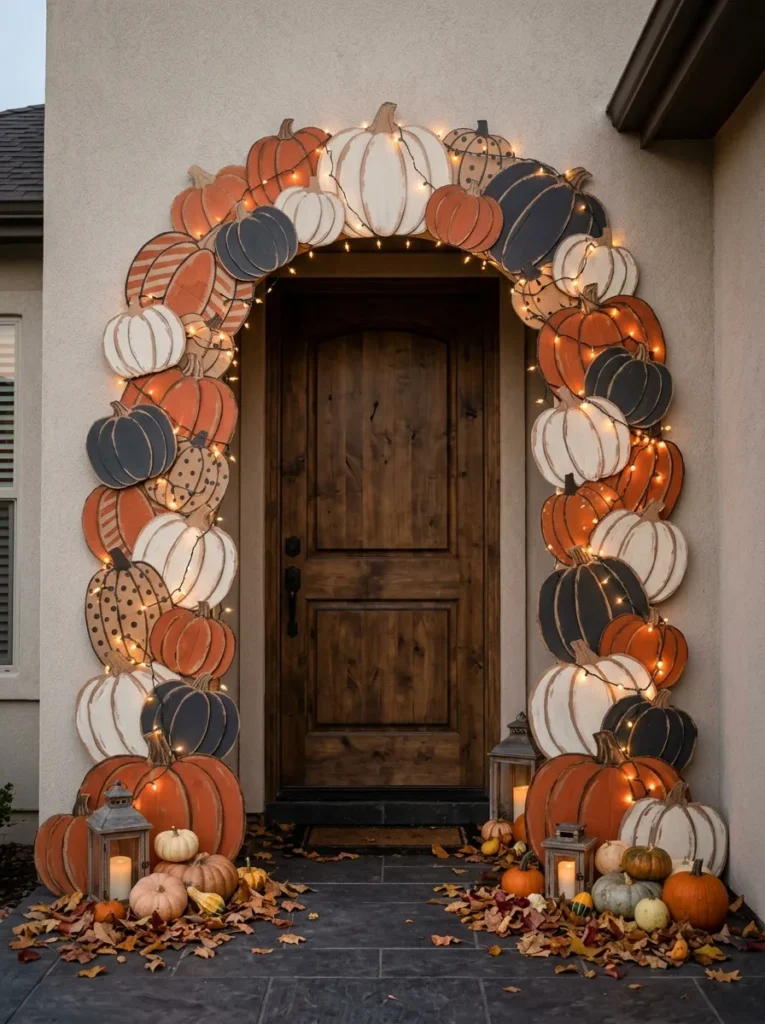
- Creates a festive focal point around a doorway.
- Layered pumpkins give the arch a fuller appearance.
- Warm orange tones make the entrance feel inviting.
- Lightweight pieces are easier to position than heavy props.
A pumpkin arch can make a doorway feel completely transformed without requiring a large collection of store-bought decorations. Cut pumpkin shapes from sturdy cardboard in several sizes, then layer smaller pieces over larger ones to create depth. Paint them in burnt orange, muted cream, and a few charcoal accents for visual variety. Arrange the pumpkins around both sides of the doorway and across the top, leaving the actual door and handle completely accessible. The repeated rounded shapes create a welcoming Halloween frame that works especially well for front entrances, porches, or indoor doorways.
To make the arch look fuller, overlap some pumpkins while leaving small gaps between others. Warm string lights can be tucked behind the cardboard pieces so the edges catch a gentle glow after sunset. I’ve noticed that using three complementary colors keeps a large doorway display from becoming visually chaotic. Add a few real or faux pumpkins along the floor to connect the cardboard pieces with the rest of the entrance. If your doorway is narrow, concentrate the larger shapes near the bottom and use smaller pumpkins toward the top for a lighter appearance.
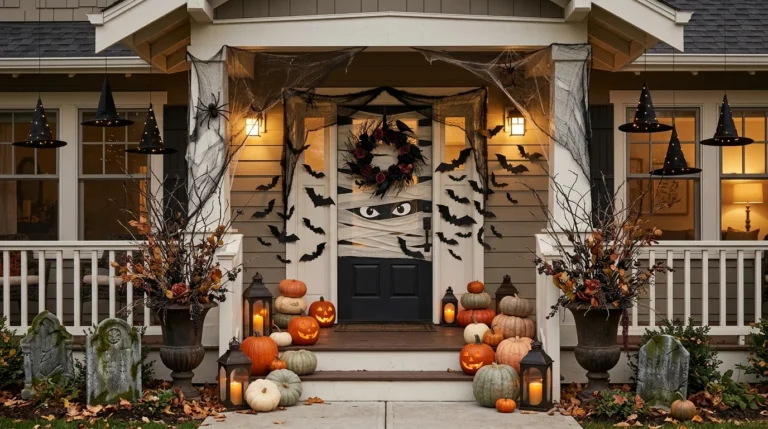
Cardboard Mummy Door

- Gives a plain door an instantly recognizable Halloween makeover.
- Layered strips create convincing wrapped-bandage texture.
- Dark eyes add a simple spooky focal point.
- The design is inexpensive and easy to remove.
Wrap an ordinary door in a spooky mummy design using nothing more than cardboard strips and a few dark accents. Cut long, uneven strips from thin cardboard and arrange them horizontally and diagonally across the door, leaving narrow gaps between some layers. Paint the strips off-white or warm ivory so the surface resembles aged bandages rather than bright white paper. Add two large dark eye shapes near the upper section to create the face. Keep the door handle and hinges uncovered so the decoration remains practical for everyday use throughout the Halloween season.
The irregular strips are what give this design its character, so avoid making every piece identical. Slightly overlap several sections and angle others across the door to create a wrapped effect. For added depth, use two shades of ivory or lightly brush gray around selected edges. In my experience, simple door transformations often get more attention than elaborate room displays because they surprise people as soon as they enter. Add a small pumpkin or lantern beside the doorway to anchor the scene, but keep the surrounding area uncluttered so the mummy remains the clear focal point.
Cardboard Potion Shelf
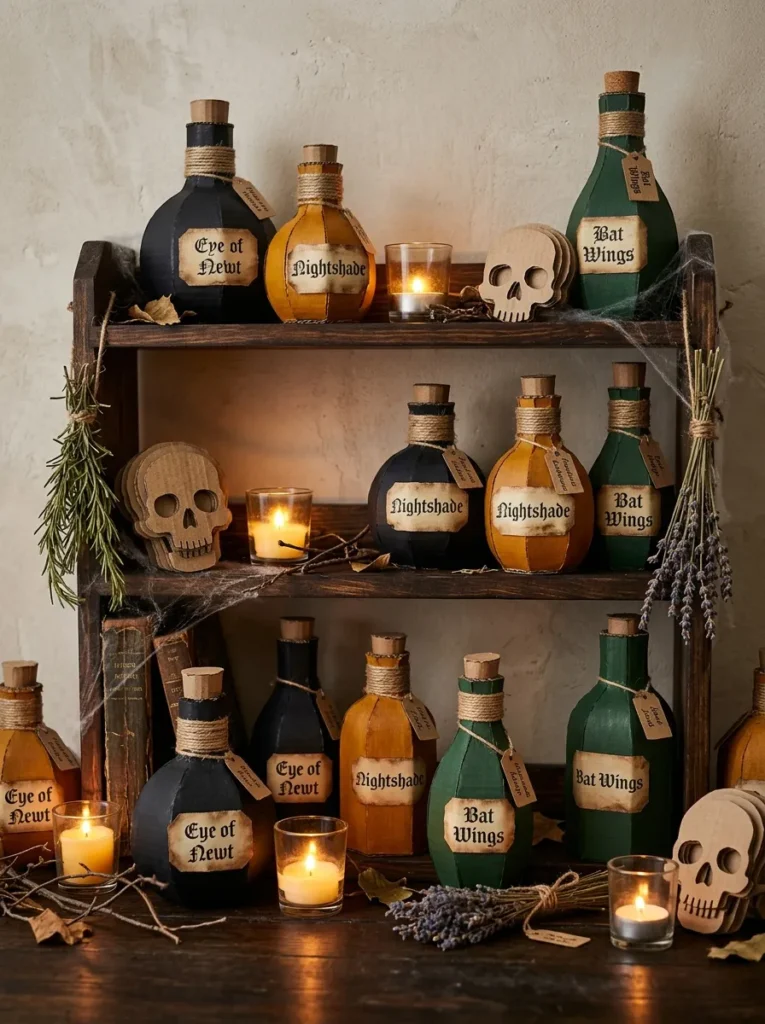
- Adds a magical Halloween vignette to empty shelving.
- Cardboard bottles create height and visual variety.
- Dark colors make warm labels and accents stand out.
- Works well with books, candles, and dried botanicals.
A small potion shelf can turn ordinary shelving into a charming Halloween vignette. Build simple cardboard bottle shapes from tubes, folded panels, or small boxes, then cover them with black, amber, deep green, or muted purple paper. Add handmade labels with names such as “Moon Dust” or “Witch Brew” to give each bottle personality. Arrange them at different heights among books, dried branches, small pumpkins, and battery candles. The mixture of shapes and textures makes the shelf feel collected rather than overly coordinated, which is ideal for creating a cozy Halloween display.
For a more convincing setup, place the tallest bottles toward the back and smaller pieces near the front edge. Add cardboard corks or rolled paper tops to vary the silhouettes. Warm lighting is especially effective because it makes amber and dark green surfaces appear richer while creating gentle shadows between objects. I’ve seen this work well on bookshelves, kitchen counters, and entryway consoles where a small seasonal vignette can add atmosphere without taking over the room. Keep the labels simple and readable so the handmade details remain visible in photographs and from across the room.
Cardboard Monster Eyes
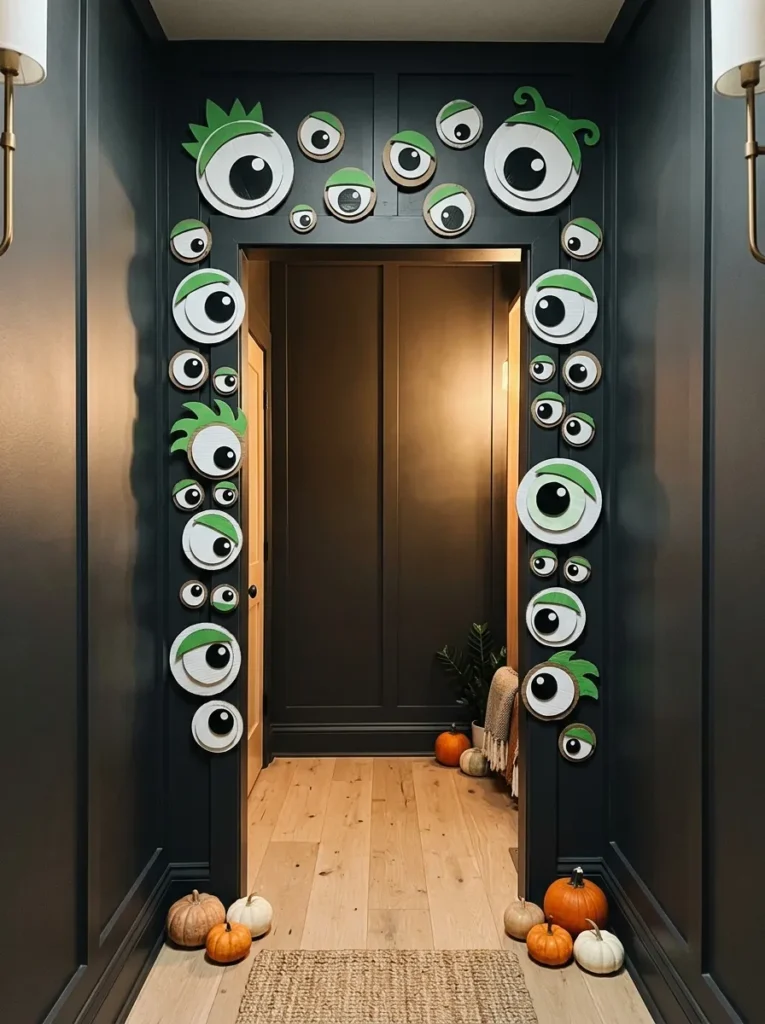
- Creates a playful surprise around a doorway or staircase.
- Oversized eyes make small spaces feel more animated.
- Layered cardboard adds depth without bulky materials.
- Bright pupils provide a fun finishing detail.
A pair of oversized monster eyes can turn an ordinary doorway into a playful Halloween surprise. Cut large circular shapes from sturdy cardboard, layer smaller pieces on top, and paint the eyes white with bold black pupils. Add green, purple, or orange accents around the edges if you want more color. Mount the finished eyes above or beside a doorway so they appear to peek into the room. This simple design works particularly well in hallways and staircases because visitors notice the unexpected shapes as they move through the space.
For a more dimensional effect, slightly curve the cardboard layers before attaching them, creating gentle shadows around the pupils and outer edges. Keep the surrounding area relatively simple so the oversized eyes remain the main attraction. In my experience, playful Halloween designs like this are especially effective in family spaces because they feel spooky without becoming intimidating. Add a few small cardboard bats or pumpkins nearby if the area needs more detail, but avoid crowding the display. The result is an inexpensive finishing touch that gives your Halloween decorating a memorable, handmade personality.
Conclusion
Halloween decorating does not have to mean buying expensive props or filling your home with bulky decorations. These ideas show how simple cardboard can become everything from spooky silhouettes and haunted houses to playful monsters and dramatic seasonal displays. Choose one project that fits your space, gather a few basic supplies, and start creating. With cardboard halloween decorations diy projects, you can personalize colors, sizes, and details to match your style. I’ve seen how small handmade touches can completely transform a room. Save this post on Pinterest, try your favorite ideas, and share it with someone who loves creative Halloween decorating.